
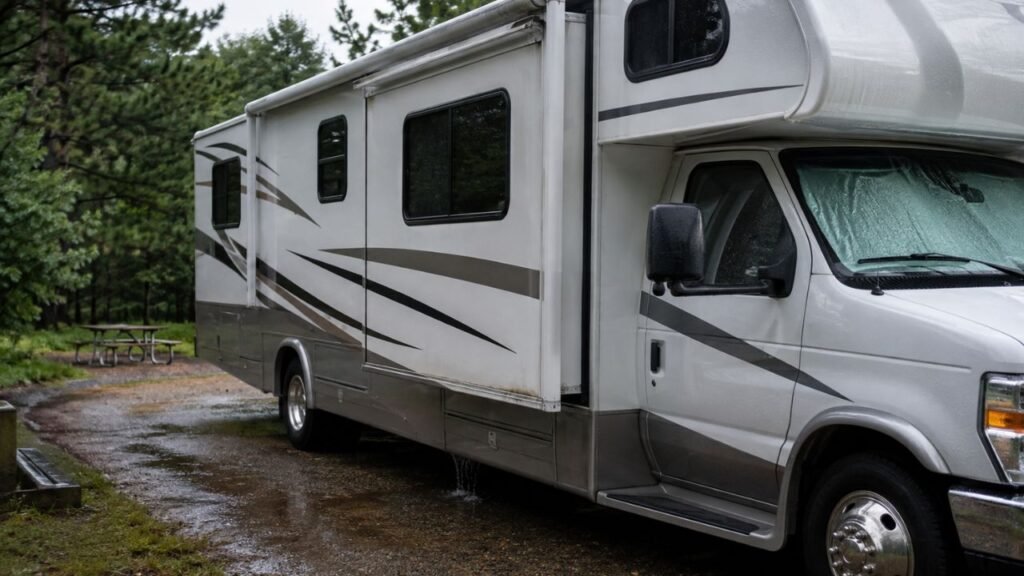
An RV slide floor gets wet while closed when water bypasses damaged seals, enters around tracks or exterior trim, or wicks beneath an exposed floor edge. Water can also enter when a wet slide retracts or when poor alignment prevents the exterior bulb seal from compressing evenly.
I’ll help you identify where the water enters, test each possible leak path, dry the floor correctly, and prevent expensive structural damage.
Key Takeaways
- A closed RV slide can still leak during heavy rain.
- Damaged bulb seals often allow water behind the slide flange.
- Poor slide alignment creates uneven seal compression and hidden gaps.
- Water may travel several feet before reaching the visible wet area.
- Slide tracks and exterior trim can direct water toward the floor.
- Retracting a wet slide may pull roof water inside.
- Torn floor barriers expose plywood edges to moisture and wicking.
- Condensation and plumbing leaks can resemble an exterior slide leak.
- The floor must dry completely before damaged areas are sealed.
- Soft or swollen flooring may require professional structural repair.
Why Is My RV Slide Floor Wet When the Slide Is Closed?
A closed slide is not automatically watertight. Several seals, trim pieces, tracks, joints, and drainage paths must work together.
The exterior bulb seal normally compresses against the slide flange. This creates the main weather barrier while the room remains closed.
However, dirt, damage, age, or poor alignment can weaken that barrier. Wind-driven rain may then enter through a very small opening.
The wet spot may also appear far below the actual leak. Water entering near the roof can travel behind trim or inside a wall cavity.
It may finally appear along the carpet, vinyl flooring, or plywood edge. This makes the bottom of the slide seem responsible, even when the leak started higher.
The most common causes include:
- Worn or poorly compressed exterior seals
- A slide that closes unevenly
- Leaks around tracks and mounting screws
- Failed sealant around upper rails
- Loose or separated bottom trim
- Retracting the slide while it remains wet
- Torn protective material beneath the floor
- Exposed plywood edges absorbing water
- Indoor condensation
- Plumbing leaks near slide-mounted fixtures
Common Causes of a Wet RV Slide Floor While Closed
The visible wet area rarely reveals the complete story. Start above the moisture and inspect every possible path downward.
Worn, Torn, or Hardened Bulb Seals
The bulb seal is the thick rubber section around the opening. It compresses against the slide flange when the room closes.
Over time, rubber can flatten, crack, harden, or pull away. A damaged section may leave a small opening along one corner.
Even a narrow gap can admit wind-driven rain. The water may then run behind the interior trim.
Look for sections that appear permanently flattened or twisted. Compare each side to find noticeably different seal compression.
Also inspect the corners where separate pieces meet. Corner joints often fail before the straight sections do.
Seal conditioner can help maintain flexible rubber. However, it cannot repair torn or permanently flattened material.
Replace the seal when it has missing sections, deep cracks, or poor contact.
Wiper Seals That Fold the Wrong Way
Wiper seals are the flexible rubber strips touching the slide walls. They sweep dirt and water while the slide moves.
A wiper may fold inward, curl backward, or lose contact. This allows water to remain on the slide wall during retraction.
The wiper seal is not always the final closed-slide barrier. That job usually belongs to the compressed bulb seal.
However, a damaged wiper can still direct water toward vulnerable joints. It may also pull rainwater inside as the room retracts.
Check the full height of every wiper seal. Look for tears, hardened sections, or loose mounting areas.
Make sure each seal contacts the wall consistently. There should not be large gaps around tracks or corners.
The Slide Does Not Close Squarely
A slide must sit evenly against the opening when fully closed. One corner stopping early can leave the seal partly uncompressed.
This problem may develop from poor synchronization, worn rollers, or loose hardware. An obstruction can also prevent complete closure.
Look at the slide from outside while it remains closed. Compare the flange gap along both vertical sides.
Watch for these warning signs:
- One corner sits farther from the RV wall.
- The flange gap changes from top to bottom.
- One bulb seal looks flatter than the others.
- Daylight appears around an interior corner.
- The slide tilts during extension or retraction.
- The motor sounds strained before full closure.
- The room stops before reaching its normal position.
A small alignment problem can create a significant rainwater path. Avoid making random adjustments without the correct service procedure.
Different slide mechanisms use different adjustment methods. Incorrect adjustments may worsen alignment or damage the system.
Water Entering Through Slide Tracks
Some slide systems have tracks mounted along the exterior sidewalls. Water may follow those tracks toward lower openings.
The track itself may not always be defective. The problem may involve mounting screws, upper joints, or nearby sealant.
Water can enter around a screw and travel behind the track. It may then emerge near the lower corner or floor edge.
Schwintek-style in-wall slide systems deserve careful inspection around track ends. Check the upper joints and mounting points for small gaps.
Do not seal every opening without knowing its purpose. Some openings may support movement, drainage, or servicing.
Follow the slide manufacturer’s sealing instructions whenever possible. Improper sealant placement can trap moisture or interfere with operation.
Failed Sealant Around the Upper Seal Track
Many slide leaks begin around the upper mounting rail. Cracked sealant allows water behind the visible rubber seal.
Once behind the rail, water can follow screws and framing downward. It may remain hidden until reaching the floor.
Inspect the full width above the closed slide. Pay special attention to upper corners and overlapping trim pieces.
Look for:
- Cracked or separated sealant
- Small holes beside mounting screws
- Loose trim edges
- Shrinking sealing tape
- Gaps where rails meet
- Staining beneath upper corners
Do not simply cover dirty sealant with another thick layer. Loose material must be removed before applying compatible sealant.
The surface must also be clean and completely dry. Otherwise, the repair may separate during the next temperature change.
Loose or Slipped Exterior Bottom Trim
The lower exterior trim helps protect the slide floor edge. It may also support seals or direct water away.
Fasteners can loosen as the slide moves repeatedly. Sealant may also separate from vibration, heat, or age.
A shifted trim piece can create a channel toward exposed plywood. Water may then travel beneath the floor covering.
Check whether the trim remains straight and firmly attached. Look closely at both lower corners and all overlapping joints.
You may notice missing screws, elongated holes, or separated sealant. Dark staining beneath the trim suggests repeated water movement.
Refastening the trim may not solve the complete problem. First determine why it moved or separated.
Closing the Slide While It Is Wet
Rainwater often remains on the slide roof after a storm. Water may also collect on sagging slide topper fabric.
When the room retracts, that water moves toward the RV wall. Wipers may not remove all of it.
Some moisture can be pulled beyond the seals. It may drip onto furniture, flooring, or the slide floor edge.
This problem becomes more likely when seals are dirty or damaged. It also occurs when the room retracts immediately after washing.
Whenever practical, let the slide dry before closing it. Remove standing water, leaves, and debris from the roof.
Use a long-handled tool from the ground when possible. Avoid climbing onto a wet or unsupported RV roof.
A Damaged Slide Floor Vapor Barrier
The underside of many slide floors has protective material covering the wood. This may be woven plastic, Darco-type material, or another membrane.
The protective layer prevents road spray and rainwater from reaching plywood. However, repeated slide movement can wear through vulnerable areas.
Sharp fasteners, rough rollers, and road debris can also tear it. Once damaged, water may reach the wooden floor from below.
Inspect the underside with the slide safely extended. Use adequate lighting and avoid moving mechanical components.
Look for:
- Torn or worn membrane material
- Open seams
- Loose tape
- Exposed plywood
- Scrape marks
- Sagging sections
- Water trapped behind the covering
A small exterior tear may conceal widespread moisture underneath. Press gently around suspicious sections without puncturing the barrier.
Water Wicking Around the Bottom Edge
Plywood can absorb water through an exposed edge. This process is often called wicking or capillary movement.
The water does not need a large opening. Repeated contact with a damp edge can gradually saturate the wood.
The protective membrane should wrap or terminate correctly near the drip line. Poor placement can direct water beneath the floor.
Staples, seams, and trim fasteners may also create entry points. Once water enters, it can spread underneath carpet or vinyl.
Inspect the outer floor edge for swelling or dark discoloration. A rough, raised edge often indicates previous moisture exposure.
The wood must dry fully before receiving any protective coating. Sealing damp plywood can trap water and accelerate decay.
Slide Topper Problems
A slide topper helps reduce direct water exposure. However, it does not make the slide completely waterproof.
Loose fabric may sag and hold a large pool. That water can suddenly spill toward the RV wall.
Torn fabric may also direct water toward one corner. Leaves and dirt can interfere with normal drainage.
Check the topper for:
- Deep sagging
- Standing water
- Torn fabric
- Weak roller tension
- Debris along the wall
- Uneven rolling
- Water spilling toward one side
A properly working topper reduces water accumulation. The seals and exterior joints must still remain watertight.
Rainwater Blown In While Driving
Rain behaves differently while the RV travels at highway speed. Air pressure can push water sideways or upward.
A seal that remains dry while parked may leak during travel. Forward-facing slide corners are especially vulnerable.
Lower trim gaps may also collect road spray. Water can then enter beneath the protective floor material.
After driving through heavy rain, inspect the slide immediately. Note whether moisture appears near the front or rear corner.
A leak occurring only during travel often suggests:
- Weak seal compression
- Loose lower trim
- Damaged floor membrane
- Exposed plywood edges
- Forward-facing corner gaps
- Missing or loose fasteners
Condensation Mistaken for an Exterior Leak
Not every wet slide floor comes from rain. Condensation can form when warm indoor air contacts a cold slide surface.
Slide rooms often have less insulation than the main RV body. Their floors and walls may become noticeably colder.
Moisture then forms around carpet edges, windows, and furniture. The floor may feel damp without showing a clear drip.
Condensation becomes more likely when:
- The weather is cold.
- Indoor humidity remains high.
- Several windows are wet.
- Air cannot circulate behind furniture.
- Cooking or showering adds moisture.
- The dampness appears without rainfall.
Use a humidity meter to check indoor conditions. Improving ventilation may reduce the moisture quickly.
A dehumidifier can also help during cool or humid weather. However, do not assume every recurring wet spot is condensation.
A Plumbing Leak Near the Slide
Some RV slides contain kitchens, sinks, refrigerators, or washing appliances. Water and drain lines must move whenever the slide operates.
A loose fitting may leak only in certain positions. Flexible hoses can also rub against framing or moving components.
A plumbing leak may appear while the slide remains closed. It can easily resemble an exterior rain leak.
Suspect plumbing when:
- The area gets wet during dry weather.
- The water pump cycles without fixture use.
- Moisture increases after using a nearby sink.
- The leak appears while connected to city water.
- Water collects beneath a refrigerator or appliance.
- The wet area smells different from rainwater.
Dry the area before testing the plumbing separately. Operate one fixture at a time and watch closely.
Rain Leak, Condensation, or Plumbing Leak?
The timing of the moisture provides an important clue. Use the following symptoms to narrow your inspection area.
| Symptom | Most Likely Cause | What to Check First |
| Wet after heavy rain while parked | Seal, trim, track, or upper rail leak | Exterior bulb seal and upper corners |
| Wet after driving through rain | Lower trim, membrane, or corner gap | Forward-facing corners and underside |
| Wet after retracting the slide | Water carried inward | Roof, walls, wipers, and topper |
| Wet only on city water | Pressurized plumbing leak | Supply fittings and flexible lines |
| Wet when the pump runs | Freshwater system leak | Fixtures and connections inside the slide |
| Damp during cold mornings | Condensation | Indoor humidity and airflow |
| Carpet wet along one wall | Water traveling downward | Upper seal track and wall joints |
| Floor soft near the outer edge | Wicking or long-term damage | Plywood edge and underside barrier |
| Both lower corners become wet | Poor compression or drainage | Alignment and corner seals |
| Moisture remains during dry weather | Saturated wood or hidden plumbing leak | Moisture readings and concealed spaces |
Do not choose a repair based only on one symptom. Confirm the source with a controlled test whenever possible.
How Water Travels Before Reaching the Slide Floor
Water follows gravity, surface tension, framing, and hidden channels. The entry point may sit several feet above the wet flooring.
Down the Exterior Slide Wall
Water entering near the roof often follows the exterior wall downward. It may remain hidden behind a wiper seal.
The moisture eventually reaches the lower trim or floor edge. From there, it can enter carpet or exposed plywood.
Look for faint dirt trails along the wall. They sometimes reveal the direction of repeated water movement.
Behind the Seal Mounting Track
A loose mounting rail can admit water behind the entire seal assembly. The outer surface may still appear dry.
Water follows screw threads, trim edges, and wall framing. It can then collect near a lower corner.
This is why replacing only the bottom seal may fail. The actual opening could remain near the top.
Through Gear or Rail Openings
Exterior tracks can create convenient paths toward the floor. Water may follow recessed channels or mounting points.
The track system does not always cause the leak itself. Nearby sealant or installation gaps may be responsible.
Inspect the upper track ends before focusing on lower moisture. Small openings there can produce large wet areas below.
Beneath the Floor Barrier
A torn floor barrier may admit water from road spray. The membrane can then hold moisture against the plywood.
Because the underside remains covered, drying may take considerable time. The interior surface may appear dry while wood remains saturated.
Check moisture levels before closing any membrane repair. Trapped water can cause swelling, odor, and rot.
Through Carpet and Wood Fibers
Carpet backing can move water sideways across the floor. Plywood can also wick moisture through its layered structure.
The darkest stain may not mark the first entry point. Moisture meter readings can reveal a wider affected area.
Compare suspicious sections with a known dry area. This helps you understand how far the water has spread.
Where Should I Check First?
A top-to-bottom inspection prevents lower symptoms from distracting you. Follow this order before removing major interior components.
- Check the slide roof for debris and standing water.
- Inspect the topper for sagging or uneven drainage.
- Examine the upper seal rail and both corners.
- Check the bulb seal for continuous compression.
- Inspect every wiper seal for curling or damage.
- Compare slide gaps on both vertical sides.
- Examine tracks, screws, and mounting joints.
- Inspect the lower trim and exterior corners.
- Check the exposed edge beneath the slide floor.
- Inspect the underside membrane for tears.
- Look for water trails behind accessible trim.
- Test any plumbing located inside the slide.
- Measure indoor humidity during dry weather.
- Check the floor for swelling, softness, or odors.
Take photographs before cleaning or disassembling anything. They can help you compare changes and explain the issue professionally.
How to Find the Exact Leak Source
Leak testing requires patience and a controlled approach. Testing everything simultaneously only makes the results harder to interpret.
Never place your hands near moving slide components. Avoid standing on an RV roof unless it safely supports access.
Dry the Area Before Testing
Start with the slide floor and surrounding trim completely dry. Existing moisture can hide the arrival of new water.
Use towels or a wet-dry vacuum for surface water. Position fans to move air across the affected area.
Mark the edge of any visible stain with removable tape. This helps you see whether moisture spreads during testing.
Inspect the Slide While Fully Closed
Stand outside and examine the flange against the RV wall. The gap should appear reasonably consistent around the opening.
Check whether the bulb seal contacts the flange everywhere. Pay particular attention to the upper and lower corners.
Inside, use a flashlight to inspect the same areas. Look for daylight, staining, or damp trim.
Use a Controlled Water Test
Have one person apply water outside while another watches inside. Begin at the lowest suspected area.
Starting low prevents water from higher sections covering untested areas. Test one small area for several minutes.
A practical testing order is:
- Lower exterior sidewall
- Bottom trim
- Lower track section
- Vertical seals
- Upper track ends
- Upper corners
- Upper seal rail
- Slide roof edge
Use gentle water flow resembling normal rainfall. Do not use a pressure washer or focused high-pressure nozzle.
High pressure can force water through otherwise functional seals. It may create a misleading test result.
Allow several minutes between test areas. Hidden water paths may take time to reach the floor.
Use Paper to Test Seal Compression
A simple paper test can reveal weak seal contact. Place a thin strip between the bulb seal and flange.
Close the slide using normal procedures. Keep hands and loose clothing away from all moving parts.
Gently pull the paper after the slide stops. Strong resistance suggests reasonable compression at that point.
Paper sliding out easily may indicate weak contact. Repeat the test around several accessible areas.
Do not place thick objects between the slide and wall. They may damage the seal or interfere with closure.
Check Moisture With a Meter
A moisture meter helps locate damp areas beneath dry-looking surfaces. Both pin and pinless models can be useful.
Materials produce different readings, so avoid relying on one number. Compare suspicious areas with known dry sections.
Map the readings across the floor and lower wall. The pattern may point toward the direction water traveled.
Repeat the readings after drying. Falling levels show whether your drying method is working.
Test the Plumbing System Separately
Choose a dry day and begin with a completely dry floor. Leave the exterior untouched during this test.
Run the water pump and avoid using fixtures initially. Listen for unexpected cycling or pressure changes.
Next, operate each nearby fixture separately. Inspect supply fittings, drains, and flexible hoses with a flashlight.
Repeat the test using city water when appropriate. Use a safe pressure regulator to avoid overstressing the plumbing.
A paper towel placed beneath fittings can reveal tiny drips. Even a small leak can saturate hidden flooring over time.
Inspect Behind Removable Trim
Accessible interior trim may conceal water trails or stained framing. Remove only pieces designed for normal service access.
Photograph each part before removal. Store screws carefully and note their original positions.
Darkened wood, rusted fasteners, or mineral trails indicate repeated moisture. Follow those clues upward whenever possible.
Avoid removing structural wall or slide components without experience. Improper disassembly can affect alignment or weather sealing.
What the Wet Location Can Tell You
The moisture location can narrow your search considerably. Treat these clues as starting points rather than final diagnoses.
- Wet at an upper inside corner: Check upper sealant and rail joints.
- Wet along one vertical carpet edge: Inspect side seals and wall channels.
- Wet beside an exterior track: Check rail joints and mounting screws.
- Wet near the outer floor edge: Inspect wicking and exposed plywood.
- Wet immediately after retraction: Check roof water and folded wipers.
- Wet after highway travel: Inspect lower trim and forward-facing gaps.
- Wet near a sink: Test supply and drain connections.
- Wet beneath a refrigerator: Check water lines and condensation drainage.
- Damp across a large cold area: Measure humidity and improve airflow.
- Soft beneath vinyl flooring: Inspect for long-term subfloor saturation.
- Musty odor without visible water: Check padding and concealed insulation.
- Wet at both lower corners: Confirm alignment and bulb-seal compression.
How to Fix an RV Slide Floor Leak
The correct repair must stop the actual entry point. Covering the visible wet spot will not prevent recurring damage.
Clean and Reposition the Seals
Dirt can prevent seals from making consistent contact. Clean both the rubber surface and slide wall carefully.
Use products compatible with the seal material. Harsh petroleum-based products may soften, swell, or weaken rubber.
After cleaning, check whether each wiper sits correctly. Gently reposition folded sections when the material remains flexible.
Cycle the slide and observe how the seals move. Replace any section that repeatedly folds or loses contact.
Replace Damaged Bulb or Wiper Seals
Replacement is necessary when seals are torn, hardened, missing, or permanently flattened.
Before purchasing material, identify the correct profile and mounting style. Similar-looking seals may have different dimensions.
Measure the original carefully and photograph its installation direction. Incorrect orientation can create new leak paths.
Clean the mounting channel before installing replacement material. Follow the adhesive and curing instructions provided for that seal.
Pay special attention to corner joints. Poorly joined corners can leak even when new straight sections work correctly.
Reseal the Upper Track and Exterior Trim
Remove loose, cracked, or separated sealant where necessary. Do not apply fresh sealant over unstable material.
Clean the surface with a method approved for the RV exterior. Allow everything to dry before resealing.
Use an RV-compatible product suitable for that surface and joint. Roof products and vertical-trim products may not be interchangeable.
Create a continuous seal without blocking drainage paths. Some trim assemblies have openings that must remain clear.
Inspect the repair after curing. Look for pinholes, skipped sections, or poor adhesion.
Correct Slide Alignment Problems
An unevenly closing slide may need synchronization or mechanical adjustment. The correct procedure depends on the system.
Simple controller resynchronization may help certain electric slides. Other systems require roller, cable, rail, or stop adjustments.
Do not force a room that binds or tilts. Continuing operation can damage motors, tracks, floors, or walls.
Professional service is appropriate when:
- One side moves ahead of the other.
- The room repeatedly loses synchronization.
- The slide closes unevenly.
- The floor scrapes during movement.
- The motor stalls before full closure.
- Tracks show unusual wear.
- The room shifts vertically.
Correcting the alignment allows the seals to compress as designed. Replacing seals alone may not solve an alignment-related leak.
Seal Track or Rail Entry Points Correctly
Inspect screw heads, track ends, rail joints, and nearby trim. Repair only areas intended to be sealed.
Use compatible sealant around confirmed exterior entry points. Avoid applying material onto moving gears or sliding surfaces.
Do not fill hollow channels without manufacturer guidance. Water may require a designed exit path.
After the repair cures, repeat the controlled water test. Confirm the leak has stopped before replacing interior trim.
Repair the Lower Floor Barrier
Small tears may be repaired with membrane-compatible tape or adhesive. The surrounding material must remain clean and dry.
Round the corners of repair patches when possible. Sharp patch corners can lift more easily during movement.
Extend the patch beyond the damaged area on every side. Press it firmly without trapping folds or moisture.
Large tears may require replacement of a wider membrane section. Professional help is sensible when access remains limited.
After repairing the barrier, cycle the slide slowly. Confirm that rollers, supports, or fasteners do not rub the patch.
Protect Exposed Plywood Edges
Exposed plywood should not remain directly in the water path. However, it must be completely dry before sealing.
Remove loose or crumbling material carefully. Treat structural deterioration before applying cosmetic protection.
Use a compatible edge-sealing method recommended for the floor construction. The coating must not interfere with slide movement.
Also correct the drip path above the edge. Protective coating cannot compensate for water constantly running toward the wood.
Repair Loose Bottom Trim
Remove failed sealant and inspect the fastener holes. Enlarged holes may need appropriate repair before refastening.
Replace missing or corroded hardware with compatible fasteners. Avoid overtightening thin trim and causing distortion.
Align the trim so it directs water away from the floor. Seal the required joints without blocking drainage.
Cycle the slide after completing the repair. Confirm the trim does not scrape, flex, or shift.
Correct Slide Topper Drainage
Remove leaves and debris that trap water on the topper. Check whether the fabric rolls evenly.
Deep sagging may require tension adjustment or fabric replacement. These repairs involve stored spring tension.
Do not disassemble a topper roller without understanding its mechanism. The spring can release with considerable force.
A technician can adjust tension and confirm proper alignment. The topper should shed water rather than directing it toward one corner.
Repair Nearby Plumbing Leaks
Tighten fittings only when the component permits adjustment. Overtightening plastic fittings may crack them.
Replace damaged hoses, worn seals, and leaking connectors. Support flexible lines so they do not rub during slide movement.
Inspect drains for loose slip joints or cracked flexible sections. A drain may leak only when a large amount of water passes.
Cycle the slide after completing plumbing repairs. Verify that lines move freely without stretching or pinching.
How to Dry a Wet RV Slide Floor
Drying must begin soon after discovering the leak. Plywood, carpet padding, insulation, and wall cavities can hold moisture.
Stop the Water Source First
Do not begin permanent flooring repairs while water still enters. Covering the damage may trap moisture underneath.
Use a temporary exterior cover only when necessary. Avoid attaching anything that could damage seals or finishes.
Complete the leak test and repair as soon as conditions allow. Then focus on thorough structural drying.
Remove Surface Water
Blot standing water with absorbent towels. Avoid rubbing water farther into carpet or seams.
Use a wet-dry vacuum for soaked carpet. Make several slow passes in different directions.
Empty the vacuum safely and repeat extraction. Continue until very little water enters the collection tank.
Increase Air Movement
Place fans so air moves across the wet surface. Aim additional airflow into accessible cabinets or cavities.
Open interior doors and removable access panels. This allows trapped moisture to escape more easily.
Avoid directing intense heat at seals or vinyl flooring. Excessive heat can distort materials and weaken adhesives.
Reduce Indoor Humidity
A dehumidifier helps remove moisture released into the air. Keep windows mostly closed while it operates effectively.
Drain the collected water regularly. Monitor indoor humidity and moisture readings each day.
Use safe electrical connections in the damp area. Keep plugs and extension connections away from wet flooring.
Heating alone may not solve the problem. Warm air can carry moisture into another cold area.
Lift Carpet or Flooring When Necessary
Carpet padding may stay wet after the carpet surface dries. Lift an accessible edge when moisture remains underneath.
Vinyl can also trap water against plywood. Bubbling or discoloration suggests moisture below the finished surface.
Do not glue flooring back down until readings stabilize. Trapped dampness can create odors and adhesive failure.
Some floor coverings cannot be reused after removal. Plan replacement when the material stretches, tears, or delaminates.
Inspect the Underside
A sealed underside membrane may prevent downward drying. Water can remain between the membrane and plywood.
Bulging or dripping sections deserve immediate attention. However, cutting the membrane carelessly can complicate repairs.
A technician may create controlled access and reseal it afterward. This is often safer for large saturated sections.
Continue drying until the wood reaches readings comparable with unaffected areas. Surface dryness alone does not confirm complete drying.
Can a Wet RV Slide Floor Cause Permanent Damage?
A brief wetting event may not cause permanent damage. Quick leak repair and complete drying can protect the floor.
Repeated leaks are much more serious. Plywood layers may swell, separate, and lose structural strength.
Carpet padding can develop persistent odors. Vinyl adhesive may loosen and create bubbles or raised areas.
Moisture can also rust fasteners and damage nearby metal components. Hidden insulation may stay wet long after the surface dries.
Possible long-term problems include:
- Soft or spongy flooring
- Swollen plywood edges
- Delamination
- Mold or mildew
- Loose flooring adhesive
- Rusted fasteners
- Damaged insulation
- Wall staining
- Structural deterioration
- Recurring musty odors
Press gently around the affected area and compare nearby sections. A noticeable difference may indicate weakened wood.
Dark staining alone does not always prove rot. However, crumbling fibers or severe softness require structural inspection.
When Does the Slide Floor Need Professional Repair?
Some slide leaks remain manageable for an experienced RV owner. Structural and mechanical issues require greater caution.
Arrange professional inspection when:
- The slide no longer closes evenly.
- The floor feels soft or unstable.
- Plywood layers are separating.
- The floor edge appears swollen.
- Water remains trapped beneath the membrane.
- The leak returns after resealing.
- Tracks require mechanical adjustment.
- The room binds during movement.
- Electrical components became wet.
- Mold extends into hidden materials.
- Wall framing shows water damage.
- A large floor section requires replacement.
- The slide may need partial removal.
A professional moisture inspection can also define the damaged area. This may prevent unnecessary removal of unaffected flooring.
How Much Can RV Slide Floor Leak Repair Cost?
Repair cost depends on access, damage severity, and slide construction. A small seal repair is very different from replacing structural flooring.
| Repair Type | Typical Complexity | Main Cost Factors |
| Cleaning and repositioning seals | Low | Labor, cleaning products, seal condition |
| Replacing a wiper seal | Low to moderate | Seal length, profile, and mounting style |
| Replacing a bulb seal | Moderate | Access, corners, adhesive, and seal profile |
| Resealing upper rails | Moderate | Old sealant removal and surface preparation |
| Repairing loose exterior trim | Moderate | Fastener damage and trim condition |
| Adjusting slide alignment | Moderate to high | Mechanism type and diagnostic time |
| Repairing the underside barrier | Moderate | Tear size and underside access |
| Sealing exposed floor edges | Moderate | Drying time and wood condition |
| Replacing carpet or vinyl | Moderate | Floor area and material availability |
| Replacing rotten slide flooring | High | Structural damage and slide disassembly |
| Repairing wall-cavity damage | High | Hidden moisture and interior removal |
Ask the repair facility what the estimate includes. Diagnosis, drying, seal replacement, flooring, and structural work may be quoted separately.
Request photographs of concealed damage before approving major repairs. This helps you understand why each repair remains necessary.
How to Prevent the Slide Floor From Getting Wet Again
Routine inspections can catch small openings before the floor becomes saturated. Focus on seals, drainage, trim, and floor protection.
Inspect the Seals Regularly
Check bulb and wiper seals for cracking, flattening, curling, and separation. Clean away dirt that prevents proper contact.
Inspect corners more frequently than straight sections. Several pieces often meet there and create vulnerable joints.
Replace severely damaged rubber rather than repeatedly conditioning it. A missing section cannot maintain weather protection.
Keep the Slide Roof Clean
Leaves and dirt can hold water against upper seals. Remove debris before retracting the room.
Inspect the roof after parking beneath trees. Small branches can also damage seals during movement.
Use safe ground-based tools whenever possible. Avoid stepping onto a slide roof not designed for foot traffic.
Let the Slide Dry Before Closing
Give rainwater time to drain before retracting the room. Wipe accessible sidewalls when conditions remain damp.
Check beneath a sagging topper for trapped water. A sudden spill can send water toward the RV wall.
When immediate retraction is unavoidable, inspect the interior afterward. Dry any moisture before it spreads beneath flooring.
Check Seal Compression
Observe how evenly the slide flange contacts the bulb seal. Repeat the paper test around accessible points.
A changing gap can indicate developing alignment problems. Early adjustment may prevent seal damage and floor leaks.
Listen for changes in motor sound during closure. New strain or stopping behavior deserves investigation.
Inspect Sealant and Trim
Check upper rails, corners, screw heads, and lower trim regularly. Look for separation after temperature changes or long trips.
Clean and repair small failures before the rainy season. Do not wait for interior staining to confirm a problem.
Use sealant compatible with the RV’s exterior materials. Avoid household products that become brittle or separate quickly.
Protect the Underside Barrier
Inspect the floor membrane for scrapes, tears, and open seams. Pay attention after traveling on rough or debris-covered roads.
Correct anything rubbing against the membrane. A patch will fail when the original abrasion continues.
Keep repairs smooth so they do not catch during slide movement. Test the room slowly after completing any underside work.
Control Indoor Humidity
Use roof vents while cooking and showering. Allow air to circulate around furniture touching exterior slide walls.
Monitor humidity during cold weather. Persistent high humidity encourages condensation on the slide floor.
A dehumidifier may be helpful during storage or extended stays. Empty and maintain it according to its instructions.
Avoid High-Pressure Washing Around Seals
Pressure washers can force water behind trim and rubber seals. They may also loosen aged sealant.
Use gentle water flow with suitable cleaning tools. Direct water downward rather than upward into overlapping joints.
Inspect the interior after washing. Early detection makes drying much easier.
Inspect After Driving Through Heavy Rain
Check the floor immediately after arriving. Focus on forward-facing corners and the lower exterior edge.
Look beneath the slide for road-spray entry points. Moisture found only after travel offers an important diagnostic clue.
Record which direction the RV traveled during the storm. Wind direction may explain why one side became wet.
A Practical RV Slide Leak Inspection Schedule
Your RV manufacturer’s maintenance schedule should receive priority. This general schedule can support routine inspections between services.
| Inspection Item | Suggested Frequency | What to Look For |
| Exterior slide seals | Monthly and before long trips | Tears, dirt, curling, and hardened rubber |
| Seal compression | Every few months | Uneven contact or visible gaps |
| Upper rail sealant | Every three to six months | Cracks, shrinkage, and loose edges |
| Exterior bottom trim | Every three to six months | Movement, missing screws, and gaps |
| Slide roof and topper | Before retraction | Debris, standing water, and torn fabric |
| Underside floor barrier | Twice yearly | Tears, rubbing, and exposed wood |
| Interior flooring | After heavy rain | Dampness, staining, odor, or softness |
| Slide plumbing | During seasonal maintenance | Drips, loose fittings, and worn hoses |
| Slide alignment | Whenever operation changes | Tilting, binding, and uneven closure |
Increase inspection frequency when storing the RV outdoors. Sun, rain, snow, and temperature swings accelerate seal deterioration.
Mistakes to Avoid When Repairing a Wet Slide Floor
A rushed repair may conceal the symptom without stopping the leak. Avoid these common mistakes:
- Assuming the wet spot marks the water entry point
- Replacing seals without checking slide alignment
- Applying sealant over dirty or loose material
- Blocking drainage channels or weep openings
- Using household bathroom caulk outside the RV
- Testing seals with high-pressure water
- Closing the slide while the roof remains wet
- Covering plywood before it dries completely
- Ignoring a small soft section near the edge
- Sealing moisture beneath the floor membrane
- Adjusting slide hardware without correct instructions
- Using petroleum products on rubber seals
- Ignoring plumbing because the leak followed rainfall
- Reinstalling trim before confirming the repair
- Assuming a slide topper replaces proper weather seals
Final Thoughts
An RV slide floor usually gets wet while closed because water bypasses exterior seals, enters around tracks or trim, or wicks into an exposed plywood edge. Uneven slide closure can make every existing seal problem worse.
Begin your inspection at the roof and upper corners. Work downward slowly, test one area at a time, and confirm the source before applying sealant.
Dry the entire floor structure before completing permanent repairs. Seek professional help when the floor feels soft or the slide closes unevenly.
Related FAQs
Can Rain Get Into an RV Slide When It Is Closed?
Yes, rain can enter a closed slide when seals are damaged, dirty, poorly compressed, or bypassed by gaps around tracks and exterior trim.
Why Is My Slide Carpet Wet Only in One Corner?
One wet corner often indicates a gap where upper and vertical seals meet, although water may also travel down a track or wall cavity.
Can a Slide Topper Stop Every Leak?
No, a slide topper reduces direct water exposure but cannot repair damaged seals, failed trim joints, misalignment, or an exposed floor edge.
Should RV Slide Seals Be Completely Watertight?
The complete sealing and drainage system should prevent normal rain intrusion, although individual wiper seals may not serve as the final watertight barrier.
Why Does Water Enter When I Retract the Slide?
Water remaining on the roof, topper, and walls can move past damaged or inward-folding wiper seals while the slide retracts.
Can Water Travel Through an RV Slide Track?
Water can follow track joints, mounting screws, and nearby channels, depending on the slide mechanism and how the exterior components were installed.
How Do I Know Whether My Slide Floor Is Rotten?
Common signs include softness, swelling, delamination, musty odors, loose flooring, dark staining, and plywood that crumbles during careful inspection.
Can I Replace an RV Slide Seal Myself?
Many experienced owners can replace accessible seals, but choosing the correct profile, adhesive, orientation, and installation method remains essential.
Will Slide Seal Conditioner Stop a Leak?
Seal conditioner may help maintain flexible rubber, but it cannot repair tears, missing sections, poor alignment, or failed exterior sealant.
Does RV Insurance Cover a Rotten Slide Floor?
Coverage depends on the policy and damage cause, since sudden covered events may be handled differently from long-term leakage or neglected maintenance.
Why Does My RV Slide Leak Only While Driving?
Highway wind can push rain through lower trim gaps, weak corner seals, or damaged floor barriers that remain dry while the RV stays parked.
Can Condensation Make an RV Slide Floor Wet?
Yes, warm humid air can condense on a cold slide floor, especially during winter when airflow remains limited around furniture and carpet edges.
How Long Does a Wet RV Slide Floor Take to Dry?
Drying may require several days or longer, depending on saturation, airflow, humidity, floor coverings, and whether moisture became trapped beneath the membrane.
Should I Retract My Slide During Heavy Rain?
A properly sealed slide can usually remain extended during rain, but retracting may be sensible when severe wind, flooding, or topper damage creates additional risk.
Can I Use Silicone Caulk Around My RV Slide?
Use only sealant approved for the specific RV surface and joint, since incompatible silicone may adhere poorly and complicate future repairs.

David Marshall shares travel route insights, mileage planning tips, and road-tested advice. His writing helps travelers understand distance, timing, and equipment choices. Every article is built around clarity and real-world usefulness.











