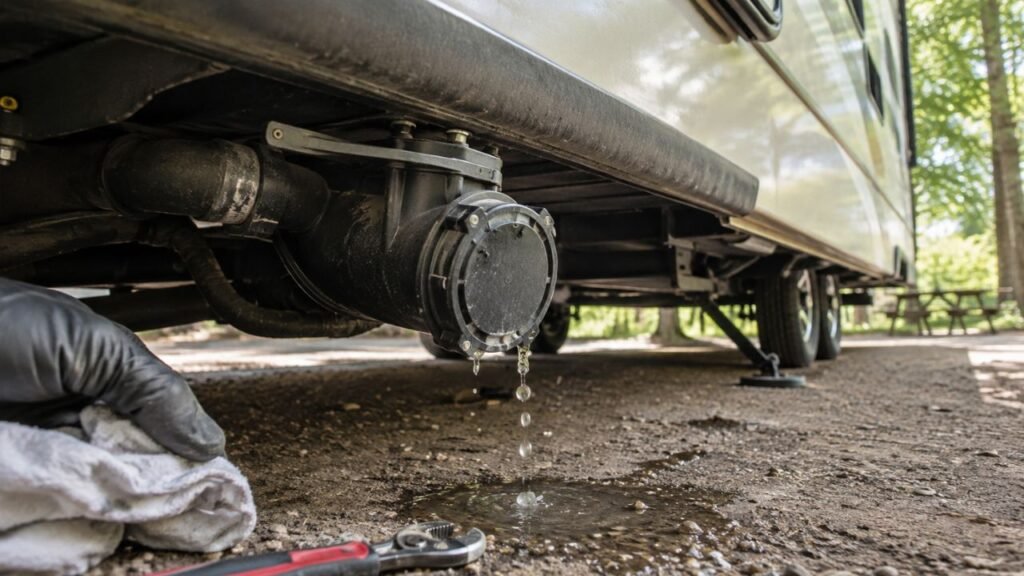
Yes, an RV black tank can leak only when it is full. This usually happens when a crack, loose fitting, damaged seal, or failed flange sits near the tank’s top. The tank stays dry at lower levels because the waste has not reached the damaged area.
I know any black tank leak can feel overwhelming and unpleasant. This guide will help you identify the likely source, test the tank safely, and choose the right repair.
Key Takeaways
- A full-only leak usually comes from the tank’s upper section.
- Common sources include top cracks, flanges, grommets, and vent connections.
- Driving can reveal leaks that do not appear while parked.
- A full monitor reading may not mean the tank is physically full.
- Never pressure-test a closed black tank using compressed air.
- Tank cracks often need plastic welding or complete tank replacement.
Why Can an RV Black Tank Leak Only When Full?
A tank only leaks after liquid reaches the damaged area. When the damage is near the top, the tank may remain completely dry at lower levels.
Once the waste rises high enough, it reaches that crack or loose connection. Liquid then escapes and may spread across the tank before dripping downward.
This is why the visible puddle may appear far from the leak. Water can travel along pipes, tank surfaces, brackets, insulation, or underbelly material.
Movement can also make the problem more noticeable. Waste sloshes upward while turning, braking, or driving over rough roads. Your tank may not leak while parked but begin leaking during travel.
Tank monitors can make diagnosis more confusing. A monitor may display “full” before liquid reaches the tank’s actual top. Waste buildup on internal sensors can also cause inaccurate readings.
Where Does a Full Black Tank Usually Leak?
Full-only leaks usually develop around components near the tank’s upper surface. These areas experience movement, stress, vibration, and pressure as the tank fills.
Top Wall or Upper Seam Cracks
Plastic holding tanks can develop cracks near their upper walls or molded seams. These cracks may result from age, road vibration, poor support, or previous impacts.
A crack near the bottom usually leaks continuously. A crack near the top stays dry until the waste reaches that height.
Small cracks may open wider when the tank becomes heavy. A nearly full tank can sag slightly and place additional stress on weakened plastic.
Toilet Drop Pipe or Tank Inlet Flange
Your RV toilet empties through a large pipe connected to the tank. That connection may use a welded flange, rubber seal, or another fitting.
The flange can separate from the tank after years of movement. The pipe may also crack, loosen, or pull against the tank opening.
This leak often appears only when waste reaches the inlet connection. It may also appear when water backs into the pipe beneath the toilet.
Vent Pipe Grommet or Seal
The black tank vent pipe normally enters through the tank’s upper surface. A rubber grommet or sealed fitting prevents leaks around that opening.
Over time, the grommet can harden, crack, warp, or move. The pipe may also shift because of vibration or improper installation.
When the tank becomes extremely full, liquid can reach this connection. Waste may then leak around the damaged grommet or vent opening.
Black Tank Flush Inlet Fitting
Many RVs have an internal black tank rinsing sprayer. Pressurized water enters through a hose and a fitting attached to the tank.
The fitting may leak because of failed sealant, cracks, or loose connections. A damaged supply hose can also leak behind the underbelly.
Pay attention to when the moisture appears. If it leaks only during flushing, the flush system may be responsible.
Cracked or Poorly Joined Plumbing Above the Tank
Several pipe joints may connect the toilet to the black tank. These connections must be properly aligned, sealed, and secured.
A loose or poorly glued joint may remain dry during normal use. It begins leaking when water rises into the toilet drop pipe.
This problem sometimes appears after black tank replacement. A repair can fail if technicians test only the tank’s lower connections.
Tank Deformation or Inadequate Support
A full black tank carries considerable weight. If the supports are loose or poorly positioned, the tank may sag.
Sagging can distort the tank’s upper fittings. It may also pull apart pipe joints or widen an existing stress crack.
Check the straps, brackets, frame supports, and mounting platform. Repairing the crack alone may not prevent another failure.
Full-Tank Leak Symptoms and Their Likely Causes
The timing and location of the leak can provide useful clues. Use the following table to narrow down the likely source.
| What You Notice | Most Likely Area | Why It Happens |
| Leak appears near maximum capacity | Upper crack, flange, grommet, or seam | Liquid finally reaches the damaged area |
| Leak starts while driving | Upper crack or loose fitting | Waste sloshes against the tank’s upper surfaces |
| Water leaks only during flushing | Flush inlet, sprayer fitting, or supply hose | Pressurized rinse water escapes from the flush system |
| Moisture appears below the toilet | Toilet pipe or tank inlet flange | Water rises into the toilet connection |
| Odor appears before visible liquid | Small upper leak or vent connection | Sewer gas escapes before enough liquid reaches the gap |
| Tank leaks when nearly empty | Outlet, dump valve, or lower crack | Damage sits below the remaining liquid level |
| Monitor reads full without leaking | Inaccurate sensor or higher leak location | The tank has remaining air space |
Remember that the first visible drip may not reveal the true source. Always look for the highest wet area you can safely access.
How to Tell Whether the Black Tank Is Actually Leaking
Several nearby plumbing problems can imitate a leaking black tank. Before removing panels or replacing parts, confirm which system is producing the moisture.
- Check whether the liquid appears after using the toilet.
- Notice whether the leak begins during black tank flushing.
- Inspect the sewer outlet and dump valve connections.
- Check the toilet base for moisture inside the bathroom.
- Inspect nearby gray tank pipes and drain fittings.
- Look for freshwater lines running above the holding tanks.
- Note whether the leak happens while parked or driving.
- Check whether the liquid has traveled across the underbelly.
Do not touch or closely smell unknown liquid. Treat every leak near the waste tanks as contaminated until proven otherwise.
A toilet base leak may come from the floor seal. That does not always mean the tank itself is damaged.
The dump valve can also leak into the sewer cap area. This usually creates moisture near the outlet rather than above the tank.
How to Safely Test an RV Black Tank for an Upper Leak
Testing can help locate the damaged area, but it requires patience. Start with an emptied and thoroughly rinsed tank whenever possible.
- Park the RV on a level concrete surface.
- Chock the wheels and stabilize the RV securely.
- Dump the black tank at an approved sewer connection.
- Rinse the tank until the discharge appears reasonably clear.
- Close the dump valve after the tank finishes draining.
- Remove only the access panels you can reach safely.
- Place absorbent pads below the suspected area.
- Use a flashlight, mirror, or inspection camera.
- Slowly add clean water through the toilet.
- Pause regularly and inspect every visible connection.
- Watch the toilet inlet, vent seal, seams, and flush fitting.
- Stop adding water immediately when moisture appears.
- Open the dump valve and drain the test water.
- Clean and disinfect the surrounding work area.
Adding water through the toilet is usually the safest approach. It allows displaced air to escape through the plumbing and roof vent.
Do not intentionally force the tank beyond its normal capacity. Your goal is to reveal the leak, not increase the damage.
Even clean water becomes contaminated after entering the black tank. Wear disposable gloves and protect your eyes during the test.
What You Should Not Do While Testing the Tank
A black tank can rupture or become severely damaged during unsafe testing. Avoid shortcuts that introduce unnecessary pressure or contamination.
- Do not crawl beneath an unsupported RV.
- Do not pressure-test the tank with compressed air.
- Do not block or seal the roof vent.
- Do not leave a flush hose running unattended.
- Do not intentionally overfill a contaminated tank.
- Do not continue filling after the leak appears.
- Do not trust the tank monitor as an exact measurement.
- Do not use open flames near sewer gases.
- Do not allow test water to drain onto the ground.
- Do not keep using the toilet after a major leak.
Be especially careful with the black tank flush connection. A blocked vent or closed outlet can allow pressure to build quickly.
How to Find a Leak Hidden Above the Tank
Upper tank leaks are often difficult to see. Flooring, frame rails, insulation, wires, and underbelly panels may block your view.
Inspect Through Existing Access Points
Start with access points already built into the RV. These may include wet-bay panels, storage compartments, removable underbelly sections, and toilet openings.
Avoid cutting walls or flooring during the first inspection. A small inspection camera can reach areas that your head or hands cannot.
Trace the Highest Wet Location
Liquid naturally runs downward, so the lowest drip is rarely the source. Follow the moisture upward until you find the first wet connection.
Dry the area before each testing stage. Fresh moisture becomes much easier to identify on a clean, dry surface.
Use Absorbent Paper Around Suspected Connections
Place dry paper towels around accessible pipes and fittings. The first towel becoming wet may identify the leaking component.
Replace the towels between filling stages. Marking each location can prevent confusion during repeated testing.
Inspect the Toilet and Vent Connections
A loose toilet, shifted drop pipe, or damaged tank flange may require toilet removal. The vent pipe can also shift within its roof and tank connections.
Removing these components requires careful resealing. Consider professional assistance when you cannot clearly see the tank opening.
Can You Keep Using the RV With a Full-Only Black Tank Leak?
Keeping the tank below the damaged area may temporarily stop visible leakage. However, this does not make the system safe or repaired.
The crack can grow as the RV moves. Repeated filling can also loosen fittings, saturate insulation, or contaminate hidden structural areas.
Temporary precautions include:
- Dump the tank more frequently.
- Keep the tank well below the leaking level.
- Avoid traveling with waste inside the tank.
- Stop using the built-in tank flush system.
- Inspect the underbelly after every toilet use.
- Place a service appointment as soon as possible.
Stop using the toilet when waste is actively leaking. Continued use can create sanitation problems and much more expensive repairs.
You should also stop using it if liquid reaches wiring, freshwater equipment, insulation, wood, or living areas.
How Is a Full-Only Black Tank Leak Repaired?
The repair depends on whether the failure involves rubber, plumbing, welded plastic, or structural support. Correctly identifying the source prevents unnecessary tank replacement.
Replace a Damaged Grommet or Seal
A damaged vent grommet or pipe seal may be replaceable. The old rubber should be removed without damaging the tank opening.
Clean the surface and install the correct replacement part. Make sure the pipe enters straight without pulling against the new seal.
A new seal may fail quickly when the connected pipe remains misaligned. Address the movement before completing the repair.
Repair Loose or Separated Pipes
Cracked ABS pipes or separated joints should be properly removed and rebuilt. Simply coating the outside with sealant may not restore structural strength.
The pipe ends must be clean, correctly fitted, and properly supported. Use products approved for the plumbing material.
Afterward, test the tank up to its highest normal level. Testing only the lower tank area can miss leaks beneath the toilet.
Repair or Reinforce a Tank Flange
A separated toilet inlet flange can be a serious repair. The flange may have been welded directly to the plastic tank.
A professional may need to plastic-weld or replace the connection. Sealant alone cannot reliably repair a failed structural weld.
Access is often the biggest challenge. The tank may need removal when frame rails or flooring block the damaged flange.
Plastic-Weld a Tank Crack
Professional plastic welding can repair certain cracks. The technician must match the welding material to the tank’s plastic type.
The area must be fully cleaned and dried before welding. Contamination can prevent the new plastic from bonding properly.
The tank also needs adequate support after repair. Otherwise, the same stress may reopen the crack.
Replace the Black Tank
Replacement may be the safer long-term option when:
- The crack is large or continuing to spread.
- The plastic has become brittle.
- The tank is badly sagging or deformed.
- Several fittings are damaged.
- The damaged area cannot be reached.
- A previous welded repair has failed.
- Collision damage weakened the tank.
- Replacement labor is similar to repair labor.
Tank replacement can involve removing the toilet, vent pipe, outlet plumbing, brackets, and underbelly panels. This work is usually better suited to an experienced RV repair shop.
Should You Use Epoxy, Sealant, or a Black Tank Repair Kit?
A patch kit can appear attractive when the leak is difficult to reach. Unfortunately, many common adhesives bond poorly to holding tank plastics.
RV tanks flex as they fill, empty, heat, and cool. A rigid patch may separate after several trips.
Before using any product, identify the tank material. Polyethylene and ABS plastics require different preparation and repair methods.
Sealant can work around a sound fitting with a minor sealing problem. It cannot restore strength to a cracked flange or failed weld.
An emergency patch may help you reach a repair facility. Do not automatically treat it as a permanent solution.
For a structural crack, plastic welding or replacement usually offers better reliability. Follow the tank manufacturer’s repair recommendations whenever available.
When Should You Call an RV Repair Professional?
Some black tank repairs are manageable from an access panel. Others require tank removal, plumbing reconstruction, or plastic welding.
Call a qualified RV technician when:
- The black tank must be removed.
- The leak sits above inaccessible frame rails.
- The toilet flange has separated from the tank.
- Waste has entered insulation or flooring.
- The tank requires plastic welding.
- Structural supports are loose or damaged.
- Several upper fittings are leaking.
- The tank is sagging or shifting.
- Plumbing must be cut and rebuilt.
- The leak returns after replacing accessible seals.
Take clear photographs before visiting the shop. Record when the leak begins and whether the RV was moving.
Also explain whether the problem occurs during flushing. These details can reduce diagnosis time and unnecessary disassembly.
Ask the shop how it will test the completed repair. The tank should be tested at the level where the original leak occurred.
How to Prevent Another Full-Tank Leak
You cannot prevent every plastic failure, but careful tank use reduces unnecessary stress. Regular inspection also helps catch small problems early.
- Dump the tank before reaching maximum capacity.
- Avoid traveling with a nearly full black tank.
- Never leave the flush connection unattended.
- Follow the manufacturer’s flushing instructions.
- Check the vent pipe and roof cap annually.
- Inspect tank supports and brackets for movement.
- Repair a loose toilet before it stresses the pipe.
- Protect exposed tanks from road debris.
- Winterize the waste system before freezing weather.
- Investigate unexplained odors before visible leakage begins.
- Test completed repairs with clean water.
- Keep records of previous tank and plumbing repairs.
A black tank does not need to be completely full before dumping. Leaving some capacity reduces sloshing and pressure against upper fittings.
Final Verdict
An RV black tank can leak only when full when the damage sits near its upper surface. Likely sources include top cracks, toilet flanges, vent grommets, flush fittings, and pipe joints.
Empty and rinse the tank before testing whenever possible. Add water slowly through the toilet, locate the highest wet area, and stop immediately when the leak appears. Repair the actual failed component rather than covering the lowest visible drip.
Related FAQs
Can a Black Tank Leak Only While Driving?
Yes, a black tank may leak only while driving because waste sloshes against upper cracks, flanges, or grommets that remain dry while the RV is parked.
Why Does My RV Smell When the Black Tank Is Almost Full?
A nearly full tank reduces air space and brings waste closer to upper fittings. A loose vent connection, damaged seal, or dry toilet bowl can then allow odors inside.
Can a Black Tank Flush Cause a Leak?
Yes, a damaged flush fitting, hose, vacuum breaker, or tank connection can leak during flushing. An unattended flush can also overfill the tank and expose existing upper damage.
How Can I Tell Whether the Leak Is From the Black or Gray Tank?
Test each tank separately and observe when moisture appears. You can also compare tank levels, plumbing locations, liquid color, and the highest wet point.
Can a Black Tank Leak From the Toilet Flange?
Yes, the flange connecting the toilet drop pipe to the tank can crack, loosen, or separate. This leak may appear only when waste reaches the tank’s upper inlet.
Is It Safe to Drive With a Leaking Black Tank?
Driving with a leaking black tank is not recommended. Movement can worsen the damage, spread contaminated liquid, and saturate insulation or other hidden RV components.
How Much Does an RV Black Tank Repair Cost?
Repair costs depend on accessibility, damage severity, tank size, and required labor. Replacing a grommet may be simple, while tank removal can become a major repair.
Does a Cracked Black Tank Always Need Replacement?
Not always. A small accessible crack may be professionally plastic-welded. Replacement is often better for large cracks, brittle plastic, severe deformation, or repeated repair failures.

David Marshall shares travel route insights, mileage planning tips, and road-tested advice. His writing helps travelers understand distance, timing, and equipment choices. Every article is built around clarity and real-world usefulness.