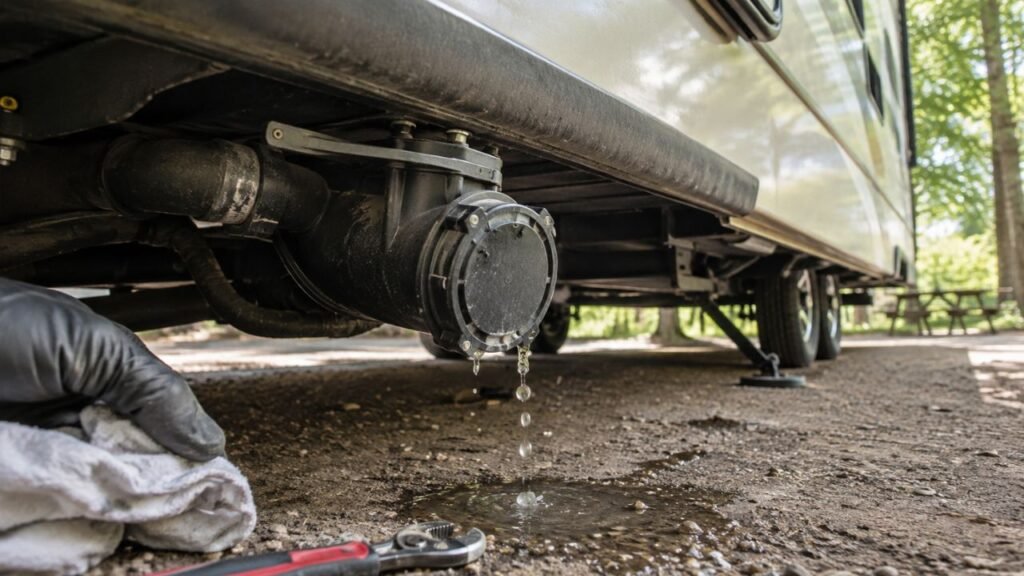
An RV low-point drain usually keeps dripping because its valve is not fully seated, debris is trapped against the seal, or the cap washer is damaged. Worn O-rings, cracked plastic, excessive water pressure, and nearby plumbing leaks can also cause a steady drip.
In this guide, I’ll help you locate the actual leak, test each possible cause, and choose the right repair. You’ll also learn when a simple washer replacement works and when the entire valve needs replacing.
Key Takeaways
- A low-point drain should not continuously drip when fully closed.
- Dirt or mineral deposits can prevent the valve from sealing properly.
- Threaded drain caps often leak because of missing or damaged washers.
- Worn internal O-rings usually require replacing the complete valve.
- High campground pressure can push water through a weakened seal.
- Residual water may drip briefly after draining the plumbing system.
- Always depressurize the RV plumbing before removing a cap or valve.
- Avoid overtightening plastic parts because they can crack easily.
- Water traveling along a pipe can make another fitting appear responsible.
- Use potable-water-safe replacement parts and sealing products.
Why Is My RV Low-Point Drain Still Dripping?
Your RV low-point drain connects directly to the pressurized hot or cold water lines. When the water pump or city connection pressurizes those lines, even a tiny sealing problem can create a continuous drip.
The most common problem is a valve that has not closed completely. Sometimes dirt, hard-water scale, or a small plastic shaving becomes trapped inside the valve seat.
Cap-style drains commonly leak when the rubber washer is missing, flattened, cracked, or installed incorrectly. Plastic valves may also develop worn O-rings or hairline cracks as they age.
A few drops after draining the RV can be normal. However, dripping that continues while the plumbing remains pressurized usually indicates an active leak that needs attention.
How an RV Low-Point Drain Works
Most RVs have separate low-point drains for the hot and cold plumbing lines. These drains are installed near the lowest sections of the plumbing so water can escape during winterization, repairs, and seasonal storage.
Depending on your RV, the drains may use removable threaded caps, pull-up valves, push-down valves, or quarter-turn shutoff valves. Some are easy to access underneath the RV, while others sit inside a storage compartment or enclosed underbelly.
When the drain is closed, a washer, valve seat, or internal O-ring prevents water from escaping. If that sealing surface becomes dirty, damaged, or misaligned, pressurized water can leak through the outlet.
Low-point drains are different from the fresh water tank drain. Low-point drains empty the plumbing lines, while the tank drain empties the onboard fresh water tank itself.
Common Reasons an RV Low-Point Drain Leaks
Several problems can create the same visible drip. Before buying parts, identify whether water is leaking through the outlet, around the cap, or from the valve body.
The Drain Valve Is Not Fully Closed
A low-point valve can appear closed while remaining slightly open. This often happens with pull-up or push-down valves that become stiff, dirty, or difficult to operate.
Quarter-turn valves may also stop before reaching their correct closed position. Check the handle direction and confirm how your specific valve operates.
Do not force a brittle plastic valve. If it feels unusually stiff, depressurize the system and inspect it before applying more pressure.
Dirt or Mineral Deposits Are Blocking the Seal
Small particles can become trapped between the valve and its sealing surface. Common examples include sand, mineral scale, plastic shavings, and debris released during plumbing repairs.
Even a very small particle can create enough space for water to escape. Opening and closing the valve several times may flush loose debris from the sealing area.
If the leak returns, the valve may need deeper cleaning or replacement.
The Drain Cap Washer Is Missing or Damaged
Many removable drain caps depend on a rubber washer rather than the threads themselves. The washer compresses against the drain opening and creates a watertight seal.
The washer may fall out during winterization or remain stuck to the fitting. It can also become flattened, hardened, cracked, or distorted over time.
A cap without the correct washer may continue leaking regardless of how tightly you turn it.
The Valve’s Internal O-Ring Has Worn Out
Some low-point valves contain internal O-rings that seal around the stem or valve mechanism. These rubber components can harden, flatten, or split after years of use.
Heat, freezing temperatures, chemical exposure, and repeated operation can accelerate wear. Once an internal O-ring fails, replacing the complete valve is often easier than rebuilding it.
The Plastic Drain Valve Is Cracked
Plastic plumbing components can develop small cracks around the body, threads, stem, or connection point. These cracks are not always visible when the system is empty.
Once pressure returns, the crack may open enough to release water. Dry the valve completely, restore pressure, and watch for moisture forming around its body.
A cracked valve should be replaced rather than sealed externally.
The Drain Cap or Valve Is Cross-Threaded
Plastic threads are easy to misalign. A cap may feel tight even though it entered the fitting at an angle.
Cross-threading prevents the washer from compressing evenly. It can also permanently damage the threads or distort the cap.
Remove the cap after depressurizing the system. Inspect the threads carefully before reinstalling it straight.
The Plumbing System Has Excessive Pressure
Campground water pressure can vary considerably. High pressure may push water past a weak washer, worn valve seat, or damaged O-ring.
Excessive pressure may not have caused the original damage. However, it can expose a seal that seemed acceptable under lower pump pressure.
Using an adjustable RV water pressure regulator can protect drains, faucets, toilet valves, and other plumbing connections.
Water Is Dripping From a Nearby Connection
Water does not always fall directly beneath its source. It can travel along PEX tubing, wiring, insulation, or the RV underbelly before reaching the low-point drain.
A loose fitting above the drain may therefore make the drain appear responsible. Dry the entire area and trace the moisture upward.
Look for droplets forming around nearby elbows, couplings, clamps, and pipe connections.
The Valve Was Damaged During Freezing Weather
Water trapped inside a closed valve can expand when frozen. That expansion may crack the valve body, deform a washer, or damage nearby plumbing.
Freeze damage can be very small and difficult to see. The valve may only leak after the plumbing is pressurized again during spring dewinterization.
If several fittings begin leaking together, inspect the entire plumbing system for freeze damage.
How to Identify Which Low-Point Drain Part Is Leaking
Start by drying the drain and surrounding plumbing completely. Then pressurize the system slowly and observe where the first drop appears.
| What You Notice | Likely Cause | How to Confirm It | Recommended Fix |
| The drip stops after moving the valve | Valve was not fully seated | Open and close it several times | Clean and reseat the valve |
| Water leaks around a threaded cap | Damaged or missing washer | Remove and inspect the cap | Replace the washer or cap |
| Water comes through the valve outlet | Worn internal seal | Pressurize and watch the outlet | Replace the valve |
| Moisture appears around the valve body | Crack or loose connection | Dry the area and inspect closely | Tighten carefully or replace |
| The leak worsens on city water | Excessive pressure or weak seal | Test using only the water pump | Regulate pressure and repair the seal |
| Dripping continues after pressure is released | Residual trapped water | Open faucets and wait several minutes | Allow the system to finish draining |
| Water runs down the pipe from above | Nearby plumbing leak | Trace moisture toward the highest wet point | Repair the actual fitting |
| The cap feels tight but still leaks | Cross-threaded cap or wrong washer | Remove and inspect the threads | Reinstall correctly or replace parts |
| The pump cycles with every few drips | Active pressurized leak | Turn the pump off and watch the drip | Repair the drain seal or valve |
How to Stop an RV Low-Point Drain From Dripping
The safest approach is to remove pressure first, inspect the sealing parts, and make one repair at a time. This helps you avoid replacing the wrong component.
1. Turn Off the Water Supply
Disconnect the city water hose before touching the drain. Then switch off the RV water pump.
If your RV has a water heater, turn off its electric and propane heating sources. Allow the water to cool before working near the hot-water drain line.
2. Release Pressure From the Plumbing
Open a cold-water faucet inside the RV. You can also open a hot-water faucet after confirming the water has cooled.
Leave the faucet open until water stops flowing. This releases pressure that could otherwise spray water when you remove the drain cap.
Place a towel or shallow container beneath the drain because some water may remain inside the line.
3. Confirm the Valve Is Fully Closed
Move the valve through its complete operating range. Open it fully, then close it again using gentle and steady pressure.
For quarter-turn valves, confirm the handle reaches its proper closed position. For pull-up or push-down valves, make sure the stem moves completely.
Do not use pliers to force a plastic handle unless the manufacturer allows it.
4. Flush Debris From the Valve Seat
With the system depressurized, open and close the valve several times. This movement may loosen sand, mineral flakes, or plastic debris.
You can briefly restore low pump pressure while the valve is open to flush the line. Turn the pump off again before closing or inspecting the valve.
Repeat the process carefully and watch whether the drip slows.
5. Remove and Inspect the Drain Cap
If your drain uses a threaded cap, remove it after releasing all pressure. Look inside the cap for a rubber washer.
Check whether the washer is cracked, hardened, flattened, or missing. Also inspect the cap for damaged threads and hairline cracks.
A cap that looks stretched or distorted should be replaced.
6. Clean the Sealing Surfaces
Wipe the drain opening, cap, washer, and threads with a clean cloth. Remove mineral residue without scratching the plastic.
For stubborn buildup, use a cleaning method approved for potable-water plumbing. Avoid petroleum products or harsh chemicals that may damage rubber seals.
Make sure the sealing surfaces are dry and free from grit before reassembly.
7. Replace the Washer or Cap
Install a washer that matches the original diameter, thickness, and shape. Some drains require a flat washer, while others use a cone-shaped seal.
A standard garden hose washer may work temporarily when it fits correctly. However, it should not be forced into a cap designed for another seal shape.
Replace the entire cap when its threads or body are damaged.
8. Reinstall the Cap Carefully
Align the cap straight before turning it. Thread it by hand to avoid cross-threading the soft plastic.
Tighten it enough to compress the washer evenly. Do not keep tightening after the cap feels firmly seated.
Excessive force can crack the cap, fitting, or surrounding pipe.
9. Inspect the Valve Body and Connections
Dry the complete valve assembly and nearby plumbing. Look around the stem, threaded base, PEX connection, and mounting area.
Restore pressure slowly and watch for the first sign of moisture. A drop forming on the valve body usually indicates a crack or failed internal seal.
Water appearing above the valve suggests another plumbing connection is leaking.
10. Test With the Water Pump
Turn on the water pump while leaving city water disconnected. The pump usually creates a controlled and predictable pressure level.
Allow the pump to stop after pressurizing the system. Watch the drain for several minutes.
If the repair holds under pump pressure, continue to the city-water test.
11. Test With Regulated City Water
Connect a pressure regulator at the campground water source. Then reconnect the city water hose and increase pressure slowly.
Most RV plumbing systems work well around 40 to 55 PSI. However, always follow the pressure limits specified for your RV.
Watch the drain and nearby fittings for several minutes before considering the repair complete.
Can You Fix a Dripping Low-Point Drain Without Replacing It?
You may be able to stop the leak without replacing the valve. Cleaning debris, reseating the valve, replacing a washer, or reinstalling a cap correctly often fixes minor problems.
A leaking cap is usually the simplest repair. If its plastic body remains undamaged, a new washer may restore the seal immediately.
Valve replacement becomes more likely when water passes directly through the outlet. That symptom often indicates a damaged valve seat or worn internal O-ring.
Cracked plastic, stripped threads, and distorted sealing surfaces rarely respond to temporary sealing methods. Replacing damaged parts usually provides a safer and more reliable repair.
Avoid treating overtightening as a permanent solution. Extra force can make the damage worse and create a larger leak.
How to Replace an RV Low-Point Drain Valve
Replacing the valve is often straightforward when it is easily accessible. However, the correct method depends on how the valve connects to your RV plumbing.
Identify the Valve and Connection Type
Inspect how the existing valve attaches to the water line. Common connection types include threaded fittings, barbed fittings, crimped PEX connections, clamp-style PEX connections, and push-to-connect fittings.
Take clear pictures before removing anything. These pictures can help you match the valve position and pipe routing during installation.
Do not assume every RV uses the same valve size or thread type.
Gather the Correct Parts and Tools
You may need the following supplies:
- A matching potable-water-safe replacement valve
- A replacement cap and washer
- A PEX cutter or suitable tubing cutter
- The correct PEX crimp or clamp tool
- Matching PEX rings, clamps, or connectors
- An adjustable wrench
- Clean towels
- A shallow water container
- A flashlight
- An inspection mirror
- Manufacturer-approved thread sealant
- A water pressure regulator
Only use fittings and sealants approved for potable-water systems.
Remove the Damaged Valve
Turn off all water sources and release system pressure. Open the low-point drain and allow remaining water to escape.
Support the nearby pipe before loosening the valve. Twisting unsupported PEX can damage another connection behind a wall or underbelly panel.
For threaded valves, hold the stationary fitting while turning the valve. For crimped or clamped connections, cut the tubing cleanly without crushing it.
Install the Replacement Valve
Position the new valve so it remains accessible and protected from road debris. Make sure the handle or stem can move through its full range.
Install threaded connections according to the fitting manufacturer’s instructions. Some tapered pipe threads require approved sealant, while washer-sealed caps do not.
For PEX connections, use the correct rings, clamps, and tools. Check that the pipe is inserted fully before securing the connection.
Pressure-Test the New Valve
Leave the repaired area exposed during testing. Start with the RV water pump and inspect every connection.
Dry any moisture and watch again. A completely dry connection makes small leaks easier to detect.
After the pump test, connect regulated city water. Recheck the valve after several minutes and again before covering the plumbing.
Should You Use Thread Tape on an RV Low-Point Drain?
Thread tape may be appropriate on certain tapered pipe-thread connections. These fittings seal through the threads as they tighten.
However, many removable low-point drain caps seal through a rubber washer. Adding thread tape to those cap threads usually does not repair the actual sealing problem.
Too much tape can make a plastic fitting difficult to tighten. It may also place excessive outward pressure on the fitting and cause cracking.
Loose pieces of tape can enter the plumbing system and become trapped in valves or faucets. Always follow the installation instructions for your specific valve.
When the cap relies on a washer, replace the washer instead of wrapping the cap threads.
Can High Water Pressure Cause a Low-Point Drain to Leak?
High city-water pressure can force water through a weak drain seal. It may expose damage that was not noticeable under normal pump pressure.
The pressure itself may not be the only problem. A healthy valve should still seal within the RV manufacturer’s approved pressure range.
Use these steps to manage pressure safely:
- Install an RV pressure regulator at the campground connection.
- Keep pressure within your RV manufacturer’s recommended range.
- Avoid connecting directly to an untested campground supply.
- Test the drain using the onboard pump first.
- Replace seals that leak even under normal pressure.
- Inspect nearby fittings after any major pressure surge.
- Use a pressure gauge when adjusting a regulator.
- Do not increase pressure to compensate for clogged faucets.
If the drain leaks only on city water, compare the regulated city pressure with the water pump’s shutoff pressure.
Is It Normal for a Low-Point Drain to Drip After Winterizing?
A few remaining drops can be normal after draining, sanitizing, winterizing, or dewinterizing an RV. Water may remain inside low sections of the plumbing and slowly work toward the outlet.
Open the faucets to admit air and allow the lines to drain completely. The dripping should gradually slow and stop once residual water escapes.
Continuous dripping after closing the valve and repressurizing the system is not normal. That usually indicates a damaged washer, poorly seated valve, or freeze-related crack.
Winterization can also reveal parts that were lost during storage. Check whether the cap washer remained attached when the drain was opened.
If the valve was exposed to freezing temperatures with water trapped inside, inspect it carefully for cracks.
What If the Low-Point Drain Drips Only When the Water Pump Runs?
A leak that appears only when the pump runs usually depends on plumbing pressure. The valve may remain dry while the system is empty but leak once the pump pressurizes the lines.
Watch whether the pump starts cycling every few minutes without any faucets open. A dripping low-point drain can slowly reduce system pressure and trigger the pump.
Turn the pump off and open a faucet. If the dripping slows as pressure drops, you have likely confirmed an active pressure-related leak.
Inspect the washer, valve seat, internal seal, and valve body. Replace the complete valve when water passes through despite proper cleaning and closure.
What If the Drain Still Drips After Replacing the Washer?
A new washer will not solve every low-point drain leak. Check these additional possibilities:
- Confirm the washer matches the original diameter and thickness.
- Make sure the washer sits flat inside the cap.
- Check whether a cone washer was replaced with a flat washer.
- Inspect the cap for hairline cracks.
- Look for cross-threaded or stripped cap threads.
- Clean mineral deposits from the sealing surface.
- Check the drain opening for scratches or distortion.
- Test the system using regulated water pressure.
- Watch whether water leaks through the valve outlet.
- Inspect nearby PEX fittings for moisture.
- Replace the entire valve when its internal seal has failed.
The cap may also bottom out before the wrong washer compresses. In that situation, tightening harder will not create a dependable seal.
Temporary Fixes Versus Permanent Repairs
Temporary repairs can help control water loss until proper parts are available. However, they should not replace damaged plumbing components permanently.
| Repair Method | Temporary or Permanent? | Best Use | Important Limitation |
| Opening and closing the valve repeatedly | Temporary or diagnostic | Clearing loose debris | Cannot repair worn seals |
| Cleaning the valve seat | Sometimes permanent | Dirt or mineral buildup | Damage may remain underneath |
| Replacing the cap washer | Usually permanent | Washer-sealed cap leaks | Requires the correct washer |
| Installing a new drain cap | Usually permanent | Cracked or stripped cap | Valve body must remain sound |
| Lowering city-water pressure | Preventive support | Pressure-related leaking | Does not repair damaged parts |
| Adding a compatible external plug | Temporary | Emergency leak control | Must be removed before draining |
| Applying thread sealant correctly | Permanent when approved | Tapered threaded fittings | Not suitable for washer-sealed caps |
| Replacing the complete valve | Permanent | Cracks or failed internal seals | Requires proper installation |
| Applying exterior sealant over a crack | Temporary and unreliable | Emergency water control only | Can hide continuing damage |
An external cap or plug may stop water temporarily. However, the original valve should still be repaired before winterization or long-term use.
Mistakes to Avoid When Repairing a Low-Point Drain
A small drain leak can become larger when plastic parts are handled incorrectly. Avoid these common mistakes:
- Removing a cap while the plumbing remains pressurized
- Working near hot-water lines before they cool
- Overtightening plastic caps or valves
- Using pliers on brittle valve handles
- Installing the wrong washer size or shape
- Applying thread tape to washer-sealed cap threads
- Cross-threading a cap during installation
- Using automotive sealants in potable-water plumbing
- Ignoring moisture entering an enclosed underbelly
- Assuming the visible drip identifies the actual leak source
- Testing with unregulated campground pressure
- Replacing parts without matching the connection type
- Leaving an emergency plug installed during winterization
- Covering the repaired area before pressure testing
- Ignoring frequent water pump cycling after the repair
If the leak returns, inspect the complete assembly instead of tightening the same cap repeatedly.
How to Prevent Future Low-Point Drain Leaks
Regular inspection can prevent a small drip from soaking insulation or damaging nearby materials.
- Operate each low-point valve during seasonal maintenance.
- Inspect the caps and washers before winterization.
- Keep spare washers and caps in your RV tool kit.
- Use a pressure regulator whenever connecting to city water.
- Flush sediment from the plumbing system when necessary.
- Avoid forcing valves that become difficult to move.
- Replace brittle or discolored plastic parts early.
- Protect exposed valves from road debris.
- Support pipes that place weight on drain fittings.
- Check the drains after sanitizing the fresh water system.
- Inspect for leaks after spring dewinterization.
- Remove temporary plugs before draining the RV.
- Keep the correct replacement valve information with your records.
- Test repairs under both pump and regulated city pressure.
It also helps to inspect the low-point drains before every extended trip. Finding a weak washer at home is easier than repairing one at a campsite.
When Should You Call an RV Technician?
Many low-point drain repairs only require cleaning or replacing a washer. Professional help becomes useful when the valve is hidden or connected to inaccessible plumbing.
You should also consider professional inspection when water has entered the RV underbelly. Wet insulation can hold moisture against wood, metal, wiring, and flooring.
Contact an RV technician when:
- Water is collecting inside the enclosed underbelly.
- The floor near the plumbing feels soft.
- The valve is hidden behind fixed panels.
- Several fittings began leaking after freezing weather.
- Multiple leaks appeared after a pressure surge.
- The repair requires unfamiliar PEX tools.
- The pipe moves excessively when you touch the valve.
- The valve connection is cracked inside a wall.
- The replacement valve leaks after installation.
- You cannot identify where the water originates.
- Electrical wiring near the leak has become wet.
Turn off the water supply until the leak is repaired. This reduces the risk of hidden moisture damage.
Final Thoughts
A dripping RV low-point drain is usually caused by a small sealing problem. Start by turning off the water, releasing pressure, and cleaning the valve or cap.
Replace damaged washers, cracked caps, and worn valves rather than overtightening them. After the repair, test first with the water pump and then with regulated city water.
Catching the leak early can prevent wet insulation, pump cycling, water waste, and hidden structural damage. Once the area remains completely dry under pressure, you can confidently consider the repair finished.
Related FAQs
Should an RV Low-Point Drain Drip When Closed?
An RV low-point drain should not continuously drip when closed and pressurized. A few residual drops may be normal after draining, but ongoing leakage usually indicates debris, a damaged washer, or a worn valve seal.
Can I Replace Only the Washer Inside the Drain Cap?
You can usually replace only the washer when the cap, threads, and sealing surface remain undamaged. Match the original washer’s diameter, thickness, and shape for a dependable seal.
Why Does My Low-Point Drain Leak on City Water but Not the Pump?
City-water pressure may be higher than your water pump’s pressure. That extra pressure can push water through a weak washer, cracked valve, or worn internal seal.
Can I Use a Garden Hose Washer in an RV Drain Cap?
A garden hose washer may work temporarily when its size and shape match the original seal. Use the correct RV replacement whenever possible because some caps require cone-shaped washers.
Can I Leave a Plug on a Leaking Low-Point Drain?
A compatible plug may temporarily control the leak. However, it should not replace repairing the damaged valve, and it must be removed before winterizing or draining the plumbing.
How Tight Should an RV Low-Point Drain Cap Be?
Tighten the cap by hand until the washer compresses and the cap feels firmly seated. Avoid using excessive force because plastic caps and fittings can crack.
Why Does My Water Pump Cycle When the Low-Point Drain Drips?
The dripping drain slowly reduces pressure inside the plumbing system. Once pressure falls below the pump’s activation point, the pump restarts to restore it.
Do RV Low-Point Drains Connect to the Fresh Water Tank?
Low-point drains normally empty the hot and cold plumbing lines. The fresh water tank usually has a separate drain installed near the bottom of the tank.
Can Freezing Damage an RV Low-Point Drain Valve?
Trapped water can freeze, expand, and crack the drain valve or nearby plumbing. Freeze damage may remain invisible until the system is pressurized during dewinterization.
How Much Water Should Come From the Low-Point Drains?
The amount depends on your plumbing layout and how much water remains in the lines. Opening faucets allows air to enter and helps the system drain more completely.
Why Is Only One Low-Point Drain Leaking?
The hot and cold drains use separate valves or caps. One may have a damaged washer, trapped debris, or a worn seal while the other remains in good condition.
Can a Low-Point Drain Leak Inside the RV?
Yes, especially when the valve or its connection sits inside a compartment or enclosed underbelly. Water may travel along the pipe before becoming visible outside.
Should I Replace Both Low-Point Drain Valves Together?
You do not always need to replace both valves. However, replacing both may be practical when they are the same age and show similar cracking or stiffness.
Can a Dripping Low-Point Drain Empty My Fresh Water Tank?
A significant leak can gradually reduce the available fresh water when the pump is active. The pump may continue cycling as it replaces pressure lost through the drain.
Why Does the New Drain Cap Still Leak?
The replacement cap may contain the wrong washer, have incompatible threads, or be cross-threaded. The sealing surface or valve body may also be damaged.

David Marshall shares travel route insights, mileage planning tips, and road-tested advice. His writing helps travelers understand distance, timing, and equipment choices. Every article is built around clarity and real-world usefulness.