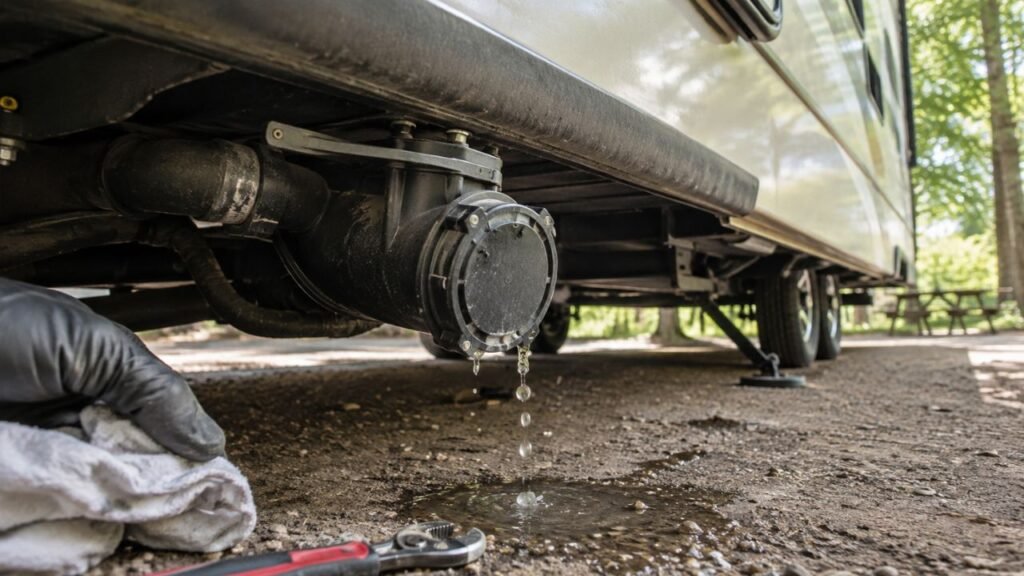
An RV fresh tank overflows on city water when pressurized water enters the tank through a path that should remain closed. The most common causes are a stuck water-pump check valve or a leaking city-water and tank-fill selector valve. High campground pressure can make either problem worse.
This guide explains how the system should work, what causes backflow, and how to find the failed component. You will also learn how to stop the overflow, make the correct repair, and prevent it from happening again.
Key Takeaways
- City water should supply your RV fixtures without filling the fresh tank.
- A stuck pump check valve is one of the most common causes.
- A faulty tank-fill selector can continuously direct water into the tank.
- High water pressure usually exposes an already weak valve or seal.
- Turn off city water immediately when the fresh tank starts overflowing.
- Cycling the pump may clear debris, but it is not always permanent.
- Never plug the tank overflow or vent to stop escaping water.
- Use your RV’s plumbing diagram before replacing any components.
Why Is City Water Filling the RV Fresh Tank?
City water is filling your fresh tank because pressurized water has found an unintended route into it. The escaping water is only the visible symptom. The actual problem is somewhere between the campground connection and the tank.
In normal city-water mode, the campground supply should pressurize your faucets, shower, toilet, and water heater. It should not enter the onboard storage tank.
Water commonly reaches the tank by flowing backward through the 12-volt water pump. A one-way check valve inside the pump normally prevents this movement.
When that valve sticks or wears out, city pressure can push water through the pump. The water then travels through the pump’s intake line and enters the fresh tank.
Some RVs also have a wet-bay selector for city-water and tank-fill modes. A worn selector valve may leak internally, even when its handle appears correctly positioned.
The tank eventually becomes full and releases water through its overflow or vent. This protects the tank from pressure, but the uncontrolled filling still requires attention.
How Should an RV City Water System Work?
Your exact plumbing layout depends on the RV manufacturer and model. However, most systems use separate operating modes to control where water travels.
City Water Mode
In city-water mode, the campground spigot provides the water pressure. Water enters through the city-water connection and supplies the RV’s fixtures directly.
The onboard water pump normally remains turned off. The fresh tank should not gain water while the system operates in this mode.
A check valve prevents city water from flowing backward through the pump. Other valves may separate the fresh tank from the pressurized plumbing.
Fresh Tank Mode
In fresh tank mode, the water pump draws water from the onboard tank. The pump then pressurizes the plumbing for your faucets and appliances.
This mode is normally used when you are dry camping. It also works when no pressurized water connection is available.
The pump should pull water from the tank in one direction. Its internal check valve should prevent water from flowing backward.
Tank-Fill Mode
Some RVs have a separate gravity-fill opening beside the fresh tank. You fill these tanks by placing a drinking-water hose into the fill port.
Other RVs use a pressurized tank-fill setting. Their wet-bay valves redirect city water into the fresh tank.
When the selector remains in tank-fill mode, the tank will continue filling. It may overflow if you do not shut off the supply.
A damaged selector may also leak into the tank while showing city-water mode.
The Role of Check Valves
A check valve allows water to move in only one direction. Several check valves may be installed throughout an RV plumbing system.
The pump’s internal check valve prevents city water from flowing backward. The city-water inlet may have another check valve that prevents pumped water from escaping outside.
These valves can stick because of sand, mineral deposits, dried residue, or internal wear. A small amount of contamination may be enough to prevent complete sealing.
What Commonly Causes a Fresh Tank to Overflow?
The pump check valve and tank-fill selector are the first components to inspect. However, you should confirm your plumbing layout before ordering replacement parts.
A Stuck Water-Pump Check Valve
A stuck pump check valve is one of the most common causes. The valve may remain slightly open because debris is trapped against its seal.
Possible contaminants include:
- Sand from campground plumbing
- Mineral deposits from hard water
- Plastic fragments from plumbing work
- Dried antifreeze residue
- Sediment from an unfiltered water supply
- Small pieces of damaged rubber
Even a tiny opening can allow water to pass backward. City pressure then pushes water through the pump and into the fresh tank.
Running the pump may wash away the debris and reseat the valve. However, the problem may return if contamination remains inside the plumbing.
A Worn Pump Check Valve
The pump check valve may be physically worn rather than temporarily stuck. Its rubber components can harden, tear, deform, or lose flexibility over time.
A worn valve often causes repeated backflow. Cycling the pump may stop the overflow temporarily, but the tank begins filling again later.
The pump may also show other symptoms, including:
- Frequent cycling when no faucet is open
- Difficulty holding pressure
- Reduced water flow
- Delayed priming
- Unusual pump noise
- Water draining back toward the tank
A damaged pump head or valve assembly may require rebuilding or replacement.
A Faulty Tank-Fill Selector Valve
Many modern RVs use a multi-position water-management panel. The panel may control city water, tank filling, winterization, sanitization, and normal pump operation.
Inside the selector are seals, O-rings, and passages. These components direct water based on the handle position.
A worn seal may allow water to cross between internal passages. The handle may indicate city-water mode while water continues entering the tank.
The selector can fail because of:
- Worn internal O-rings
- Mineral buildup
- Frozen water damage
- Cracked plastic parts
- Excessive operating force
- Incorrect valve movement
- Age-related seal deterioration
A damaged selector usually needs new seals, a replacement cartridge, or complete replacement.
Incorrect Selector Valve Positions
The tank may be filling because one or more wet-bay valves are positioned incorrectly. This commonly happens after winterizing, sanitizing, or filling the tank.
Some valve panels are difficult to read. Others use similar symbols for very different operating modes.
Do not copy valve positions from another RV without verification. Two similar-looking panels may use different internal plumbing arrangements.
Check the label beside the valves and consult your model-specific manual. Make sure every handle is fully placed in city-water mode.
A Selector Valve That Is Not Fully Seated
A selector handle can appear correctly positioned without fully reaching its stop. This may leave internal passages partially connected.
Turn off the city-water supply before moving the valve. Release pressure through a faucet, then rotate the selector firmly into the correct position.
Never force a stiff handle. Excessive force can damage the stem, seals, or plastic valve body.
Excessive Campground Water Pressure
High campground pressure can force water past a weak seal. A valve that holds at moderate pressure may leak at a stronger connection.
However, pressure alone does not normally create a route into the tank. A properly functioning check valve and selector should block backflow.
High pressure usually exposes another problem, such as:
- A worn pump check valve
- A partially stuck valve
- A damaged selector seal
- An incorrectly installed component
- A loose plumbing connection
A pressure regulator can reduce the symptoms. It cannot permanently repair a damaged valve.
Incorrect Plumbing After a Previous Repair
The problem may begin after a pump, filter, valve, or winterization line has been changed. A hose may be connected to the wrong port or installed backward.
Possible installation problems include:
- Reversed pump inlet and outlet lines
- A backward inline check valve
- Missing backflow protection
- An open winterization bypass
- Incorrect selector-valve connections
- Modified tank-fill plumbing
- Improper accumulator installation
Trace each water line carefully before changing anything. Look for arrows showing the correct direction of flow.
A Damaged Tank Vent or Overflow Line
A blocked vent does not usually cause city water to enter the tank. Instead, it changes how the tank behaves after unwanted filling begins.
The fresh tank needs a clear vent as its water level changes. The vent also allows air to leave while the tank fills.
A kinked or blocked vent may cause:
- Tank swelling
- Slow filling
- Water escaping from another opening
- Tank deformation
- Unusual gurgling sounds
- Inaccurate tank-level behavior
Do not confuse the vent problem with the original backflow path. Both issues may need repair.
What Should You Do When the Tank Starts Overflowing?
Act quickly when water begins leaving the tank overflow. Stopping the water supply reduces the chance of tank, underbelly, or structural damage.
- Turn off the campground water spigot.
- Disconnect the drinking-water hose.
- Open a cold-water faucet to release trapped pressure.
- Turn off the onboard water pump.
- Drain the fresh tank to a safe level.
- Confirm all wet-bay valves are correctly positioned.
- Check the tank and nearby compartments for leaks.
- Inspect the underbelly for sagging or trapped water.
- Look for displaced tank supports or mounting straps.
- Keep city water disconnected during troubleshooting.
Never plug the overflow outlet or vent hose. Blocking these openings can allow pressure to build inside the tank.
If the tank looks swollen, shifted, or unsupported, stop using it. Have the mounting system inspected before refilling.
How Can You Identify the Failed Component?
The location of escaping water does not identify the defective part. Compare the timing, pressure, valve positions, and pump behavior before making repairs.
| Possible Cause | Common Clue | Quick Diagnostic Test | Likely Solution |
| Stuck pump check valve | Tank fills with the selector correctly set | Run the pump, then reconnect regulated city water | Flush, clean, rebuild, or replace the pump |
| Worn pump check valve | Overflow returns after temporarily stopping | Isolate the pump path and test again | Replace the valve assembly, pump head, or pump |
| Incorrect valve position | Tank starts filling immediately | Compare every handle with the panel diagram | Move the valves into city-water mode |
| Faulty tank-fill selector | Tank fills despite correct handle positions | Cycle the selector with pressure removed | Replace seals, cartridge, or valve |
| Excessive water pressure | Problem appears at certain campgrounds | Test pressure with a gauge and regulator | Lower the pressure and repair the weak component |
| Incorrect previous repair | Problem started after plumbing work | Trace each hose and check flow arrows | Correct the installation |
| Restricted tank vent | Tank swells or water exits unusually | Inspect the vent and overflow hoses | Clear, straighten, or replace the hose |
How Do You Troubleshoot the Overflow Step by Step?
Begin with simple checks before disconnecting any plumbing lines. A logical process helps you avoid replacing healthy components.
Confirm That the Tank Is Actually Filling
RV tank-level sensors are not always accurate. Residue, damaged wiring, or dirty probes can produce false readings.
Confirm the problem using several signs:
- Watch the tank-level display increase.
- Listen for water entering the tank.
- Check the overflow or vent outlet.
- Inspect a visible translucent tank.
- Note whether the tank becomes heavier.
- Measure how much water drains afterward.
If only the monitor reading changes, the problem may involve the sensor. Water physically leaving the overflow confirms actual filling.
Check Every Wet-Bay Valve Position
Turn off the campground water before moving any selector. Open a faucet to release pressure inside the system.
Compare every valve position with the diagram for city-water use. Do not rely only on the direction of the handle.
Some valves indicate flow based on the pointed end. Others use the long side of the handle.
Make sure each valve reaches its intended stop. A partly positioned valve may connect more than one water path.
Inspect the Tank-Fill Selector
Look for cracks, loose handles, damaged stems, and leaking connections. A handle that spins freely may no longer move the internal valve.
With the pressure removed, move the selector through its approved positions. Return it firmly to city-water mode.
This movement may dislodge small debris from an internal seal. If the overflow returns, the valve likely requires service.
Measure the Incoming Water Pressure
Install a water-pressure gauge at the campground spigot. Measure the supply before relying on the RV’s plumbing.
Campground pressure can change throughout the day. It may rise when fewer campers are using water.
Install an adjustable pressure regulator near the spigot. Set it according to the maximum pressure listed by your RV manufacturer.
Many owners use a range around 40 to 55 PSI. Your RV’s specifications should determine the final setting.
Reconnect the system and watch the fresh tank carefully. If lower pressure stops the filling, a weak valve may still require repair.
Cycle the Water Pump Check Valve
Cycling the pump can sometimes clear a small piece of debris. It may also help the internal valve return to its sealing position.
Use this process:
- Turn off the city-water supply.
- Disconnect the water hose.
- Open a faucet and release the pressure.
- Confirm the fresh tank contains usable water.
- Turn on the onboard pump.
- Run water through one or two faucets.
- Let the pump pressurize the system again.
- Turn the pump off.
- Connect regulated city water.
- Watch the tank level and overflow outlet.
Run enough water to move debris through the pump. Avoid running the pump dry.
If the tank stops filling, the pump check valve was probably stuck. The result may only be temporary.
Determine Whether the Pump Is the Backflow Path
The strongest test is isolating the line between the pump and fresh tank. Some RVs already have an approved shutoff valve for this purpose.
Close the valve while the city-water system is depressurized. Reconnect regulated city water and observe the tank.
If the tank no longer fills, water was probably traveling backward through the pump. The pump check valve or pump head is the likely cause.
Do not pinch flexible tubing or install a random shutoff valve. Improper isolation can damage plumbing or restrict normal pump operation.
A technician can perform this test when the lines are inaccessible.
Test the Selector Valve Separately
If isolating the pump does not stop the filling, inspect the tank-fill selector. The selector may be allowing city water to reach the tank directly.
Move the selector between approved positions while pressure is removed. Return it to city-water mode and test again.
The valve may need replacement when:
- Water enters the tank in every position.
- The handle feels loose or disconnected.
- The valve leaks externally.
- The problem returns after cycling.
- Internal seals cannot be serviced.
- The valve body has freeze damage.
Review Recent Plumbing Work
Think about when the problem first appeared. Recent service often provides an important clue.
Check whether the RV recently received:
- A replacement water pump
- A new water filter
- An accumulator tank
- Winterization service
- Dewinterization service
- Wet-bay repairs
- A new city-water inlet
- An inline check valve
- Fresh-tank cleaning
Inspect the affected area for reversed lines, open bypasses, and incorrect flow direction.
Can Cycling the Water Pump Stop the Overflow?
Cycling the water pump can stop the overflow when debris prevents the check valve from closing. Pump operation may move the contaminant and allow the seal to reseat.
This method works best when the problem starts suddenly. It is also more promising when the pump otherwise operates normally.
However, cycling the pump cannot repair damaged rubber, a worn valve seat, or a cracked pump head. The tank may begin filling again during the next city-water connection.
Treat pump cycling as a troubleshooting step rather than a guaranteed repair.
The valve likely needs further service when:
- Backflow returns repeatedly.
- The tank continues filling slowly.
- Lower water pressure only reduces the problem.
- The pump loses pressure after shutting off.
- The pump cycles without an open faucet.
- Water flow has become weak or inconsistent.
How Do You Fix an RV Fresh Tank That Overflows?
The correct repair depends on the confirmed backflow route. Replacing random components may cost more without solving the overflow.
Clean or Reseat the Pump Check Valve
Some pumps allow access to their internal valve assembly. Follow the manufacturer’s instructions before opening the pump.
Turn off every water source and disconnect electrical power. Release system pressure before loosening any fittings.
Inspect the valve for:
- Sediment
- Mineral scale
- Damaged rubber
- Cracked plastic
- Warped sealing surfaces
- Loose internal components
Use only cleaning products approved for potable-water systems. Harsh chemicals can damage seals or contaminate drinking-water lines.
Reassemble the pump carefully and test for leaks.
Replace the Pump Valve Assembly
Some manufacturers sell replacement valve assemblies or pump heads. These parts may cost less than replacing the entire pump.
Use the exact pump model and part number. Similar pump housings may use different internal components.
A replacement assembly should match:
- Pump flow rate
- Pressure rating
- Voltage
- Port arrangement
- Housing design
- Manufacturer specifications
After installation, sanitize or flush the plumbing as required.
Replace the Complete Water Pump
Replacing the entire pump may be more practical when several components are worn. It may also be necessary when repair parts are unavailable.
Consider complete replacement when:
- The pump is old or heavily used.
- The motor operates inconsistently.
- The housing is cracked.
- The pump frequently loses prime.
- Several internal valves are damaged.
- The replacement head approaches the pump’s cost.
- The old pump has ongoing pressure problems.
Match the new pump’s pressure and flow with the existing RV plumbing. A more powerful pump is not always a better choice.
Install an Approved Inline Check Valve
An inline check valve can add another layer of backflow protection. It is sometimes installed on the pump’s outlet or inlet, depending on the plumbing design.
The valve must be:
- Approved for potable water
- Properly sized
- Installed in the correct direction
- Compatible with the system pressure
- Accessible for future service
- Resistant to flow restriction
Follow the RV or pump manufacturer’s guidance. An incorrectly placed valve may reduce water flow or create priming problems.
An inline valve can solve backflow in some systems. It should not hide serious pump damage that affects normal operation.
Repair the Tank-Fill Selector Valve
Some selector valves have replaceable O-rings or cartridges. Others require complete replacement of the valve body.
Shut off water and release pressure before disassembly. Photograph every hose and connection before removing anything.
Marking the lines reduces the chance of incorrect reassembly.
Replace seals with the exact material and size required. A similar-looking O-ring may swell, leak, or fail in potable-water service.
Replace the Water-Management Panel
A damaged panel may be easier to replace as a complete assembly. This is especially true when several integrated valves have failed.
Complete replacement may be appropriate when:
- The valve body has cracked.
- Internal parts are unavailable.
- Freeze damage affects several passages.
- Multiple selector positions leak.
- The panel has been previously modified.
- Access makes individual repair impractical.
Record the original valve positions and hose routing before removal.
Correct the Selector Positions
No replacement parts are needed when the valves are simply mispositioned. Return every selector to the manufacturer’s city-water configuration.
Apply a clear label if the original diagram is faded. Keep a photo of the correct settings on your phone.
Check the positions after:
- Filling the tank
- Sanitizing the system
- Winterizing
- Dewinterizing
- Using the antifreeze intake
- Servicing the water heater
- Changing filters
Regulate the City-Water Pressure
Connect the regulator directly to the campground spigot. This protects the hose and RV plumbing from excessive pressure.
An adjustable regulator with a gauge makes pressure easier to monitor. Set it according to your RV manufacturer’s limit.
Avoid assuming that every campground provides safe pressure. Conditions can vary between sites and throughout the day.
Remember that a regulator manages pressure. It does not repair a leaking check valve or selector.
Can High City Water Pressure Cause the Tank to Overflow?
High city-water pressure can contribute to fresh-tank overflow. However, it usually does not cause the entire problem by itself.
There must still be a route allowing water into the tank. That route is commonly a weak pump check valve or leaking fill selector.
A worn valve may hold at 35 PSI but leak at 70 PSI. This can explain why the problem only appears at certain campgrounds.
Reducing the pressure may stop the visible overflow. The weak valve should still be inspected because it may continue deteriorating.
Always confirm the actual pressure with a gauge. A strong stream from the spigot does not provide an accurate measurement.
Can an Overflowing Fresh Tank Damage the RV?
The overflow outlet helps release excess water from a full tank. However, continued filling can still create expensive problems.
Possible damage includes:
- Fresh-tank swelling or deformation
- Broken tank fittings
- Loose or bent mounting straps
- Damage to tank supports
- Water trapped inside the underbelly
- Wet insulation
- Floor damage
- Cabinet damage
- Mold or mildew growth
- Corrosion around metal supports
- Electrical damage near wet areas
- Wasted campground water
A blocked vent increases the risk because air cannot escape normally. The tank may expand before water finds another exit.
Inspect the underbelly after a significant overflow. Sagging material may indicate trapped water.
Do not puncture the underbelly without identifying wiring, plumbing, and structural components. A technician can drain and inspect it safely.
How Can You Prevent the Fresh Tank From Filling Again?
Good connection habits reduce the chance of another unexpected overflow. They also help protect the rest of your plumbing system.
- Use a water-pressure regulator at every campground.
- Add a pressure gauge when using an adjustable regulator.
- Open the campground spigot slowly.
- Verify all selector positions before connecting water.
- Watch the fresh tank during the first several minutes.
- Use a potable-water sediment filter when appropriate.
- Flush the plumbing after long storage.
- Flush the system after winterization.
- Exercise selector valves periodically.
- Replace stiff or leaking valves promptly.
- Keep the tank vent and overflow hose clear.
- Inspect pump connections during routine maintenance.
- Follow the correct flow direction for inline valves.
- Avoid leaving city water connected while away.
- Turn off the campground spigot before sleeping when concerned.
- Keep your plumbing diagram inside the RV.
- Record pump and selector part numbers.
- Check the tank supports after major overflows.
A sediment filter may help protect internal valves from campground debris. Replace the filter regularly so it does not reduce water flow.
When Should You Call an RV Technician?
Some backflow problems are easy to isolate. Others involve hidden plumbing, integrated wet-bay panels, or possible structural damage.
Contact an RV technician when:
- The tank keeps filling after pump cycling.
- Isolating the pump does not stop the overflow.
- The selector valve is hidden behind finished panels.
- Plumbing lines cannot be traced safely.
- The tank appears swollen or displaced.
- Water has entered the enclosed underbelly.
- Electrical equipment is located near the leak.
- Previous owners modified the plumbing.
- The selector body has freeze damage.
- Several valves leak simultaneously.
- The pump wiring needs modification.
- You cannot identify the correct valve positions.
- Removing cabinets or flooring is required.
- The overflow returns immediately after repair.
Bring your RV model, plumbing diagram, pump number, and water-panel information. These details can shorten the diagnostic process.
Final Thoughts
An RV fresh tank usually overflows on city water because pressurized water is entering through a failed valve. The most common route is backward through the onboard water pump.
A leaking tank-fill selector is another frequent cause. Incorrect wet-bay settings can create the same symptom without any failed parts.
Start by turning off the water and confirming every valve position. Then measure the campground pressure and cycle the pump.
If the problem returns, isolate the pump and selector paths separately. This approach helps you replace the actual failed component instead of guessing.
Never block the tank overflow or vent to hide the problem. Those openings protect the tank while you identify the unwanted water path.
Related FAQs
These common questions can help you better understand city-water backflow and fresh-tank overflow.
Why Does My Fresh Tank Fill When the Water Pump Is Off?
The water-pump motor does not need to run for backflow to occur because city water can push backward through a failed internal check valve, allowing water to reach the fresh tank even when the pump is off.
Should the RV Water Pump Be On While Using City Water?
Most RVs do not require the water pump when connected to city water since campground pressure supplies the system, and the pump should remain off unless your RV’s manual specifically calls for it.
Is Water Coming From the Fresh Tank Overflow Normal?
Water from the overflow is normal only during intentional tank filling, but it is not normal in city-water mode and usually indicates incorrect valve settings or unwanted backflow.
Why Does the Overflow Stop After I Run the Pump?
Running the pump can temporarily clear debris from the check valve and allow it to reseat, stopping backflow, but the issue may return if the valve is worn or still contaminated.
Will a Pressure Regulator Fix a Bad Check Valve?
A pressure regulator can reduce excessive pressure but cannot repair a damaged or worn check valve, so it may lessen symptoms but not fix the underlying problem.
Can I Keep Using City Water With a Bad Pump Check Valve?
Using city water with a bad pump check valve can keep overfilling the tank and cause water waste or damage, so it should be disconnected until the valve is repaired or isolated.
How Do I Know Whether the Pump or Selector Valve Is Bad?
Confirm all selector positions first, then isolate the pump path if possible; if overflow stops the pump is likely at fault, but if it continues the selector or tank-fill plumbing is the issue.
Can a Full Fresh Tank Burst?
Fresh tanks are vented to prevent pressure buildup, but a blocked vent or continuous pressurized filling can still cause tank deformation, fitting damage, or structural stress.
Why Does the Problem Only Happen at Certain Campgrounds?
Higher campground water pressure can expose weak valves that normally hold under lower pressure, so the issue may only appear at locations with stronger supply pressure.
Is the City-Water Check Valve the Same as the Pump Check Valve?
No, they are separate components, with the city-water check valve preventing backflow out of the inlet and the pump check valve preventing reverse flow through the pump.
Can a Dirty Water Filter Cause the Tank to Overflow?
A dirty filter usually restricts flow rather than causing backflow, but debris from filter changes can reach valves and contribute to overflow issues.
Can Winterizing Cause This Problem?
Yes, winterizing or dewinterizing can leave valves in the wrong position or introduce residue that prevents proper sealing, leading to unintended tank filling.
Should I Install a Shutoff Valve Near the Water Pump?
A shutoff valve can help with service and diagnosis if installed correctly, but it must be potable-water rated and not restrict normal pump operation.
Why Is Water Pouring From Under My RV?
Water under the RV may come from the fresh-tank overflow, a loose fitting, or a damaged hose, so the water supply should be shut off and the source identified before reconnecting.
Can the Tank Overflow When the Selector Is Correctly Positioned?
Yes, because internal selector seals can fail or a pump check valve can leak, allowing water into the tank even when external controls are set correctly.

David Marshall shares travel route insights, mileage planning tips, and road-tested advice. His writing helps travelers understand distance, timing, and equipment choices. Every article is built around clarity and real-world usefulness.