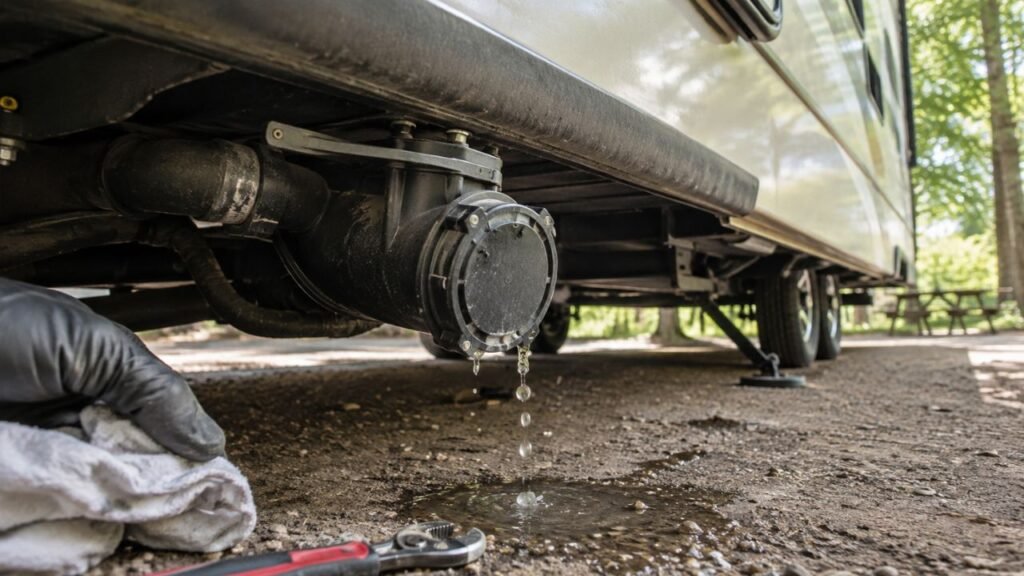
Every RV owner should regularly inspect the tires, roof seals, batteries, brakes, plumbing, appliances, safety detectors, and moving components. These basic maintenance tasks help prevent breakdowns, water damage, electrical problems, and expensive repairs.
This guide explains what to check before trips, monthly, seasonally, and annually. It also shows which tasks you can handle yourself and when professional service is safer.
Key Takeaways
- Check tires, wheels, brakes, lights, and towing equipment before every trip.
- Inspect the roof and exterior seals regularly for cracks or gaps.
- Keep RV batteries properly charged and connections clean.
- Sanitize the freshwater system after storage and when contamination is suspected.
- Maintain black and gray tanks to prevent odors and blockages.
- Test smoke, carbon monoxide, and propane detectors regularly.
- Follow manufacturer schedules for brakes, bearings, appliances, and generators.
- Record inspections, repairs, and replacement dates in a maintenance log.
What RV Maintenance Should Every Owner Do?
Every RV owner should follow a routine covering travel safety, water protection, electrical systems, plumbing, appliances, and seasonal storage. The exact tasks will vary slightly between motorhomes, travel trailers, fifth wheels, truck campers, and pop-up campers.
Start with the systems that could create immediate safety problems. Tires, brakes, propane equipment, electrical connections, and safety detectors deserve priority. Roof seals and plumbing should follow closely because a small leak can cause major hidden damage.
You should also maintain components that move or experience friction. These include slide-outs, awnings, jacks, steps, hitches, suspension parts, and wheel bearings.
The owner’s manuals for your RV and installed equipment should always come first. General schedules are useful, but manufacturers may require different products, procedures, or inspection intervals.
RV Maintenance Schedule at a Glance
RV maintenance becomes easier when you divide it by frequency. This table provides a practical starting point for building your own schedule.
| Maintenance Interval | Main Tasks | Applies To |
| Before every trip | Tires, wheels, lights, brakes, hitch, leaks, safety equipment | All RVs |
| Monthly | Batteries, visible seals, detectors, slide-outs, pests, generator | Most RVs |
| Every three to six months | Roof inspection, awning care, filters, appliance vents | Most RVs |
| Seasonally | Freshwater sanitation, tank cleaning, winterizing, deep cleaning | All RVs |
| Annually | Brakes, bearings, propane system, HVAC, suspension inspection | Depends on RV type |
| By mileage or operating hours | Engine, transmission, generator, filters, chassis fluids | Motorhomes and generators |
These intervals are general guidelines rather than universal rules. Always follow the maintenance schedule provided by your RV, chassis, axle, appliance, and generator manufacturers.
What Should You Check Before Every RV Trip?
A pre-trip inspection focuses on problems that could affect safe travel. You do not need to disassemble anything, but you should carefully inspect the RV before moving it.
Check Tire Pressure and Tire Condition
Check every tire while it is cold, including the spare. Cold pressure means the RV has been parked long enough for the tires to cool.
Use the pressure recommended for your RV’s actual load and tire setup. Do not simply inflate every tire to a guessed pressure.
Inspect each tire for:
- Sidewall cracking
- Cuts or punctures
- Bulges or bubbles
- Uneven tread wear
- Exposed cords
- Embedded objects
- Damaged valve stems
- Missing valve caps
Tread depth matters, but RV tires can age before the tread wears out. Sunlight, heat, long storage periods, overloading, and underinflation can weaken them.
Check the tire date code and follow the tire manufacturer’s replacement guidance. A tire that looks acceptable may still be too old for safe travel.
Inspect Wheels and Lug Nuts
Walk around the RV and look closely at each wheel. Missing, damaged, or loose lug nuts require immediate attention.
Rust streaks running from a lug nut may indicate movement. Cracks, bent wheel edges, or damaged valve stems also deserve professional inspection.
Use a properly calibrated torque wrench when checking lug nuts. Tighten them only to the RV or axle manufacturer’s specification.
Newly installed wheels may require re-torquing after a short travel distance. Follow the specific schedule provided by the installer or manufacturer.
Test Brakes, Lights, and Electrical Connections
Confirm that every exterior light works before entering traffic. Have another person watch while you test the system.
Check:
- Brake lights
- Turn signals
- Running lights
- Clearance lights
- Reverse lights
- License plate lights
- Hazard lights
Towable RV owners should inspect the seven-pin connector for dirt, corrosion, looseness, or damaged wiring. Confirm that the trailer brake controller recognizes the trailer.
Test the trailer brakes at low speed in a safe area. They should engage smoothly without grabbing, pulling, or producing unusual noises.
Inspect the breakaway cable and switch. The cable should attach separately from the safety chains and should not drag on the road.
Inspect the Hitch and Towing Equipment
A hitch problem can separate your RV from the tow vehicle. Take a few minutes to confirm every connection.
For a travel trailer, check the:
- Coupler engagement
- Coupler latch
- Hitch ball
- Hitch pin
- Retaining clip
- Safety chains
- Weight-distribution bars
- Sway-control components
- Breakaway cable
For a fifth wheel, confirm that the jaws are fully closed around the kingpin. Perform the hitch manufacturer’s recommended visual and pull checks.
Gooseneck owners should inspect the coupler, locking mechanism, safety chains, and breakaway cable. Any bent, cracked, or unusually worn component should be replaced before travel.
Look for Leaks and Loose Components
Walk around and underneath the RV before departure. Look for water, oil, coolant, fuel, hydraulic fluid, or waste leakage.
Check beneath:
- The engine and transmission
- Holding tanks
- Water lines
- The water heater
- Slide-out mechanisms
- Hydraulic jacks
- The RV underbelly
- Propane equipment
A small puddle may come from normal air-conditioner condensation. However, colored, oily, strongly scented, or continuous leakage needs investigation.
Secure the Interior and Exterior
Loose items can damage the RV or create a road hazard. Make sure everything is secured before moving.
Check the following:
- Cabinets and drawers are latched.
- Refrigerator doors are locked.
- Roof vents are closed.
- Windows are secured.
- The awning is fully retracted.
- Entry steps are retracted.
- Stabilizer jacks are raised.
- Leveling blocks are removed.
- Storage doors are locked.
- Antennas are lowered.
- Slide-outs are fully retracted.
- Loose campsite items are packed.
Complete one final walk-around after everyone enters the RV. This last check often catches forgotten cords, hoses, chocks, or jacks.
How Do You Maintain an RV Roof and Prevent Leaks?
Water damage is one of the most expensive RV problems. Regular roof and seal inspections help you find small openings before moisture reaches the walls, insulation, or floor.
Inspect the Roof Surface
Inspect the roof regularly and after storms, falling branches, or low-clearance contact. Look for changes rather than waiting for visible interior water.
Watch for:
- Cuts
- Tears
- Punctures
- Bubbling
- Loose roofing material
- Soft areas
- Storm damage
- Standing water
- Damaged trim
Do not assume every RV roof can support your weight. Check the owner’s manual before walking on it.
When the roof is not walkable, use a stable ladder or arrange a professional inspection. Never lean across the roof from an unsafe position.
Check Roof Seams and Penetrations
Most roof leaks begin around seams or installed components. Inspect the sealant surrounding every roof opening.
Pay close attention to:
- Roof vents
- Plumbing vents
- Skylights
- Antennas
- Solar mounts
- Air conditioners
- Ladder mounts
- Front cap seams
- Rear cap seams
- Roof edges
Look for cracking, shrinking, lifting, separation, or missing sealant. Even a narrow opening can allow water inside during heavy rain.
Inspect Windows, Doors, and Sidewall Seams
Not every ceiling stain begins on the roof. Water can enter through windows, marker lights, doors, trim, and exterior fixtures.
Inspect around:
- Window frames
- Entry doors
- Storage doors
- Exterior lights
- Corner moldings
- Utility connections
- Slide-out openings
- Sidewall joints
Check the condition of rubber seals and compression gaskets. Hardened, flattened, or torn seals may no longer keep water out.
Use the Correct RV Sealant
RV sealants are not interchangeable. The correct product depends on your roof material, seam location, and existing sealant.
Before applying anything, confirm compatibility with the manufacturer. Some products can damage rubber roofing, plastic fixtures, or painted surfaces.
Do not simply spread new sealant over dirt and loose material. Clean and prepare the area according to the sealant instructions.
Large cracks, extensive separation, soft roofing, or repeated leaks may indicate deeper damage. Covering those problems with more sealant will not repair the structure underneath.
Watch for Interior Signs of Water Intrusion
Water damage often develops behind finished surfaces. Inspect the interior regularly for subtle warning signs.
Look for:
- Musty smells
- Ceiling stains
- Wall discoloration
- Bubbling wall covering
- Swollen cabinets
- Soft flooring
- Damp storage compartments
- Rust around fasteners
- Mold or mildew
- Loose trim
Investigate these signs immediately. Drying the visible area does not solve the leak that caused it.
How Should You Maintain RV Tires, Brakes, and Bearings?
The tires, brakes, bearings, and suspension carry the RV’s entire weight. Their maintenance directly affects handling, stopping distance, and roadside reliability.
Monitor Tire Age and Wear
Check tire pressure before travel and inspect the tread frequently. Uneven wear can reveal alignment, suspension, loading, or inflation problems.
Inspect both the outside and inside sidewalls whenever possible. Inner damage can remain hidden during a quick exterior walk-around.
Protect stored tires from long-term sunlight and standing water. Avoid parking them on sharp objects, loose debris, or surfaces that trap moisture.
Tire covers may reduce UV exposure during extended storage. However, covers do not replace pressure checks or physical inspections.
Inspect and Service Trailer Brakes
Many travel trailers and fifth wheels use electric drum brakes. These systems may require periodic inspection, adjustment, and component replacement.
Warning signs include:
- Weak braking
- Uneven braking
- Grabbing
- Pulling
- Squealing
- Grinding
- Excessive brake-controller settings
- One wheel running unusually hot
Brake service intervals depend on mileage, axle design, road conditions, and manufacturer requirements. Heavy use, mountain travel, or frequent towing may require more frequent checks.
Do not continue towing when braking performance suddenly changes. Have the system inspected before another trip.
Inspect Wheel Bearings and Hubs
Wheel bearings allow the wheels to rotate smoothly under heavy loads. Insufficient lubrication, contamination, or incorrect adjustment can cause overheating and failure.
Watch for:
- Grease leaking around the hub
- Damaged grease seals
- Grinding or rumbling sounds
- Excessive wheel movement
- Unusually hot hubs
- Metallic debris in grease
You can carefully compare hub temperatures during travel stops. One hub that is much hotter than the others may have a brake or bearing problem.
Do not touch a severely overheated hub with bare skin. Stop traveling and arrange an inspection.
Follow the axle manufacturer’s bearing service schedule. Avoid assuming every axle requires the same grease or service interval.
Check Suspension Components
Inspect visible suspension parts for cracks, looseness, bending, or uneven wear.
Important components include:
- Leaf springs
- Spring hangers
- Shackles
- Equalizers
- U-bolts
- Bushings
- Shock absorbers
- Airbags
- Axle mounts
- Motorhome steering parts
Worn bushings and loose suspension hardware can affect alignment and tire wear. Clunking, wandering, excessive bouncing, or leaning should be investigated.
Weigh the RV Periodically
An overloaded RV places excessive stress on tires, bearings, brakes, suspension, and the frame. It can also make the vehicle difficult to control.
Weigh the RV when it is loaded for travel. Include passengers, water, fuel, propane, food, tools, and personal gear.
Compare the measured weights with:
- Gross Vehicle Weight Rating
- Gross Axle Weight Ratings
- Tire load ratings
- Cargo capacity
- Hitch or pin weight limits
Total weight is important, but side-to-side and axle loading also matter. One overloaded tire or axle can fail even when the overall RV remains under its gross rating.
How Do You Maintain an RV Battery and Electrical System?
Your RV battery and electrical systems power lights, pumps, controls, appliances, and safety equipment. Regular checks can prevent confusing low-voltage problems and unexpected power loss.
Identify the Battery Type
Before performing battery maintenance, identify what type you own. The charging requirements differ significantly.
Common RV batteries include:
- Flooded lead-acid
- Absorbed glass mat
- Gel
- Lithium iron phosphate
Flooded batteries may require electrolyte checks. Sealed AGM and gel batteries should not be opened.
Lithium batteries often require compatible chargers and specific cold-weather precautions. Always follow the battery manufacturer’s instructions.
Check Battery Charge and Condition
Inspect the battery bank regularly, especially before dry camping or storage.
Look for:
- Corroded terminals
- Loose cable connections
- Damaged insulation
- Swollen battery cases
- Cracks
- Leaking fluid
- Overheated cables
- Broken hold-downs
Keep connections clean and properly tightened. Loose terminals create resistance, heat, charging problems, and intermittent power loss.
Measure battery condition using an appropriate monitor or testing method. A simple display showing voltage may not provide a complete picture under every condition.
Maintain Flooded Lead-Acid Batteries
Flooded batteries may require periodic electrolyte inspection. Wear eye protection and gloves when working around them.
Use only distilled water when topping up cells. Do not add acid during normal maintenance.
Follow the manufacturer’s instructions regarding charge state and fill level. Overfilling can cause electrolyte to escape during charging.
Keep flames, sparks, and smoking materials away from batteries. Charging lead-acid batteries can release flammable gas.
Verify Converter and Charger Operation
Your converter or inverter-charger should match the battery chemistry. Incorrect settings may cause undercharging, overcharging, reduced capacity, or premature failure.
Check whether charging voltage rises when shore power is connected. A battery that never charges may indicate a converter, fuse, wiring, or connection problem.
A battery that repeatedly loses power may not always be faulty. Hidden electrical loads and poor charging performance can produce the same symptoms.
Inspect Shore-Power Equipment
Inspect the shore-power cord, plug, adapters, and surge protector before use.
Stop using the equipment if you find:
- Burned plug blades
- Melted plastic
- Loose connections
- Cracked insulation
- Corrosion
- Unusual heat
- Electrical odors
Make sure the campground receptacle matches your RV’s electrical service. Avoid damaged outlets and loosely fitting plugs.
Do not open energized panels or transfer switches unless you are qualified. RV electrical systems can expose you to dangerous voltage.
Test GFCI Outlets and Breakers
Use the test and reset buttons on GFCI outlets according to the manufacturer’s instructions. Replace or professionally inspect any outlet that will not trip or reset correctly.
Repeated breaker trips usually indicate overload, damaged wiring, moisture, or failing equipment. Do not replace a breaker with a larger size to stop it from tripping.
How Do You Maintain an RV Plumbing System?
RV plumbing experiences vibration, changing temperatures, pressure fluctuations, and long storage periods. Small leaks should be repaired before they reach the floor or underbelly.
Inspect Water Lines, Fittings, and Faucets
Pressurize the system and inspect visible plumbing connections. Use both the water pump and city-water connection during separate checks.
Look around:
- The water pump
- Pump strainer
- City-water inlet
- Water heater
- Toilet
- Sinks
- Shower
- Outdoor kitchen
- Low-point drains
- Freshwater tank
- Filter housings
Use a dry paper towel around fittings to find slow leaks. A connection may feel dry while still releasing a small amount of water.
Inspect beneath cabinets and inside storage compartments. Leaks often develop in areas that are rarely opened.
Check the Water Pump
A healthy water pump should build pressure and stop when no fixture is open. Repeated cycling may indicate a leak, pressure loss, or internal pump problem.
Common warning signs include:
- Pump running every few minutes
- Pump running without delivering water
- Weak or pulsing flow
- Excessive noise
- Loss of prime
- Air in the water lines
- Water around the pump
- Debris in the strainer
Check the freshwater level before troubleshooting. An empty tank or closed valve can make a working pump appear faulty.
Use a Water-Pressure Regulator
Campground water pressure can vary throughout the day. High pressure may damage fittings, hoses, faucets, filters, or toilet valves.
Use an RV-rated pressure regulator between the campground connection and drinking-water hose. An adjustable regulator with a gauge can help you monitor incoming pressure.
Select a pressure that matches the RV manufacturer’s recommendations. Do not assume every RV plumbing system tolerates the same pressure.
Maintain the Water Heater
Inspect the water heater according to its manufacturer’s schedule. Different models use different heating methods and internal components.
Maintenance may include:
- Flushing sediment
- Inspecting the burner area
- Cleaning exterior vents
- Checking electrical connections
- Inspecting the pressure-relief valve
- Replacing an anode rod when equipped
- Looking for tank leakage
Never drain a hot, pressurized water heater. Turn off the heat source, allow the water to cool, and release pressure safely.
Do not remove a pressure-relief valve or anode rod without following the correct shutdown procedure.
Protect Plumbing During Freezing Weather
Water expands when frozen and can split pipes, valves, pumps, filters, and water-heater components.
Before freezing weather, follow the RV manufacturer’s winterization procedure. This may involve draining the system, bypassing the water heater, and using approved RV antifreeze.
Do not use automotive antifreeze in the freshwater system. It is toxic and not designed for potable plumbing.
Remember to protect outdoor showers, washing-machine lines, ice makers, toilet valves, filters, and low-point drains.
How Often Should You Sanitize the RV Freshwater System?
Sanitize the freshwater system after long storage, suspected contamination, repairs, or unusual taste and odor. Many owners also include sanitation in their seasonal preparation.
A general sanitation process includes:
- Turn off the water heater and water pump.
- Drain old water from the freshwater tank.
- Prepare the manufacturer-approved sanitizing solution.
- Add the solution using the recommended method.
- Fill the tank with potable water.
- Run the solution through every cold and hot fixture.
- Allow the required contact time.
- Drain the entire system.
- Refill and flush until the odor disappears.
- Replace or sanitize water filters as directed.
The correct solution strength depends on the RV and product instructions. Avoid guessing or making the mixture unnecessarily strong.
Do not allow concentrated bleach to contact surfaces or components that may be damaged. Wear appropriate protection and work in a ventilated area.
Sanitation removes many microorganisms, but it will not repair a contaminated tank, damaged line, or unsafe water source. Investigate recurring odors, discoloration, or slime.
How Do You Maintain RV Black and Gray Tanks?
Holding-tank care helps prevent odors, clogs, inaccurate sensors, and leaking valves. Black and gray tanks need slightly different maintenance routines.
Maintain the Black Tank
The black tank needs enough liquid to keep waste from drying into a solid mass. Avoid leaving the black valve open continuously at a full-hookup campsite.
Allow the tank to fill to an appropriate level before dumping. The larger volume helps carry solids through the sewer hose.
After dumping, use the built-in rinser when equipped and when campground rules permit. Follow the rinser instructions and never leave the RV unattended.
Use only toilet paper and products suitable for RV waste systems. Wipes labeled flushable may still create problems inside RV tanks and valves.
Add water after dumping unless the RV is being winterized. A completely dry tank encourages residue to harden.
Maintain the Gray Tank
Gray tanks collect soap, food residue, grease, hair, and other debris. Over time, this material can produce odors or slow drainage.
Use sink strainers to catch food particles. Avoid pouring grease, oils, or large amounts of food waste down RV drains.
Clean the tank using a product approved for RV holding systems. Do not mix cleaning chemicals because dangerous fumes may form.
Inspect Dump Valves and Sewer Connections
Inspect the waste system before and after dumping.
Check:
- Termination-valve seals
- Valve handles
- Sewer caps
- Hose fittings
- Bayonet connections
- Tank outlets
- Underbelly leakage
- Drips after dumping
A small amount of liquid behind the sewer cap may indicate a leaking termination valve. Repair the seal before the leak becomes worse.
Avoid Common Holding-Tank Mistakes
Common mistakes include:
- Leaving the black valve open continuously
- Using harsh household drain cleaners
- Flushing wipes or hygiene products
- Allowing solids to dry inside the tank
- Dumping without enough liquid
- Mixing incompatible chemicals
- Ignoring slow drainage
- Driving with loose sewer equipment
- Forgetting gloves and sanitation supplies
- Leaving rinse water running unattended
Follow local dumping rules and use approved disposal facilities. Never release waste onto the ground or into storm drains.
What Appliance Maintenance Does an RV Need?
RV appliances operate in a compact space and may use electricity, propane, or both. Cleaning, ventilation, and early problem detection help them work safely.
Maintain the RV Refrigerator
Inspect the refrigerator vents and exterior access area for leaves, dust, insects, or nesting material. Airflow is especially important for absorption refrigerators.
Check the door gasket for gaps and clean food residue from the sealing surface. A weak seal causes longer run times and uneven cooling.
Test each available operating mode before a trip. Depending on the refrigerator, this may include shore power, battery power, or propane.
Some absorption refrigerators require reasonably level operation. Follow the refrigerator manufacturer’s leveling limits rather than relying on a general rule.
Stop using the refrigerator if you smell ammonia, see yellow residue, or notice signs of cooling-unit leakage. Arrange professional service.
Maintain the Furnace
Keep interior return-air openings and exterior furnace vents clear. Blocked airflow can reduce performance or create overheating.
Inspect exterior vents for mud-dauber nests, spider webs, leaves, and other debris. Do not insert tools into the burner area without proper instructions.
Warning signs include:
- Delayed ignition
- Repeated cycling
- Unusual soot
- Strong odors
- Rumbling
- Failure to ignite
- Detector alarms
Turn off the furnace and propane supply when combustion appears abnormal. Burner and gas-valve service should be handled by a qualified technician.
Maintain the Air Conditioner
Basic air-conditioner maintenance includes:
- Cleaning or replacing filters
- Vacuuming interior vents
- Checking airflow
- Inspecting visible seals
- Clearing approved exterior debris
- Watching for icing
- Checking drainage
- Listening for unusual noises
Weak airflow may come from dirty filters or blocked vents. Icing may indicate restricted airflow, low temperature operation, or a mechanical issue.
Roof air conditioners contain electrical components and sealed refrigerant systems. Internal repairs should be handled by qualified professionals.
Maintain the Range and Oven
Keep burners and ignition areas clean. Food residue can interfere with ignition or produce uneven flames.
A normal propane flame is generally steady and mostly blue. Yellow flames, soot, delayed ignition, or strong odors require inspection.
Use the range hood or another approved ventilation source while cooking. Never use the stove or oven as a space heater.
Maintain the Washer, Dryer, and Dishwasher
Optional appliances add hoses, drains, filters, vents, and electrical connections. Inspect them for leakage and secure attachment.
Clean lint filters and dryer vents according to the appliance instructions. Restricted airflow can reduce performance and increase heat.
Check washing-machine hoses for cracking, bulging, or loose connections. Turn off the water supply during long storage when recommended.
How Should You Maintain RV Slide-Outs, Awnings, and Jacks?
Slide-outs, awnings, and jacks contain moving parts exposed to weather and road debris. The correct cleaning and lubrication method depends on the specific system.
Clean and Inspect Slide-Outs
Remove leaves, twigs, and standing water from the slide roof before retracting it. Debris can damage seals or enter the RV.
Inspect:
- Wiper seals
- Bulb seals
- Gear tracks
- Cables
- Hydraulic lines
- Wiring
- Rollers
- Exterior trim
- Slide alignment
Watch the slide while it moves. Stop if one side travels unevenly, the motor struggles, or the mechanism produces new noises.
Check the interior and exterior for water after rain. A misaligned slide may not compress the seals evenly.
Lubricate Only Where Recommended
Do not spray general-purpose lubricant on every visible slide component. Some mechanisms need a specific dry lubricant, while others should remain clean and dry.
Use products approved by the slide manufacturer. The wrong lubricant may attract dirt, damage rubber, or interfere with braking surfaces.
Clean rubber seals using a compatible product. Petroleum-based cleaners may damage certain seal materials.
Inspect the Awning
Extend the awning during calm weather and inspect it carefully.
Look for:
- Fabric tears
- Loose stitching
- Mold or mildew
- Tree sap
- Bent arms
- Loose fasteners
- Roller misalignment
- Motor problems
- Water pooling
- Damaged wiring
Allow the fabric to dry before long-term storage. Rolling it up while wet encourages mildew and staining.
Never leave an awning extended in strong wind or heavy rain. Weather can change quickly, even when you remain near the campsite.
Inspect Leveling and Stabilizing Equipment
Leveling jacks and stabilizer jacks serve different purposes. Leveling systems may support and adjust the RV, while stabilizers mainly reduce movement.
Inspect:
- Jack feet
- Mounting bolts
- Hydraulic hoses
- Electrical wiring
- Bent tubes
- Rust
- Fluid leakage
- Manual override access
Do not use stabilization-only jacks to lift the RV. Excessive force can damage the frame, jacks, or mounting points.
Use suitable pads beneath jack feet when the ground is soft. Pads spread the load and reduce sinking.
Maintain Entry Steps and Handrails
Keep entry steps clean and free from mud, salt, stones, and road debris. Inspect mounting bolts, pivot points, wiring, and safety switches.
Lubricate only the approved pivot locations. Excess lubricant can collect dirt and increase wear.
Confirm that automatic steps extend and retract properly. Keep people clear while testing them.
What Safety Equipment Should RV Owners Test?
Safety equipment should remain easy to access and ready to operate. Test it regularly and replace devices when they reach their manufacturer-specified service life.
Test Smoke, Carbon Monoxide, and Propane Detectors
Press the test button on each detector according to its instructions. Replace removable batteries when required.
Check the replacement or expiration date printed on the detector. Many safety alarms must be replaced as complete units after a set period.
Never cover, disconnect, or silence a detector because it alarms repeatedly. The alarm may indicate a dangerous condition or a failing unit.
Leave the RV immediately if you suspect propane or carbon monoxide. Shut off equipment only when doing so is safe.
Inspect Fire Extinguishers
Keep fire extinguishers mounted near an exit where they remain accessible.
Check:
- Pressure gauge position
- Corrosion
- Physical damage
- Discharge hose condition
- Mounting bracket
- Inspection tag
- Replacement date
Replace or service any extinguisher that has been discharged, damaged, or recalled. Make sure every traveler knows where it is stored.
Check Emergency Exits
Emergency windows and doors can become stiff after years without use.
Regularly:
- Identify every emergency exit.
- Remove objects blocking access.
- Test latches as directed.
- Confirm windows open.
- Review an escape plan.
- Explain the plan to passengers.
Do not wait for smoke or fire before learning how the exit operates.
Inspect Propane Equipment
Visually inspect propane cylinders, hoses, regulators, and compartments. Look for corrosion, damage, abrasion, loose mounting, or oily residue.
Propane compartments should remain clear and properly ventilated. Never store ignition sources or unrelated equipment inside them.
Do not use a flame to search for leaks. Professional pressure testing and propane repairs require proper equipment and training.
What Maintenance Does a Motorhome Need?
A motorhome combines an RV living area with a vehicle chassis. It therefore needs both coach maintenance and normal automotive service.
Follow the Chassis Service Schedule
Use the chassis manufacturer’s schedule for:
- Engine oil
- Oil filters
- Coolant
- Transmission fluid
- Brake fluid
- Differential fluid
- Power-steering fluid
- Fuel filters
- Air filters
- Belts
- Hoses
Service intervals may depend on mileage, time, operating conditions, or engine hours. Long storage periods do not eliminate maintenance needs.
Diesel and gasoline motorhomes may follow very different schedules. Use the correct manual for your chassis and engine.
Inspect Steering and Suspension
Motorhomes are heavy and place substantial stress on suspension and steering components.
Watch for:
- Wandering
- Pulling
- Steering vibration
- Excessive bouncing
- Uneven tire wear
- Clunking
- Leaning
- Airbag leakage
An alignment cannot repair worn suspension parts. Have loose or damaged components corrected before alignment.
Maintain the Engine Battery
The chassis battery starts the engine, while house batteries power the living area. Some RVs connect these systems through isolators, combiners, or charging modules.
Inspect the engine battery for corrosion, low charge, looseness, and physical damage. Long storage can drain it even when the RV is not being used.
Use a compatible maintainer when recommended. Confirm that the device matches the battery type and storage setup.
Service the Generator
Generator maintenance is based mainly on operating hours and time. Check the generator manual for the exact schedule.
Common tasks include:
- Changing oil
- Replacing filters
- Inspecting fuel lines
- Checking coolant on applicable models
- Cleaning exterior openings
- Testing output
- Exercising during storage
Run the generator using the manufacturer’s exercise procedure. The recommended load and duration vary between models.
Old fuel can cause starting and performance problems. Storage treatment also depends on the fuel type and generator design.
What Maintenance Does a Travel Trailer or Fifth Wheel Need?
Towable RVs do not have an engine, but their hitch, axles, brakes, bearings, and suspension still require regular attention.
Inspect the Coupler or Fifth-Wheel Hitch
Travel-trailer owners should inspect the coupler for wear, deformation, cracking, and smooth latch operation.
Check the hitch ball for correct size and excessive wear. Lubricate it only when recommended by the hitch manufacturer.
Fifth-wheel owners should inspect:
- Hitch jaws
- Kingpin
- Pivot points
- Mounting hardware
- Bed rails
- Puck attachments
- Release handle
- Safety latch
Clean and lubricate the hitch according to its manual. Replace damaged or unusually worn components before towing.
Check the Breakaway System
The breakaway system applies the trailer brakes if separation occurs. It is not a parking brake.
Inspect the switch, cable, wiring, and breakaway battery. Replace a frayed cable or cracked switch immediately.
Attach the cable to a secure point on the tow vehicle, separate from the safety chains. Do not loop it around the hitch ball.
Test the system according to the manufacturer’s instructions. Avoid leaving the pin pulled longer than necessary because the brake magnets can overheat.
Inspect the Tongue Jack or Landing Gear
Inspect the mounting bolts, foot, wiring, fuse, switches, and motor housing.
Look for:
- Bent tubes
- Loose bolts
- Damaged wiring
- Hydraulic leaks
- Grinding
- Slow operation
- Motor strain
- Corrosion
Learn how to use the manual override before an emergency. Store the required crank or tool somewhere accessible.
Never exceed the jack’s rated capacity. Make sure the RV is properly chocked before lifting or unhitching.
Service Axles, Brakes, and Bearings
Follow the axle manufacturer’s schedule for bearing lubrication, brake inspection, seal replacement, and fastener checks.
Check suspension hardware after rough travel or impact. A damaged spring, hanger, or axle can quickly destroy a tire.
What Seasonal RV Maintenance Is Required?
Seasonal maintenance prepares the RV for changing temperatures, storage, and heavier travel. Your exact schedule will depend on your climate and camping habits.
Spring Maintenance
Before the first major trip:
- De-winterize the plumbing.
- Sanitize the freshwater system.
- Inspect the roof and seals.
- Check for pest damage.
- Reinstall and test batteries.
- Test the water heater.
- Run the refrigerator and furnace.
- Inspect tires and brakes.
- Test lights and detectors.
- Check the awning and slide-outs.
- Inspect the fire extinguisher.
- Restock emergency supplies.
Run every system before leaving home. Discovering a failed pump or appliance in your driveway is much easier than finding it at a campsite.
Summer Maintenance
Hot weather increases stress on tires, batteries, sealants, refrigerators, and air conditioners.
During summer:
- Check tire pressure frequently.
- Clean air-conditioner filters.
- Inspect refrigerator vents.
- Monitor battery temperature.
- Check roof sealant after extreme heat.
- Protect exterior surfaces from UV exposure.
- Watch for water leaks.
- Keep insect screens clear.
- Inspect awning fabric.
- Check fluid levels in motorhomes.
Avoid covering appliance vents or blocking airflow. High ambient temperatures already make cooling equipment work harder.
Fall Maintenance
Fall is a useful time to inspect heating systems and prepare for wet or freezing weather.
Recommended tasks include:
- Test the furnace.
- Inspect propane equipment.
- Clean the roof.
- Check exterior seals.
- Remove leaves from vents.
- Inspect weather stripping.
- Drain unused hoses.
- Repair leaks before winter.
- Remove food attractants.
- Check storage areas for moisture.
Complete repairs before freezing weather arrives. Sealants and adhesives may require specific temperature ranges for proper application.
Winter Storage Maintenance
Storage does not stop deterioration. Batteries can discharge, tires can lose pressure, pests can enter, and moisture can accumulate.
Before winter storage:
- Winterize the plumbing.
- Drain tanks as directed.
- Maintain or disconnect batteries.
- Protect tires from prolonged exposure.
- Remove food and trash.
- Clean the refrigerator.
- Leave approved interior doors open.
- Control moisture safely.
- Close pest entry points.
- Follow generator storage guidance.
- Inspect the RV periodically.
Do not seal required appliance or propane ventilation openings. Use only approved vent covers and storage methods.
Which RV Maintenance Tasks Can Owners Do Themselves?
Many routine checks are suitable for careful owners. Safety-critical repairs and tasks requiring specialized equipment should usually go to a qualified technician.
| Maintenance Task | Usually DIY-Friendly | Professional Help Recommended |
| Checking tire pressure | Yes | When damage or abnormal wear appears |
| Inspecting visible roof seals | Yes | For unsafe roofs or structural damage |
| Cleaning battery terminals | Often | For severe corrosion or damaged wiring |
| Sanitizing freshwater systems | Often | When contamination continues |
| Testing safety detectors | Yes | When alarms fail or wiring is damaged |
| Cleaning AC filters | Yes | For internal electrical or refrigerant repairs |
| Inspecting propane hoses | Visual inspection only | For leak testing or repairs |
| Checking trailer brakes | Basic external checks | For internal service or adjustment |
| Servicing wheel bearings | Experienced owners only | When training or tools are limited |
| Opening electrical panels | Not recommended for most owners | Qualified electrician or RV technician |
| Repairing structural leaks | Minor sealing may be DIY | For soft walls, floors, or roof decking |
| Servicing hydraulic systems | Visual checks only | For leaks, pressure problems, or internal repair |
Your experience, tools, physical ability, and access to technical information matter. There is no shame in hiring a professional for a task you cannot perform safely.
When Should You Call an RV Technician?
Stop and seek professional service when the problem involves fire, gas, braking, structural damage, or high-voltage electricity.
Professional help is recommended for:
- Propane leaks
- Repeated propane alarms
- Brake failure
- Uneven braking
- Exposed wiring
- Melted electrical connections
- Repeated breaker trips
- Soft roofs or floors
- Major water damage
- Hydraulic leaks
- Slide-out misalignment
- Frame damage
- Appliance combustion problems
- Generator output problems
- Steering or suspension concerns
- Persistent freshwater contamination
- Overheated wheel hubs
- Cracked hitch components
Stop using the affected system when you smell propane, see smoke, feel overheated wiring, lose braking ability, or notice severe tire damage.
Move people away from immediate danger and contact emergency services when necessary.
Common RV Maintenance Mistakes to Avoid
Small mistakes can create expensive problems. Most are preventable when you slow down and follow the correct manual.
Avoid these common errors:
- Following only a generic maintenance schedule
- Ignoring manufacturer instructions
- Guessing tire pressure
- Checking only visible tire tread
- Applying new sealant over dirt
- Using incompatible sealants
- Using automotive antifreeze in freshwater plumbing
- Leaving the black-tank valve open
- Using stabilizer jacks for lifting
- Mixing battery types
- Using the wrong battery charger
- Ignoring repeated fuse failures
- Covering appliance vents during storage
- Lubricating components that should remain dry
- Ignoring small roof leaks
- Working on energized electrical systems
- Testing propane leaks with a flame
- Forgetting the spare tire
- Forgetting the breakaway battery
- Skipping maintenance during storage
- Failing to keep records
A temporary fix can be useful during an emergency. However, it should not replace a proper inspection and permanent repair.
Signs Your RV Needs Immediate Maintenance
Some problems can wait until the next scheduled service. Others require immediate attention before the RV is used again.
Stop and inspect the RV when you notice:
- A burning smell
- Smoke
- Hot plugs or cords
- Propane odor
- Repeated safety alarms
- Tire bulges
- Exposed tire cords
- Weak or pulling brakes
- Grinding wheel noises
- Unusually hot hubs
- Soft floors or ceilings
- Water pouring from the underbelly
- Rapid battery discharge
- Flickering lights
- Repeated breaker trips
- Generator surging
- Slide-outs moving unevenly
- Hydraulic fluid leakage
- Severe trailer sway
- New clunks or vibration
- Steering changes
- Visible frame cracks
Do not keep driving to see whether the problem disappears. Continuing can turn a manageable repair into a roadside emergency.
How to Create an RV Maintenance Log
An RV maintenance log helps you remember completed work and upcoming service. It can be a notebook, spreadsheet, phone app, or printed checklist.
Record:
- Service date
- RV mileage
- Generator hours
- Component inspected
- Work completed
- Problems found
- Parts installed
- Products used
- Tire pressure
- Tire date codes
- Battery readings
- Technician details
- Receipt numbers
- Warranty information
- Next inspection date
Keep photographs of roof seals, tire wear, water damage, and repaired areas. Pictures help you compare changes over time.
Organized records may also support warranty claims and improve buyer confidence. A maintenance history shows that the RV was not simply repaired when something failed.
Simple RV Maintenance Checklist
Use this condensed checklist as a reminder. Add manufacturer-specific tasks for your own RV and installed equipment.
Before Every Trip
- Check tire pressure and condition.
- Inspect wheels and lug nuts.
- Test brakes and exterior lights.
- Inspect hitch connections.
- Check the breakaway system.
- Look for fluid and water leaks.
- Secure slide-outs and awnings.
- Retract steps and jacks.
- Close vents and windows.
- Confirm safety equipment is accessible.
Monthly
- Check battery charge.
- Inspect battery connections.
- Test safety detectors.
- Inspect visible seals.
- Operate slide-outs and jacks.
- Check for pests.
- Look for interior moisture.
- Inspect shore-power equipment.
- Exercise the generator as directed.
- Check tire pressure during storage.
Seasonally
- Inspect the complete roof.
- Sanitize the freshwater system.
- Clean holding tanks.
- Inspect appliance vents.
- Clean air-conditioner filters.
- Inspect the awning.
- Check plumbing connections.
- Test all appliances.
- Winterize or de-winterize.
- Deep-clean the interior and exterior.
Annually
- Inspect or service brakes.
- Service bearings as required.
- Arrange propane-system testing.
- Inspect suspension components.
- Service HVAC equipment.
- Complete chassis maintenance.
- Service the generator.
- Review detector replacement dates.
- Check fire extinguishers.
- Weigh the loaded RV.
Related FAQs
How Often Should an RV Be Serviced?
An RV should receive pre-trip inspections, monthly checks, seasonal maintenance, and annual servicing. Engine, generator, brake, and bearing service should follow manufacturer intervals.
What Is the Most Important RV Maintenance Task?
Tires, brakes, roof seals, propane equipment, and safety detectors deserve the highest priority. These systems directly affect travel safety, fire prevention, and water-damage protection.
How Often Should RV Roof Seals Be Checked?
Inspect roof seals several times each year and after severe weather, branch impacts, or long trips. Follow your RV manufacturer’s recommended interval.
How Often Should an RV Freshwater Tank Be Sanitized?
Sanitize it after long storage, repairs, suspected contamination, or unusual taste and odor. Many owners also sanitize it during seasonal preparation.
How Often Should RV Wheel Bearings Be Serviced?
Follow the axle manufacturer’s mileage and time schedule. Bearing design, road conditions, loads, and towing frequency can change the required interval.
Should You Run an RV Generator During Storage?
Many generators require periodic exercise during storage. Follow the generator manufacturer’s instructions for the correct load, duration, fuel preparation, and service interval.
Can You Do RV Maintenance Yourself?
You can handle many inspections, cleaning tasks, battery checks, and basic plumbing care. Brakes, propane, structural damage, and complex electrical repairs often require professional service.
How Much Does Annual RV Maintenance Cost?
Annual costs vary by RV type, age, mileage, storage conditions, and labor rates. A motorhome usually has more drivetrain-related maintenance than a towable RV.
Does an RV Need Maintenance While in Storage?
Yes. Batteries discharge, tires lose pressure, seals deteriorate, pests enter, and moisture develops during storage. Inspect the RV regularly even when it is not traveling.
How Long Do RV Batteries Last?
Battery lifespan depends on chemistry, charging quality, temperature, discharge depth, and storage. Proper charging and regular inspection can significantly extend service life.
Do RV Tires Need Replacement When the Tread Looks Good?
Possibly. RV tires may age from heat, sunlight, storage, and sidewall stress before the tread wears out. Follow the tire manufacturer’s age and inspection guidance.
Does Regular RV Maintenance Improve Resale Value?
Regular maintenance may improve buyer confidence and reduce concerns about hidden problems. Detailed records provide evidence that important systems received proper care.
Final Thoughts
RV maintenance feels less overwhelming when you divide it into simple intervals. Handle travel checks before each trip, inspect major systems monthly, and complete deeper maintenance seasonally.
Start with tires, brakes, roof seals, propane equipment, batteries, and safety detectors. Once those essentials become routine, the rest of your RV maintenance schedule becomes much easier to manage.

David Marshall shares travel route insights, mileage planning tips, and road-tested advice. His writing helps travelers understand distance, timing, and equipment choices. Every article is built around clarity and real-world usefulness.