
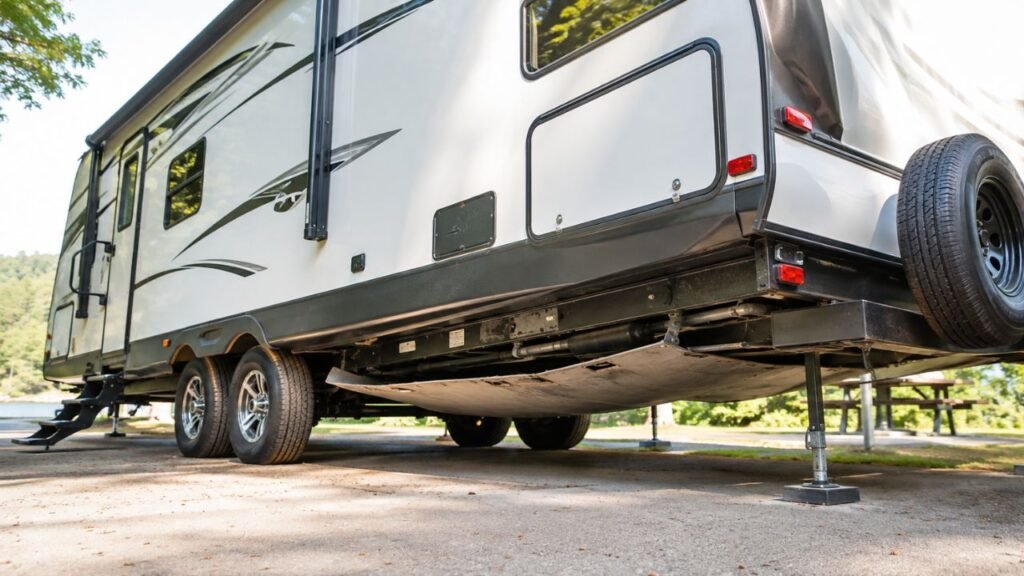
Your RV underbelly is usually sagging because water, wet insulation, or loose fasteners are weighing it down. Wind damage, failed tank supports, stretched material, and missing cross braces can also cause the covering to bow or hang lower than normal.
This guide will help you identify the cause, inspect the area safely, repair the damage, and prevent the underbelly from sagging again.
Key Takeaways
- A heavy or sloshing sag often means water is trapped inside.
- Wet insulation can become surprisingly heavy and pull the covering downward.
- A loose front edge may catch wind and tear while towing.
- Coroplast should not support a fresh, gray, or black holding tank.
- Repair any leak before fastening the underbelly back into place.
- Wide washers and support strips hold better than individual screws.
- Never drill or cut blindly into an enclosed RV underbelly.
- Tank straps, frame damage, and sewage leaks need immediate attention.
- A small, dry bow may be normal between widely spaced supports.
- Loose or flapping material should be secured before highway travel.
What Is an RV Underbelly?
An RV underbelly is the protective covering installed beneath the trailer floor. It shields plumbing, electrical wiring, holding tanks, insulation, and heating ducts from road debris.
Many enclosed RV underbellies use corrugated plastic sheets commonly called Coroplast. Other RVs may have woven fabric, flexible plastic sheeting, or rigid molded panels.
The covering may also help block cold air from reaching water lines. In warmer weather, it reduces heat movement through the floor.
However, the underbelly itself is not a structural support. It should not carry the weight of a holding tank, plumbing assembly, or accumulated water.
Is a Sagging RV Underbelly Normal?
A small, even bow can be normal on some RVs. Large Coroplast panels often flex slightly between frame rails or factory support strips.
You should become concerned when the sag is deep, localized, wet, heavy, or growing. A section that moves, drips, flaps, or feels full needs immediate inspection.
A normal bow usually looks smooth and even. It should not contain a heavy pocket or hang close to the road.
An abnormal sag often appears under a tank, bathroom, kitchen, or water heater. It may also form behind a loose front-facing edge.
What Causes an RV Underbelly to Sag?
A sagging underbelly is normally a symptom of another problem. The shape, weight, and location of the sag can help you narrow down the cause.
Trapped Water From a Plumbing Leak
Trapped water is one of the most serious causes. The enclosed covering can hold several gallons before you notice dripping.
Possible leak sources include:
- Loose water-line fittings
- Cracked pipes
- Leaking fresh-water tanks
- Damaged gray or black tanks
- Loose shower drains
- Leaking toilet connections
- Water heater fittings
- Outdoor shower connections
- Failed low-point drain valves
- City-water inlet connections
Water usually collects at the lowest point of the underbelly. This creates a deep pocket that feels heavier than the surrounding material.
You may also hear water moving when you press upward. Do not stand directly beneath the pocket because the covering could tear suddenly.
Wet or Shifted Insulation
Many enclosed RV underbellies contain fiberglass insulation. Dry fiberglass is light, but soaked insulation becomes heavy very quickly.
The insulation may absorb water from a plumbing leak or road spray. It can then slide, bunch together, and pull the covering downward.
Wet insulation also loses much of its thermal performance. Leaving it enclosed may cause musty odors, mold, corrosion, and damaged flooring.
Do not simply push wet insulation back into position. The leak must be repaired, and saturated material should usually be replaced.
Loose, Rusted, or Missing Fasteners
RV manufacturers commonly attach Coroplast using self-tapping screws and washers. Constant vibration can loosen these fasteners over time.
Road water, salt, and mud may also cause the screws to rust. Some screws snap, while others pull through the plastic.
The mounting holes can become stretched or torn. Installing another small screw through the same damaged hole may not hold for long.
Wide washers, backing strips, or termination bars spread the load more effectively. They also reduce the risk of future pull-through.
Wind Damage While Towing
A slightly loose front edge can become a major problem at highway speed. Air enters the opening and pushes downward against the panel.
The loose material may begin ballooning, flapping, or stretching. Continued airflow can tear out fasteners and pull down an entire section.
Wind damage often starts near the front of the trailer. However, it can spread toward the axles and rear sections.
Secure every forward-facing edge before towing. Even a small gap can catch a surprising amount of air.
Missing or Inadequate Cross Supports
Large sheets of Coroplast need support across long open spans. Without enough braces, the center may slowly bow downward.
Some factory installations have wide gaps between support rails. The covering may appear acceptable when new but sag after repeated heat cycles.
Additional cross braces can help, but they must attach to suitable frame points. Never run screws into an unknown area above the panel.
A brace should support the covering without pressing against tanks, plumbing, wiring, or heating ducts.
Improperly Supported Holding Tanks
Fresh, gray, and black tanks become extremely heavy when filled. Water weighs roughly eight pounds per gallon.
A 40-gallon tank may therefore hold more than 300 pounds of liquid. That weight must be carried by proper straps, rails, or cradles.
The Coroplast covering should never support a holding tank. If a tank pushes against the underbelly, its structural supports may have failed.
Check for broken straps, bent rails, loose bolts, damaged brackets, or cracked welds. Do not tow until the tank is properly supported.
Road Debris Damage
Rocks, branches, tire pieces, and other debris can puncture an RV underbelly. A small cut may grow as air pushes through it.
Damage near the tires deserves close attention. Water, gravel, and road spray constantly strike these areas.
A puncture may also allow insulation to fall downward. Once the opening grows, the panel can lose support across a much larger section.
Rodent or Animal Damage
Mice, rats, squirrels, and other animals may enter through small openings. They can tear insulation, damage wiring, and enlarge existing holes.
Even a pet walking across a flexible fabric underbelly can stretch it. The material may remain permanently loose afterward.
Look for droppings, nesting material, chewed insulation, or damaged wiring. Repair entry points only after confirming no animal remains inside.
Age and Material Fatigue
RV underbelly materials experience vibration, heat, cold, moisture, and road grime. Over time, plastic may become stretched or brittle.
Repeated temperature changes cause materials to expand and contract. Fastener holes may slowly enlarge during this movement.
Older panels may no longer return to their original shape. Replacement is often more reliable than repeatedly adding screws.
Poor Reinstallation After Previous Repairs
Technicians sometimes remove sections to reach plumbing, wiring, or tanks. The panel may sag if it is not reinstalled correctly.
Missing screws, reused torn holes, uneven cuts, or removed support strips can all create problems.
Inspect recently serviced areas carefully. Compare both sides of the RV and look for missing hardware or unsupported seams.
What Does the Location of the Sag Tell You?
The position of the sag can point toward a likely source. Use this table as a starting point, but confirm the cause before repairing anything.
| Sag Location or Appearance | Possible Cause | Urgency | What to Check First |
| Deep, heavy pocket | Trapped water or soaked insulation | High | Shut off water and check for leaks |
| Sag below a holding tank | Failed tank strap or support rail | High | Inspect tank mounting hardware |
| Loose front edge | Failed fasteners and wind damage | High | Secure the edge before towing |
| Wide, shallow bow | Unsupported Coroplast span | Moderate | Check spacing between cross braces |
| Sag below the shower | Drain, supply line, or pan leak | High | Test the shower and inspect fittings |
| Sag below the toilet | Toilet seal, valve, or tank connection | High | Check for water and wastewater leaks |
| Sag near the water heater | Fitting, valve, or tank leak | High | Inspect the water heater compartment |
| Dry panel with torn holes | Fastener pull-through | Moderate | Install washers or a support strip |
| Torn, flapping section | Wind or road debris damage | High | Stop towing until it is secured |
| Damp section with musty smell | Wet insulation | High | Open the area and remove wet material |
| Sag near the axle | Road damage or missing brace | Moderate | Check for punctures and loose hardware |
| Panel pushing down when tanks fill | Tank support problem | High | Inspect straps, rails, and brackets |
How Can I Tell Whether Water Is Trapped Inside?
A water-filled underbelly usually feels different from a simple material sag. Check it carefully without putting yourself beneath the heaviest area.
Look at the Shape
Water normally forms a concentrated pocket. A support-related sag often appears wider, smoother, and more even.
Watch whether the sag changes after using the shower, toilet, sinks, or water heater.
A growing pocket strongly suggests an active leak.
Press the Area Carefully
Stand beside the sag and press upward gently. Use a long, blunt object when access is limited.
A water-filled section may feel heavy or move slowly. You might also hear sloshing inside.
Do not use anything sharp. A pointed tool can puncture a tank, pipe, wire, or heating duct.
Check for Dripping
Water may escape through screw holes, seams, tears, and low spots. Note the color, smell, and cleanliness before touching it.
Clear water may come from a supply line or fresh tank. Soapy water may indicate a gray-tank or drain leak.
Dark, foul-smelling liquid may come from the black tank. Treat unknown water as contaminated until you identify it.
Watch the Water Pump
Turn off every faucet and water-using appliance. Listen for the water pump cycling without anyone using water.
Repeated cycling often means pressure is escaping somewhere. The leak could be hidden above the enclosed underbelly.
A pump that runs continuously may indicate a larger leak, empty tank, air leak, or failed pump component.
Check the Fixtures Above the Sag
Use the RV floor plan to identify what sits above the affected section. Inspect each fixture separately.
Run one fixture at a time and watch the underbelly. This method makes the leak easier to isolate.
Check the following areas:
- Shower drain and supply fittings
- Toilet valve and floor connection
- Kitchen sink drain
- Bathroom sink drain
- Water heater fittings
- Outdoor shower
- Fresh-water tank connections
- City-water inlet
- Low-point drains
- Washing machine connections
Should I Puncture the Underbelly to Drain Trapped Water?
You may need to release trapped water before the material tears. However, you should never puncture an RV underbelly blindly.
Tanks, pipes, electrical wiring, heating ducts, and propane lines may sit directly above the sag. A drill or knife can create a much larger problem.
Start by checking for an existing seam, loose fastener, access panel, or small tear. Opening one of these areas may provide safer drainage.
When no safe opening exists, identify what is above the lowest point first. Use the floor plan, tank position, and visible plumbing routes.
Support the heavy section before loosening anything. Water may release suddenly once a fastener or panel edge moves.
Wear gloves and eye protection. Use a container if the liquid could be gray or black wastewater.
After draining the pocket, do not immediately seal it. Open enough of the area to find the leak, remove wet insulation, and dry the space.
How to Inspect a Sagging RV Underbelly Safely
The underbelly can hide water, sewage, sharp metal, wiring, and heavy tanks. Take a few precautions before starting your inspection.
- Park the RV on firm, level ground.
- Apply the parking brake on the tow vehicle.
- Chock the RV wheels securely.
- Disconnect the city-water connection.
- Turn off the RV water pump.
- Disconnect shore power when working near wet wiring.
- Close the propane cylinders near propane components.
- Wear gloves, safety glasses, and suitable clothing.
- Photograph the panel before removing hardware.
- Mark brace positions and panel orientation.
- Support heavy, water-filled sections before opening them.
- Keep containers ready for unexpected drainage.
- Never rely only on RV stabilizer jacks.
- Never crawl beneath an unsupported trailer.
- Use properly rated lifting equipment when more clearance is required.
Stabilizer jacks are designed to reduce movement. They are not intended to support the full weight of an RV during repairs.
How Do I Find the Source of the Sag?
Finding the cause first prevents you from sealing a leak or structural problem behind a repaired panel.
Start at the Lowest Point
Examine the deepest part of the sag. Determine whether it feels wet, heavy, loose, stretched, or simply unsupported.
Check nearby fasteners and support strips. A missing row of screws may explain a dry, lightweight sag.
Trace What Is Directly Above It
Look inside the RV and identify fixtures above the affected area. Remember that water can travel along pipes, framing, and insulation.
The leak may not be directly above the lowest point. Water often runs several feet before collecting.
Test One Fixture at a Time
Begin with the fixture closest to the sag. Run it briefly and observe the underbelly.
Test the sink, shower, toilet, water heater, and city-water connection separately. Allow enough time for a slow leak to appear.
Test the Pressurized Plumbing System
Fill the fresh tank and run the pump. Then close every faucet and listen.
If the pump cycles, inspect pressurized fittings and pipes. These leaks may continue whenever the pump or city water is on.
Test the Drain System
A drain leak usually appears only while water is flowing. Fill the sink or shower slightly, then release the water.
Watch the underbelly during drainage. A loose P-trap, cracked pipe, or failed drain gasket may leak only during this test.
Inspect Tank Straps and Supports
Lowering the underbelly panel may reveal tank straps, cross rails, brackets, and mounting bolts.
Look for:
- Loose bolts
- Rusted brackets
- Cracked welds
- Bent support rails
- Broken tank straps
- Missing hardware
- Shifted tanks
- Fresh rub marks
A tank that moves when pushed needs proper support before towing.
Inspect the Forward-Facing Edge
The front edge receives the strongest airflow. Check every screw, washer, seam, and termination strip.
Look for stretched holes or dirty lines beneath the panel. These marks may show where air has been entering.
How to Fix a Sagging RV Underbelly
The correct repair depends on what caused the sag. Always fix the leak or support failure before repairing the covering.
Repair the Leak First
Do not tighten a wet panel and assume the problem is solved. Trapped moisture can damage insulation, flooring, wiring, and metal components.
Replace damaged fittings, pipes, seals, tanks, valves, or drains. Pressurize the system afterward and confirm the leak has stopped.
Test drain repairs by running water through the affected fixture. Watch the exposed area before closing the underbelly.
Remove Wet Insulation
Remove fiberglass insulation that feels saturated, dirty, compressed, or contaminated. It may not dry properly inside the enclosed space.
Allow wood, framing, tanks, and metal components to dry completely. Use moving air and ventilation where possible.
Do not close damp material inside the underbelly. Remaining moisture can create mold, odor, corrosion, and floor damage.
Replace the insulation with a suitable type and thickness. Keep it clear of moving parts, exhaust systems, and service points.
Replace Loose or Failed Fasteners
Remove badly rusted, bent, or broken screws. Match replacement hardware to the frame material and original installation.
Use corrosion-resistant self-tapping screws where appropriate. Add wide washers to spread pressure across the Coroplast.
Tighten each screw until the washer sits firmly. Do not crush or deeply deform the plastic.
Avoid placing random screws into unknown areas. Confirm the location of tanks, wiring, plumbing, and propane lines first.
Repair Torn Fastener Holes
A larger screw may not solve a stretched hole. The new fastener can simply tear through the weakened material again.
Better repair options include:
- Large fender washers
- RV underbelly washers
- Aluminum termination strips
- Galvanized backing strips
- Replacement panel sections
- New fastener locations in safe frame areas
A continuous strip often works better than several separate washers. It spreads the load across the panel’s edge.
Add Cross Supports
Dry Coroplast may sag when the span between supports is too wide. Adding cross braces can reduce this bow.
Possible support materials include aluminum angle, steel flat bar, metal conduit, or manufacturer-style support rails.
Attach each brace to suitable structural points. Do not use the underbelly material as the only attachment surface.
The support should contact the panel gently. It must not lift, squeeze, or rub against tanks and plumbing.
Leave access for tank sensors, valves, drains, and future repairs.
Patch Small Holes and Tears
Small punctures can often be patched without replacing the entire panel. The surface must be clean and completely dry.
Trim loose or jagged edges carefully. Avoid enlarging the opening more than necessary.
Apply underbelly repair tape or compatible waterproof flashing tape. Extend the patch beyond every side of the damage.
Round the tape corners to reduce peeling. Press it firmly into the Coroplast grooves and surrounding surface.
For larger cuts, place a backing patch behind the opening. This provides more support than tape alone.
Replace Severely Damaged Panels
Replace the panel when it is brittle, badly stretched, contaminated, or covered with multiple failed patches.
Measure the existing section before removal. Note the thickness, direction of the flutes, and overlap at each seam.
Transfer safe access openings to the new panel. Support the sheet while installing it to prevent premature sagging.
Use wide washers or termination strips around the perimeter. Add cross supports where the original span was too wide.
Repair Holding Tank Supports Separately
A sagging tank cannot be fixed by adding screws beneath the Coroplast. The tank needs proper frame-mounted support.
Replace damaged straps, rails, brackets, bolts, or cradles. Structural welding may be necessary when brackets or frame members have cracked.
Do not place a jack directly against a plastic tank without spreading the load. The concentrated pressure can crack or deform it.
A qualified RV technician or welder should handle uncertain tank-support repairs.
Which Materials Work Best for Underbelly Repairs?
Using suitable materials helps the repair survive vibration, water, dirt, and highway airflow.
- Replacement Coroplast of matching thickness
- RV underbelly repair tape
- Compatible waterproof flashing tape
- Corrosion-resistant self-tapping screws
- Large fender washers
- Purpose-made underbelly washers
- Aluminum termination strips
- Galvanized steel backing strips
- Aluminum or steel cross braces
- Closed-cell insulation where suitable
- Replacement fiberglass insulation
- Plastic-safe cleaning products
- Gloves and safety glasses
Ordinary duct tape may work as a temporary roadside repair. However, heat, dirt, and moisture usually weaken its adhesive quickly.
Use a tape designed for outdoor plastic surfaces whenever possible. Even strong tape will fail when applied over dust, grease, or moisture.
When Should I Replace the Underbelly Instead of Repairing It?
Patching is useful for isolated damage. Replacement becomes more practical when the material can no longer hold its shape.
Consider replacing the panel when:
- The plastic has become brittle.
- The panel is permanently stretched.
- Several fastener holes have torn through.
- Large sections are missing.
- Sewage has contaminated the material.
- Multiple old patches are failing.
- The panel cannot sit flat against its supports.
- Highway airflow has badly distorted it.
- The Coroplast has split along several flutes.
- Removing most of the panel is already necessary.
- Suitable attachment edges no longer remain.
- The original panel was cut poorly during previous service.
Replacing one damaged section is often easier than repairing the entire underbelly. You do not always need to replace every panel.
Can I Drive With a Sagging RV Underbelly?
You should not tow when the underbelly is loose, heavy, flapping, or hanging near moving components.
Highway airflow can pull a small loose section completely away. The material may strike tires, axles, suspension parts, or the road.
Do not drive when:
- The front-facing edge is loose.
- Water is trapped inside.
- A holding tank appears unsupported.
- The material is touching a tire or axle.
- Wiring or plumbing is hanging down.
- The panel is flapping in the wind.
- Sewage is leaking.
- A structural brace is damaged.
A small, dry, even bow may not require an emergency repair. Still, inspect it before your next long trip.
For a temporary roadside repair, secure the loose edge to a safe frame location. Avoid drilling near hidden components.
Temporary straps, tape, or washers may help you reach a repair location. They should not replace a proper inspection.
How Much Does RV Underbelly Repair Cost?
Repair cost depends on the damaged area, underbelly material, leak location, insulation condition, and required labor.
| Repair Type | Typical Difficulty | Relative Cost | Main Cost Factors |
| Small tape patch | Easy | Low | Tape and surface cleaning |
| Replace screws and washers | Easy | Low | Hardware and damaged holes |
| Install termination strips | Moderate | Low to moderate | Metal strips and drilling |
| Add cross supports | Moderate | Moderate | Support material and frame access |
| Replace one Coroplast panel | Moderate | Moderate | Panel size and removal work |
| Replace wet insulation | Moderate | Moderate | Insulation, drying, and access |
| Repair a hidden plumbing leak | Varies | Moderate | Leak location and damaged parts |
| Repair holding tank supports | Difficult | High | Brackets, welding, and tank access |
| Replace most of the underbelly | Difficult | High | Panels, insulation, and labor |
| Clean wastewater contamination | Difficult | Moderate to high | Removal, sanitation, and replacement |
A small DIY patch may only require tape and hardware. Tank supports, hidden leaks, and extensive contamination can require professional service.
Ask for a written estimate when several panels must be removed. The visible sag may not reveal the full amount of damage.
Can I Remove the RV Underbelly Permanently?
You can temporarily remove the underbelly for inspection and repairs. Permanently removing it is usually not a good idea.
Without the covering, plumbing, tanks, wiring, insulation, and ducts remain exposed. Road debris can damage these parts while towing.
Rodents also gain easier access to the RV floor. Cold air can reach water lines and increase the risk of freezing.
An enclosed underbelly may also be part of the RV’s heating design. Furnace ducts sometimes direct warm air around tanks and pipes.
If the RV originally had an enclosed underbelly, repair or replace it. Permanent removal may reduce protection, comfort, and resale value.
How to Prevent the Underbelly From Sagging Again
Routine checks can catch small problems before the material fills with water or tears on the highway.
- Inspect the underbelly before every long trip.
- Check it again after rough-road travel.
- Watch for loose forward-facing edges.
- Replace rusted fasteners promptly.
- Use wide washers around vulnerable edges.
- Repair small tears before they grow.
- Listen for unexplained water-pump cycling.
- Inspect beneath sinks and showers regularly.
- Check water heater fittings for moisture.
- Examine tank straps and rails annually.
- Avoid traveling with unnecessary wastewater weight.
- Do not overfill holding tanks.
- Confirm service panels are secured after repairs.
- Keep rodents from entering gaps.
- Dry wet areas before reinstalling panels.
- Add cross supports to long unsupported spans.
- Avoid mounting accessories directly to Coroplast.
- Inspect the panel after tire or road-debris damage.
Pay special attention after plumbing service. A single missing fastener can allow air to enter and pull down a larger section.
When Should I Call an RV Technician?
Some underbelly repairs are simple, but hidden tanks and utilities make other repairs risky.
Get professional help when:
- A holding tank appears loose or unsupported.
- Tank brackets or frame welds are cracked.
- Black wastewater has entered the underbelly.
- Electrical wiring has been exposed to water.
- You smell propane near the damaged area.
- The leak source remains hidden.
- Mold covers a large section.
- Several panels need removal.
- The floor above feels soft.
- Plumbing is difficult to reach safely.
- The underbelly is hanging near the axles.
- You cannot raise the RV safely.
- The material tore away while driving.
- You are unsure what sits above the panel.
A technician can pressure-test plumbing, inspect tank supports, and access hidden areas without causing additional damage.
Final Words
A sagging RV underbelly should not be treated as a cosmetic issue until you know what caused it. The covering may be hiding water, wet insulation, a damaged tank support, or a loose edge catching highway airflow.
Start by checking whether the sag feels heavy, wet, or localized. Shut off the water supply, inspect the fixtures above it, and avoid cutting into unknown areas.
Once you find the cause, repair that problem before closing the underbelly. A properly supported, dry, and securely fastened panel should remain stable during normal travel.
Most small fastener and tape repairs are manageable at home. However, tank supports, sewage leaks, wiring damage, and structural problems deserve professional attention.
Related FAQs
Why Is My RV Underbelly Full of Water?
Your underbelly may be holding water from a leaking pipe, drain, tank, toilet, shower, water heater, or city-water connection. Shut off the water supply and find the leak before sealing the panel.
Is Slight RV Underbelly Sagging Normal?
A shallow, even bow may be normal between widely spaced supports. A deep, wet, heavy, loose, or rapidly worsening sag usually indicates a problem requiring inspection.
Can Wet RV Underbelly Insulation Dry by Itself?
Lightly damp insulation may eventually dry with enough airflow, but saturated fiberglass dries very slowly. Removing and replacing soaked insulation is usually safer and more reliable.
Can I Use Gorilla Tape on an RV Underbelly?
Heavy waterproof tape can patch small tears when the surface is clean and dry. However, underbelly repair tape or compatible flashing tape usually lasts longer outdoors.
What Screws Hold an RV Underbelly in Place?
Many RVs use self-tapping screws with wide washers. Match the original frame material and avoid using screws that could reach hidden tanks, pipes, wiring, or propane lines.
How Do I Support a Sagging Coroplast Underbelly?
Install frame-mounted cross braces, metal strips, or termination bars beneath long spans. Do not rely on extra screws alone when the plastic is stretched or the holes are torn.
Can a Full Holding Tank Cause the Underbelly to Sag?
A properly mounted tank should not rest on the underbelly. Sagging that worsens as the tank fills may indicate damaged straps, rails, brackets, or mounting hardware.
Will a Sagging Underbelly Affect RV Insulation?
Yes, gaps allow outside air to enter, while wet or shifted insulation provides less temperature protection. This can make the floor colder and increase freezing risks.
Can a Loose Underbelly Damage My RV While Driving?
Yes, loose material can catch wind, tear farther, strike moving parts, and expose plumbing or wiring to road debris. Secure it before towing at highway speed.
How Often Should I Inspect My RV Underbelly?
Inspect it before major trips, after rough-road travel, and during seasonal maintenance. You should also check it after plumbing, tank, electrical, or suspension repairs.
Why Does My RV Underbelly Sag More When the Tank Is Full?
The tank may be moving downward because its straps or support rails are failing. The added liquid weight makes the problem more visible and increases the risk of damage.
Can I Replace Only One Underbelly Panel?
Yes, you can replace one damaged section when the remaining panels are secure. Match the thickness and overlap the edges properly to prevent water and airflow entry.
Should RV Underbelly Coroplast Be Completely Flat?
Not always. A slight bow between supports is common, but the panel should not hold water, touch moving components, or hang significantly below the frame.
What Causes RV Underbelly Screws to Pull Out?
Vibration, corrosion, overtightening, stretched plastic, wind pressure, and undersized washers can cause screws to pull through. Wider washers or backing strips provide stronger support.
Can I Add More Screws to Fix a Sagging Underbelly?
Extra screws may help when the material is dry and undamaged. They will not fix wet insulation, torn holes, missing supports, or a failing holding-tank mount.
Does a Sagging Underbelly Mean My RV Floor Is Damaged?
Not always, but trapped water may eventually damage the subfloor. Check for soft flooring, stains, musty odors, swelling, or discoloration above the affected area.

David Marshall shares travel route insights, mileage planning tips, and road-tested advice. His writing helps travelers understand distance, timing, and equipment choices. Every article is built around clarity and real-world usefulness.











