
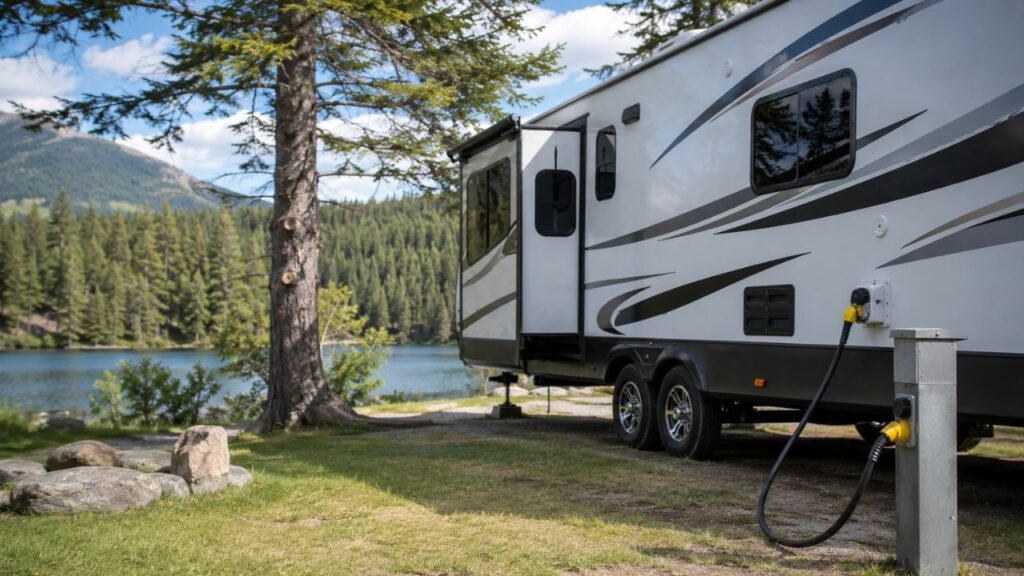
Your RV outlets work on shore power because they need 120-volt AC electricity. Your house battery supplies 12-volt DC electricity, so the outlets need an inverter before they can use battery power.
This guide explains how your RV power systems connect. I’ll also help you identify inverter problems, battery issues, tripped protection devices, and normal system limitations.
Key Takeaways
- Standard RV outlets require 120-volt AC electricity.
- RV house batteries normally supply 12-volt DC electricity.
- An inverter converts battery power into usable AC power.
- Many RVs have a converter but no inverter.
- Some inverters power only selected outlets inside the RV.
- Low battery voltage can cause the inverter to shut down.
- Tripped GFCIs, breakers, and inverter resets can disable outlets.
- Solar panels cannot directly power standard outlets without an inverter.
- High-wattage appliances can quickly overload a small inverter.
- Burning smells, hot cables, and repeated trips require professional attention.
How RV Shore Power and Battery Power Work Differently
Your RV contains two separate electrical systems. Knowing their roles makes this outlet problem much easier to diagnose.
The 120-Volt AC System
The 120-volt AC system works much like your home electrical system. It powers standard wall outlets and larger household-style appliances.
Shore power supplies this electricity when you plug into a campground pedestal. A generator can also provide the same type of power.
The AC system commonly operates:
- Standard wall outlets
- Air conditioners
- Microwave ovens
- Electric water heater elements
- Residential refrigerators
- Electric fireplaces
- Washers and dryers
- Battery chargers and converters
These circuits are normally protected by breakers inside your electrical panel.
When shore power disappears, the AC system loses its direct power source. Unless an inverter replaces that source, your standard outlets stop working.
The 12-Volt DC System
Your house battery stores and supplies 12-volt DC electricity. This system keeps many essential RV features working while unplugged.
The DC system commonly operates:
- Interior lights
- Water pumps
- Ventilation fans
- Furnace blowers
- Slide-out motors
- Awning motors
- Propane appliance control boards
- Tank monitors
- USB charging ports
- Thermostats
These circuits are usually protected by automotive-style fuses.
This explains why your lights may work normally while every household outlet remains dead. The lights and outlets use entirely different electrical systems.
Where the Inverter Fits Into the System
An inverter connects the battery system to selected AC circuits. It changes 12-volt DC electricity into 120-volt AC electricity.
Without an inverter, your battery cannot directly power a household receptacle. The voltage and current type are completely different.
An inverter also needs enough battery capacity to support the connected load. A small battery bank may operate chargers and televisions but struggle with microwaves or coffee makers.
Why Your RV Outlets Only Work on Shore Power
This behavior may be completely normal for your RV. However, it can also indicate an inverter, battery, breaker, or wiring problem.
Your RV Does Not Have an Inverter
Many RVs leave the factory without an inverter. They usually include a converter instead, which often causes confusion.
A converter uses shore power to produce 12-volt DC electricity. It charges your batteries and supports the RV’s DC equipment.
A converter does not change battery power into outlet power.
Therefore, an RV can have a working converter, charged batteries, and dead outlets while unplugged. Nothing is necessarily broken in that situation.
Look for a labeled inverter control panel inside your RV. You can also inspect storage compartments near the battery bank.
An inverter usually looks like a metal box with large battery cables. It may also have AC wiring, cooling fans, and a remote control connection.
The Inverter Is Turned Off
Many RV inverters require manual activation after disconnecting shore power. The switch may be easy to overlook.
Check these common locations:
- The main RV control panel
- A wall-mounted inverter remote
- A touchscreen control system
- The inverter’s physical power switch
- A storage compartment near the batteries
- An electrical equipment bay
Some inverter displays show standby, search, sleep, or power-saving modes. These modes may delay output until the inverter detects a load.
Turn the inverter on, then test a known inverter-powered outlet. Use a small lamp or phone charger instead of a high-draw appliance.
Only Selected Outlets Are Inverter-Powered
Many factory inverter systems do not energize every outlet. They power only circuits considered necessary during off-grid use.
Common inverter-powered locations include:
- The television outlet
- A bedroom receptacle
- A residential refrigerator outlet
- A workstation outlet
- One kitchen outlet
- An entertainment cabinet outlet
Other outlets remain connected only to shore or generator power.
This setup limits battery drain and reduces installation costs. It also helps prevent someone from accidentally running several large appliances.
Test every outlet while unplugged and record which ones work. This simple check reveals how your inverter circuits are arranged.
The Battery Charge Is Too Low
An inverter requires much more battery current than small DC appliances. Your lights may still work even when the inverter cannot.
Most inverters shut down when battery voltage falls below a safe limit. This protects the batteries and inverter from damage.
A battery can show acceptable voltage while nothing is running. Its voltage may then drop sharply when the inverter receives a load.
This condition may indicate:
- A discharged battery
- An aging battery
- A damaged battery cell
- Loose battery terminals
- Corroded cable connections
- Undersized inverter cables
- Excessive cable length
- A weak chassis ground
Check voltage at the battery terminals before turning on the inverter. Then test again while a small AC load is operating.
A large voltage drop under load deserves closer inspection.
The Inverter Breaker or Reset Has Tripped
Many inverters include their own reset button or output breaker. This protection can trip after an overload or short circuit.
The breaker may be located directly on the inverter body. Some models hide it beside the AC output connections.
Turn off connected appliances before resetting the inverter. Then press the reset or cycle the breaker fully off and back on.
If it immediately trips again, do not keep resetting it. A repeated trip suggests an overload, wiring fault, or failing inverter.
The Inverter Is Overloaded
Every inverter has a maximum continuous wattage rating. It may also have a higher short-duration surge rating.
A 1,000-watt inverter cannot continuously support a 1,500-watt space heater. It may shut down immediately or after warming up.
Common overload sources include:
- Electric space heaters
- Hair dryers
- Coffee makers
- Electric kettles
- Toasters
- Microwaves
- Induction cooktops
- Air conditioners
- Large vacuum cleaners
- Portable electric grills
Unplug these loads and restart the inverter. Test again with a small lamp or phone charger.
Remember that several smaller devices can create one large combined load. Always add their wattage together.
A GFCI Outlet Has Tripped
One GFCI receptacle can protect several standard outlets downstream. Therefore, one tripped GFCI may disable outlets throughout the RV.
Check GFCI outlets in these areas:
- The bathroom
- The kitchen
- Exterior storage compartments
- Outside entertainment areas
- Wet bays
- Basement storage
- Near the refrigerator
- Beside the bathroom sink
Press the reset button firmly after restoring inverter power. The GFCI may not reset unless it receives proper AC voltage.
If it repeatedly trips, disconnect everything plugged into its circuit. Moisture, damaged appliances, and wiring faults can cause recurring trips.
The Inverter Fuse or DC Breaker Has Failed
An inverter draws very high current from the battery bank. A large fuse or DC breaker protects this heavy wiring.
If that protection opens, the inverter receives no battery power. Its display may remain completely dark.
Look for a high-amperage fuse or breaker near the batteries. It may be mounted inside a protective holder.
Never bypass this fuse with wire or metal. Never replace it with a higher amperage rating without manufacturer guidance.
These devices protect against battery fires and serious cable damage.
Loose or Corroded Battery Connections
Battery connections can appear secure while still causing major voltage loss. Inverter current exposes weak connections very quickly.
Inspect the battery system for:
- Loose terminal nuts
- White or green corrosion
- Discolored cable lugs
- Frayed copper strands
- Melted insulation
- Warm cable ends
- Loose negative connections
- Damaged battery switches
- Poor chassis grounds
Disconnect power before tightening or cleaning battery connections. Follow your battery manufacturer’s safety instructions.
A connection that becomes hot during operation has excessive resistance. Stop using the inverter until the problem is corrected.
The Inverter Transfer Switch Is Not Changing Sources
Many inverter systems include an automatic transfer function. This device selects shore power or inverter power for specific circuits.
While plugged in, shore power passes through the inverter or transfer switch. After unplugging, the inverter should take over automatically.
A stuck relay can leave the outlets working on shore power only. Loose wiring or burned contacts can create the same symptom.
Possible warning signs include:
- Clicking without power transfer
- Intermittent outlet power
- Burned electrical smells
- Buzzing from the transfer switch
- Shore power working but inverter output missing
- Outlets flickering during source changes
Transfer switches contain dangerous 120-volt wiring. Let a qualified technician inspect them unless you have proper electrical training.
The Inverter Has Failed
Inverters contain control boards, cooling fans, relays, capacitors, and power electronics. Any of these components can eventually fail.
Common failure signs include:
- No display with proper battery voltage
- Repeated fault codes
- Loud internal clicking
- A burning smell
- Unusual heat
- Constant fan operation
- Output voltage that rises and falls
- Immediate shutdown under small loads
- No AC output despite normal battery input
Check the manufacturer’s error code before replacing the inverter. Some problems come from batteries or wiring rather than the inverter itself.
Quick Comparison of RV Power Components
Several RV electrical devices have similar names but perform different jobs. This table shows what each one actually does.
| Component | Main Job | Power Conversion | Powers Outlets While Unplugged? |
| House battery | Stores electrical energy | None | Not directly |
| Converter/charger | Charges batteries and supplies DC power | 120V AC to 12V DC | No |
| Inverter | Creates AC power from batteries | 12V DC to 120V AC | Yes |
| Inverter/charger | Combines inverter and charging functions | Converts both directions | Yes |
| Generator | Produces AC electricity | Mechanical energy to AC | Yes |
| Shore power | Supplies external AC electricity | None | No |
| Solar charge controller | Regulates solar charging | Solar DC to battery DC | No |
The most important distinction involves the converter and inverter. A converter charges batteries, while an inverter powers outlets from those batteries.
How to Check Whether Your RV Has an Inverter
Before troubleshooting further, confirm whether your RV was designed to power outlets from batteries. This prevents unnecessary repairs and replacement parts.
- Search for an inverter control panel inside the RV.
- Check compartments near the house batteries.
- Look behind removable electrical access panels.
- Review labels on installed electrical equipment.
- Check the owner’s manual and wiring diagram.
- Look for large DC cables entering a metal box.
- Search for outlets labeled “inverter powered.”
- Check whether you have an inverter/charger combination.
- Identify any dedicated inverter subpanel.
- Ask the previous owner about aftermarket installations.
Do not assume a solar system automatically includes an inverter. Many RV solar packages only charge the house batteries.
How to Troubleshoot RV Outlets That Do Not Work on Battery Power
Start with simple tests before opening any electrical enclosure. Stop immediately if you find heat, smoke, melted wiring, or water intrusion.
1. Unplug the RV From Shore Power
Disconnect the shore power cord from the campground pedestal. Confirm that your generator is also turned off.
This creates a true battery-only test. Otherwise, shore power may hide an inverter problem.
Wait briefly after disconnecting. Some transfer switches take several seconds before changing power sources.
2. Turn On the Inverter
Locate the inverter switch or remote control panel. Turn the inverter on and watch the display.
Look for messages such as:
- Low battery
- Overload
- Overtemperature
- Ground fault
- Output disabled
- Standby mode
- Search mode
- Communication error
Write down any displayed error code. That code can quickly narrow the problem.
3. Test Every Outlet
Different outlets may belong to different circuits. Test them individually while the inverter remains on.
- Test the television outlet.
- Test bedroom receptacles.
- Test kitchen receptacles.
- Test bathroom receptacles.
- Test exterior outlets.
- Test storage compartment outlets.
- Test the refrigerator outlet.
- Test any labeled inverter outlet.
Use a small lamp or basic outlet tester. Avoid beginning with a microwave, heater, or coffee maker.
Record which outlets work. A consistent pattern often reveals selected inverter circuits.
4. Reset Every GFCI Outlet
Find each GFCI outlet and press its reset button. One outlet may protect several other receptacles.
Some RVs hide GFCIs in storage bays or bathroom cabinets. Check every likely wet location.
If the reset button refuses to stay in, confirm the inverter is producing AC power. A GFCI may not reset without incoming voltage.
5. Reset the Inverter Breaker
Turn off every connected AC appliance before resetting protection. Locate the inverter’s breaker or reset button.
Move the breaker fully into the off position. Then move it firmly back into the on position.
A breaker can look normal even when internally tripped. Cycling it fully ensures a proper reset.
6. Check the Main RV Breaker Panel
Inspect the AC breaker panel for a tripped circuit. Look for labels mentioning outlets, receptacles, inverter, refrigerator, or entertainment.
Reset the suspected breaker by moving it fully off. Then return it to the on position.
Do not repeatedly reset a breaker that immediately trips. Disconnect the loads and investigate the cause.
7. Measure Battery Voltage
Battery voltage offers a useful starting point, though it does not tell the entire story.
| Battery Type | Approximate Resting Voltage | General Condition |
| 12V lead-acid | 12.7 to 12.8 volts | Fully charged |
| 12V lead-acid | Around 12.4 volts | Partially charged |
| 12V lead-acid | Around 12.2 volts | Roughly half charged |
| 12V lead-acid | Below 12.0 volts | Heavily discharged |
| 12V LiFePO4 | Around 13.4 to 13.6 volts | Near full charge |
| 12V LiFePO4 | Around 13.0 volts | Partially charged |
| Either chemistry | Sharp drop under load | Possible battery or cable problem |
These values are approximate. Temperature, recent charging, battery design, and connected loads can change readings.
Measure directly across the battery terminals. Then repeat the test while the inverter powers a small appliance.
A severe drop under load may indicate a weak battery or poor connection.
8. Inspect the Inverter Fuse and DC Breaker
Locate the main positive cable between the batteries and inverter. A large fuse or breaker should protect this cable.
Visually inspect the fuse holder for heat damage or loose connections. Use proper testing equipment when checking continuity.
Some resettable DC breakers include a visible trip indicator. Reset them only after removing the suspected overload.
Never work across battery terminals with loose metal tools. A short circuit can create intense heat and dangerous sparks.
9. Remove High-Wattage Appliances
Disconnect appliances that may exceed the inverter’s rating.
- Space heater
- Hair dryer
- Microwave
- Electric kettle
- Toaster
- Coffee maker
- Air conditioner
- Induction cooktop
- Vacuum cleaner
- Electric water heater
- Portable cooking appliance
Restart the inverter and test a small load. If the outlets return, the previous load likely caused an overload.
10. Inspect Battery and Ground Connections
Switch off the inverter and disconnect charging sources before touching cables.
Check for:
- Loose positive terminals
- Loose negative terminals
- Corrosion under cable lugs
- Melted fuse holders
- Damaged battery disconnect switches
- Loose chassis grounds
- Frayed cables
- Cable insulation rubbing against metal
- Improperly stacked terminal connections
- Swollen or leaking batteries
Correct cable size matters greatly. A large inverter connected through thin cables cannot operate reliably.
11. Check Inverter AC Output
This test determines whether the inverter itself creates 120-volt AC electricity.
However, the output terminals can cause severe electric shock. Do not open the inverter or test exposed AC conductors without proper training.
A technician can compare:
- Battery input voltage
- Battery voltage under load
- Inverter AC output
- Transfer switch input
- Transfer switch output
- Outlet circuit voltage
This process separates inverter failure from downstream wiring problems.
12. Test the Transfer Switch
A transfer switch controls which source reaches the outlet circuit. It may be built into the inverter or mounted separately.
A technician can verify whether shore power passes correctly. They can also confirm whether inverter power reaches the output side.
Burned relay contacts often require transfer switch replacement. Cleaning or bypassing damaged contacts is not a safe permanent repair.
Why Some RV Outlets Work on Battery While Others Do Not
Your RV may have separate outlet groups for practical reasons. Battery power is limited, so manufacturers often prioritize only essential circuits.
One group may receive power directly from the main breaker panel. Those outlets work only with shore power or generator power.
Another group may pass through the inverter. Those outlets can work from shore power, generator power, or the battery bank.
Some installations use a dedicated inverter subpanel. Others power only one specially installed receptacle.
This arrangement prevents heavy appliances from draining the battery bank. It also keeps the inverter system smaller and more affordable.
Therefore, one working battery-powered outlet does not mean every outlet should work.
What Can You Safely Run From an RV Battery Through an Inverter?
The correct answer depends on inverter capacity, battery storage, cable size, and appliance wattage. Start with smaller loads whenever possible.
| Appliance | Typical Power Draw | Usually Practical on Battery? |
| Phone charger | 5 to 30 watts | Yes |
| Tablet charger | 10 to 40 watts | Yes |
| Laptop charger | 45 to 150 watts | Yes |
| Television | 50 to 150 watts | Yes |
| CPAP machine | 30 to 100 watts | Usually |
| Small fan | 20 to 75 watts | Yes |
| Game console | 70 to 220 watts | Usually |
| Coffee maker | 600 to 1,500 watts | Briefly with proper system |
| Microwave | 1,000 to 1,800 watts | Briefly with large system |
| Hair dryer | 1,200 to 1,800 watts | Usually inefficient |
| Space heater | Around 1,500 watts | Not recommended |
| Air conditioner | 1,200 to 3,500 watts or more | Requires a large system |
A 1,500-watt AC appliance draws far more than 1,500 watts from the battery system after conversion losses.
At 12 volts, the inverter may demand well over 100 amps. This requires strong batteries, short cables, and secure connections.
How Long Will RV Outlets Run From the Battery?
Inverter wattage alone does not determine runtime. Battery energy and appliance consumption are more important.
Estimate Your Usable Battery Energy
Use this basic calculation:
Battery volts × battery amp-hours = stored watt-hours
For example:
12 volts × 100 amp-hours = 1,200 watt-hours
However, stored energy and usable energy are not always equal.
Traditional lead-acid batteries often last longer when regularly discharged only halfway. A 100Ah lead-acid battery may provide roughly 600 usable watt-hours.
LiFePO4 batteries usually allow much deeper discharge. A 100Ah lithium battery may provide close to 1,000 usable watt-hours, depending on its settings.
Account for Inverter Losses
Inverters consume some energy while changing DC electricity into AC electricity. They also use power while operating without a load.
Actual efficiency varies by model and load level. A practical estimate often falls around 85% to 95%.
This means the outlets receive less energy than the battery stores.
Calculate Approximate Runtime
Use this simple formula:
Usable watt-hours ÷ appliance watts = approximate runtime
Suppose a lithium battery provides 1,000 usable watt-hours. A television consumes 100 watts.
1,000 ÷ 100 = approximately 10 hours
After allowing for inverter losses, actual runtime may be closer to eight or nine hours.
Now consider a 1,000-watt microwave.
1,000 ÷ 1,000 = approximately one hour
However, microwaves run for short periods and may draw more than their cooking rating. Battery voltage drop and surge demand can further reduce performance.
These calculations are estimates rather than guarantees. Battery condition, temperature, wiring, and inverter efficiency all affect real runtime.
Does Solar Power Make RV Outlets Work?
Solar panels do not normally power standard outlets directly. They produce DC electricity that passes through a solar charge controller.
The controller uses that energy to recharge your house batteries. An inverter must still create 120-volt AC power for the outlets.
A typical power path looks like this:
Solar panels → charge controller → battery bank → inverter → AC outlets
Solar charging can slow battery depletion during sunny weather. It may even replace the energy used by small devices.
However, solar output changes with:
- Cloud cover
- Shade
- Panel angle
- Season
- Temperature
- Roof obstructions
- Battery charge level
- Controller capacity
A small solar system will not continuously support a microwave, heater, or air conditioner.
Can You Add an Inverter to Power Your RV Outlets?
Adding an inverter is possible, but the entire system must match your expected electrical loads. Proper wiring and protection are essential.
Choose the Correct Inverter Type
Common inverter choices include:
- Pure sine wave inverter
- Modified sine wave inverter
- Standalone inverter
- Inverter/charger
- Inverter with automatic transfer switching
- Portable inverter with a dedicated outlet
Pure sine wave inverters provide cleaner power for sensitive electronics. They are usually the better choice for modern RV equipment.
Modified sine wave units cost less but may cause noise, heat, poor motor performance, or appliance compatibility problems.
Choose the Correct Inverter Size
List every appliance you expect to operate. Record its running wattage and startup surge.
The inverter’s continuous rating must cover the combined running load. Its surge rating must support brief startup demands.
Avoid choosing an oversized inverter without upgrading the battery bank. A large inverter can drain a small battery very quickly.
Make Sure the Battery Bank Can Support It
Battery capacity determines runtime and available current. Large inverters require high battery current.
A 2,000-watt inverter may draw around 170 amps or more from a 12-volt battery system at heavy load.
Your battery bank must support that discharge rate. The battery management system must also allow sufficient current.
Lead-acid batteries may suffer large voltage drops under heavy loads. Lithium batteries usually handle high current better, but their ratings still matter.
Decide Which Outlets Need Inverter Power
You do not always need to power every receptacle.
Possible installation approaches include:
- One dedicated inverter outlet
- Selected existing outlets
- A separate inverter subpanel
- The residential refrigerator circuit
- Television and workspace outlets
- Most general outlet circuits
- A whole-coach inverter setup
A dedicated outlet is often the simplest option. A whole-RV system requires careful circuit planning and transfer protection.
Use Proper Cables, Fuses, and Disconnects
High-current DC wiring must be properly sized and protected.
A safe installation generally requires:
- Short battery cable runs
- Correct cable gauge
- A fuse near the battery
- A rated DC disconnect
- Secure crimped cable lugs
- Protected cable routing
- Proper chassis bonding
- Adequate inverter ventilation
- Correct AC circuit protection
- A safe transfer method
Never connect inverter output directly into the RV shore power inlet. This can create dangerous backfeeding and equipment damage.
A qualified RV electrician should handle whole-coach installations.
Converter vs. Inverter
These two devices perform opposite electrical jobs. Confusing them can lead to incorrect troubleshooting.
| Feature | Converter | Inverter |
| Input power | 120V AC | 12V DC |
| Output power | 12V DC | 120V AC |
| Charges house batteries | Yes | Usually no |
| Powers DC lights and pumps | Yes while shore power is available | Not its main job |
| Powers outlets from batteries | No | Yes |
| Commonly factory-installed | Yes | Not always |
| Used while dry camping | Only through stored battery power | Yes |
Some RVs use an inverter/charger that performs both functions. Its control panel may show charging, inverting, battery voltage, and fault information.
Common Mistakes to Avoid
Many inverter and outlet problems become worse because of incorrect assumptions. Avoid these common mistakes.
- Assuming every RV includes a factory inverter
- Confusing the converter with the inverter
- Expecting every outlet to receive inverter power
- Testing first with a high-wattage appliance
- Replacing a fuse with a larger rating
- Bypassing a tripped breaker
- Ignoring warm or discolored cable connections
- Running space heaters from a small battery bank
- Assuming solar panels directly power outlets
- Backfeeding the shore power inlet
- Opening energized electrical panels
- Resetting a repeatedly tripping breaker
- Using thin extension cords for large loads
- Installing an inverter without proper ventilation
- Ignoring battery management system limits
Protection devices trip for a reason. Identify the cause before restoring power repeatedly.
When the Outlet Problem Is Normal
Your RV may be operating exactly as designed.
The situation is probably normal when:
- The RV has no inverter.
- Only designated inverter outlets work.
- The inverter powers a residential refrigerator only.
- The battery disconnect disables the inverter.
- The inverter must be manually activated.
- The battery bank is too low for inverter operation.
- High-draw circuits are intentionally excluded.
- The outlets have never worked while unplugged.
A repair may not be necessary unless the outlets previously worked from battery power.
Check your owner’s manual before replacing electrical components. Factory wiring diagrams can confirm the intended setup.
When to Call an RV Technician or Electrician
Some checks involve dangerous battery current or 120-volt electricity. Call a professional when the problem moves beyond basic resets and visual inspections.
Seek help when:
- The inverter smells burned.
- Battery cables become unusually hot.
- You see melted insulation.
- A fuse blows repeatedly.
- A breaker immediately retrips.
- The inverter shuts down without a load.
- Outlet voltage changes unpredictably.
- The transfer switch chatters or buzzes.
- Water entered an electrical compartment.
- The inverter case shows heat damage.
- Battery terminals spark excessively.
- You cannot identify the inverter wiring.
- You are uncomfortable testing AC voltage.
Electrical safety matters more than completing the repair yourself.
Final Answer
Your RV outlets need 120-volt AC electricity. Shore power provides that electricity directly, while your house batteries normally provide only 12-volt DC power.
For outlets to work while unplugged, your RV needs an operating inverter connected to those outlet circuits. Check the inverter switch, battery voltage, GFCIs, breakers, fuses, cable connections, and transfer system before assuming the outlets are faulty.
Related FAQs
Do RV Outlets Normally Work From the House Battery?
Most RV outlets do not work directly from the house battery. They require an inverter to convert 12-volt DC battery power into 120-volt AC electricity.
Why Do My RV Lights Work but the Outlets Do Not?
Your lights normally use 12-volt DC battery power. Standard outlets require 120-volt AC power from shore power, a generator, or an inverter.
Will a Converter Make RV Outlets Work on Battery Power?
No, a converter changes 120-volt AC electricity into 12-volt DC electricity. An inverter performs the opposite conversion needed for battery-powered outlets.
Do All RVs Come With an Inverter?
No, many RVs include a converter and battery charger but no factory inverter. Inverters are often optional or installed aftermarket.
Why Does Only One RV Outlet Work on the Inverter?
The inverter may be wired to one dedicated circuit. Manufacturers often limit inverter power to a television, refrigerator, bedroom, or workspace outlet.
Can I Run My RV Microwave From the Battery?
You can run a microwave with a properly sized inverter, strong battery bank, heavy cables, and adequate circuit protection. A small battery system may shut down quickly.
Can Solar Panels Power My RV Outlets?
Solar panels charge the battery bank through a charge controller. An inverter must then convert that stored battery energy into AC outlet power.
Can a Low Battery Stop Inverter Outlets From Working?
Yes, inverters often shut down when battery voltage drops below their safe operating limit. Lights may continue working because they require less power.
Where Is the Inverter Reset Button Located?
The reset may be located on the inverter body, remote control panel, or nearby breaker assembly. Its exact location depends on the inverter model.
Should the RV Inverter Stay On All the Time?
It depends on your system and electrical needs. An inverter uses some battery energy while idle, so switching it off can reduce unnecessary battery drain.
Why Do My Outlets Work With a Generator but Not the Battery?
A generator produces 120-volt AC electricity directly. Your battery produces 12-volt DC electricity and requires an inverter to power standard outlets.
Can I Make Every RV Outlet Work From the Inverter?
Yes, but the system requires proper circuit design, battery capacity, cable sizing, fuses, breakers, and transfer equipment. Professional installation is strongly recommended.
Why Does My Inverter Turn On but the Outlets Stay Dead?
The inverter may have no AC output, a tripped output breaker, a failed transfer switch, a tripped GFCI, or outlets outside the inverter-powered circuit.
Can a Bad Battery Make the Inverter Look Faulty?
Yes, a weak battery may show normal voltage at rest but collapse under load. The inverter may then report low voltage or shut down immediately.
Does the Battery Disconnect Switch Affect the Inverter?
It can, depending on the wiring. Some battery disconnect switches cut power to the inverter, while others leave it connected directly to the battery bank.

David Marshall shares travel route insights, mileage planning tips, and road-tested advice. His writing helps travelers understand distance, timing, and equipment choices. Every article is built around clarity and real-world usefulness.











