
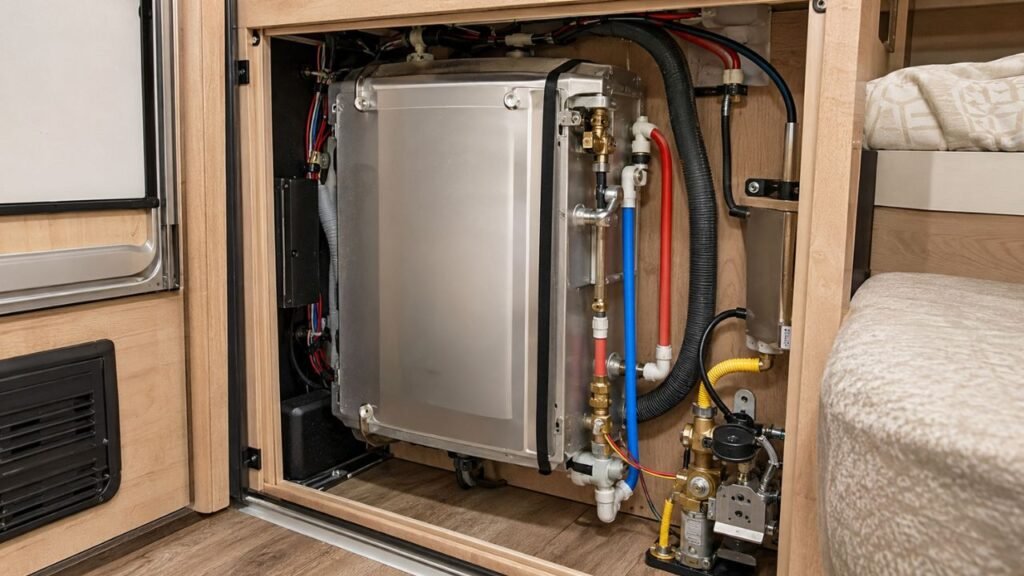
Your RV water heater works on gas but not electric because the electric heating circuit has failed or lost power. Common causes include a tripped breaker, an overlooked switch, a burned heating element, a failed relay, or damaged wiring.
This guide walks you through each likely cause in order. You will learn what to check yourself and when to stop.
Key Takeaways
- Gas and electric modes use separate heating components.
- Check shore power, breakers, and switches before replacing parts.
- Some water heaters have a hidden exterior electric switch.
- Dry firing can destroy an electric element within seconds.
- Working RV lights do not confirm 120-volt shore power.
- Repeated breaker trips may indicate a dangerous electrical fault.
- Always fill the tank before activating electric heating.
- Leave live voltage testing to a qualified RV technician.
Why Gas Mode Can Work While Electric Mode Fails
A dual-mode RV water heater has two different heat sources. Propane mode uses a burner, while electric mode uses a 120-volt heating element.
Both modes heat water inside the same tank. However, they do not always share every switch, wire, thermostat, or control component.
Your propane burner can operate perfectly while the electric element receives no power. A failed electric component will not necessarily affect propane operation.
This split failure actually helps narrow down the problem. It suggests that the tank, water supply, and propane controls remain functional.
The exact electrical arrangement depends on your heater model. Suburban, Dometic, Atwood, tankless, and residential-style systems can work differently.
Always locate the model number before removing covers or ordering replacement parts.
Most Common Reasons an RV Water Heater Works on Gas Only
Several problems can disable electric mode without affecting propane operation. Start with simple power checks before testing internal components.
The Electric Water Heater Switch Is Off
Many RV owners do not realize there may be two electric switches.
One switch may be located on your interior control panel. Another switch may sit behind the exterior water heater access door.
Traditional Suburban tank heaters often have a small black rocker switch outside. It can accidentally get switched off during maintenance or winterization.
Check both locations before assuming a part has failed.
Some owners also turn off the exterior switch before draining the tank. They may forget to reactivate it after refilling.
The Water Heater Circuit Breaker Has Tripped
The electric element normally operates from a dedicated 120-volt circuit breaker. When that breaker trips, propane mode can still work normally.
Open your RV breaker panel and locate the water heater breaker. A tripped breaker may appear slightly out of alignment.
Move the breaker firmly to the OFF position first. Then switch it back to the ON position.
Do not repeatedly reset a breaker that trips again. A shorted element or damaged wire may be causing the fault.
The RV Is Not Receiving Proper Shore Power
A standard electric heating element needs 120-volt AC power. This usually comes from shore power or a generator.
Your RV battery cannot normally power the element directly. It may power switches and control circuits, but not the heating load.
You could have working lights and still lack shore power. Most RV lights operate from the 12-volt battery system.
Check whether other 120-volt appliances are working. Test a wall outlet, microwave, or air conditioner when appropriate.
Possible shore power problems include:
- A disconnected campground pedestal breaker
- A damaged power cord
- A loose plug
- A faulty adapter
- Low campground voltage
- A weak generator output
- A tripped main RV breaker
Low voltage can also prevent reliable heating. It may overheat wiring and damage electrical components.
The Heating Element Has Burned Out
A failed heating element is one of the most common causes. The element sits inside the tank and heats the water directly.
Heating elements can fail from age, corrosion, sediment, or electrical damage. However, dry firing causes many sudden failures.
Dry firing happens when electric mode starts with an empty tank. The exposed element overheats because water cannot carry away the heat.
This can destroy the element extremely quickly.
The propane burner may still heat normally after the element fails. That makes dry firing easy to overlook.
Testing resistance and continuity can confirm whether the element has failed.
The High-Limit Reset Has Tripped
RV water heaters use temperature controls to prevent overheating. These controls may include a thermostat and an emergency cutoff.
The emergency cutoff is often called the ECO. Some units have small reset buttons beneath an exterior rubber cover.
Disconnect power before accessing this area. Press the appropriate reset button and listen for a click.
A single reset may restore electric operation. However, repeated tripping suggests an unresolved thermostat or overheating problem.
Do not keep resetting the safety control without finding the cause.
The AC Relay Has Failed
Some water heaters use an AC relay to deliver power toward the heating element.
The relay receives a control signal when you select electric mode. It then closes a higher-voltage circuit supplying the element.
A failed relay may click without transferring electricity. It may also remain completely silent.
The propane system may continue working because it uses another output circuit.
Testing the relay usually involves live voltage measurements. That work is best handled by an experienced technician.
A Wire or Terminal Has Become Loose or Burned
RV movement places constant stress on electrical connections. Road vibration can loosen terminals gradually.
Loose connections create resistance, which produces heat. That heat can discolor terminals, melt connectors, and damage insulation.
Look for these warning signs:
- Melted plastic
- Darkened wire terminals
- Brittle insulation
- Green or white corrosion
- Loose spade connectors
- Burned smells
- Scorch marks
Disconnect shore power, generator power, and inverter output before inspecting wiring.
A burned connection needs more than simple tightening. The damaged terminal and affected wiring may require replacement.
The Interior Control Switch Has Failed
The interior electric switch can wear out or develop failed contacts. Its indicator light may still illuminate even when power does not pass correctly.
Some switches control a 12-volt signal rather than the element directly. That signal activates a relay or control board.
A failed switch can therefore prevent electric heating while propane remains available.
The switch should be tested according to the model-specific wiring diagram.
The Control Board Has Failed
Modern RV water heaters may use an electronic control board for both modes. The board receives commands and activates the required components.
One section of the board can fail independently. The propane output may work while the electric output remains inactive.
Control board failures are less common than power or element problems. Check basic electrical causes before replacing the board.
Guessing can become expensive because control boards often cost more than switches or elements.
The Electric Thermostat Has Failed
Some water heaters use separate temperature circuits for electric and propane modes. Others share parts of the same control system.
A failed electric thermostat can interrupt power to the heating element. Propane mode may continue using a separate circuit.
Thermostats must sit firmly against the tank surface. Poor contact can cause incorrect temperature readings and repeated safety trips.
Verify your exact model before testing or replacing a thermostat.
Quick Symptom and Cause Guide
Your water heater’s behavior can point toward the failing component. Use this table to decide where to begin.
| What You Notice | Most Likely Cause | First Check |
| Gas works, but electric does nothing | Switch, breaker, or missing AC power | Check both switches and the breaker |
| Breaker trips immediately | Shorted element or damaged wiring | Leave the breaker off |
| Breaker trips after several minutes | Failing element or overheated connection | Inspect wiring and element condition |
| Electric indicator glows, but water stays cold | Burned element or failed relay | Test the element and power output |
| Reset button keeps tripping | Thermostat problem or overheating | Inspect thermostat contact and wiring |
| Electric mode works intermittently | Loose terminal, relay, or switch | Inspect all connections |
| Water becomes only slightly warm | Low voltage or heavy water demand | Confirm voltage and heating time |
| Element failed after tank draining | Electric mode was activated while empty | Replace the damaged element |
| Lights work, but electric heating does not | No 120-volt AC power | Test another AC appliance |
| Electric mode stopped after travel | Loose wiring or switched-off exterior control | Inspect the exterior compartment |
What to Check Before Using a Multimeter
Complete the basic checks first. Many electric heating problems require no component testing.
- Confirm water reaches the RV plumbing system.
- Open a hot faucet and purge trapped air.
- Make sure the water heater tank is completely full.
- Check that bypass valves are correctly positioned.
- Connect the RV to suitable shore power.
- Verify the campground pedestal breaker is on.
- Check the RV’s main circuit breaker.
- Check the dedicated water heater breaker.
- Turn on the interior electric switch.
- Check for an exterior electric switch.
- Press the high-limit reset once.
- Turn off competing high-draw appliances.
- Allow enough time for the water to heat.
A six-gallon heater may need considerable time on electric mode. Testing the water too soon can make a working system seem faulty.
Incoming water temperature also affects recovery time. Cold winter water takes longer to heat than warm summer water.
How to Troubleshoot an RV Water Heater That Will Not Work on Electric
Work through these steps in order. Stop before live electrical testing unless you understand 120-volt RV systems.
Step 1: Confirm the Tank Is Full
Never assume the tank filled automatically after storage or winterization.
Connect your water source and open a hot water faucet. Let the faucet run until air stops sputtering.
A steady stream usually confirms the tank and hot lines contain water.
Also inspect the bypass valve arrangement. A valve left in winterizing position may prevent the tank from filling.
Do not activate electric mode until you know the tank is full.
Step 2: Confirm the RV Has 120-Volt Power
Check another 120-volt device inside the RV. A wall outlet or microwave can help confirm AC power.
Do not rely on ceiling lights for this test. Those lights usually operate from 12-volt battery power.
If no AC appliance works, inspect the following:
- Campground pedestal breaker
- Main RV breaker
- Shore power cable
- Plug connections
- Electrical adapters
- Generator output
- Surge protector display
Correct the main power problem before diagnosing the water heater.
Step 3: Check Every Water Heater Switch
Turn on the interior electric water heater switch. Then check behind the exterior access door.
Look carefully for a small rocker switch near the lower corner. Switch locations vary between manufacturers and models.
Make sure the exterior switch is firmly in the ON position. A switch can sometimes look active while resting between positions.
Inspect the switch for corrosion or heat damage. Replace it when its contacts no longer pass electricity correctly.
Step 4: Reset the Water Heater Breaker
Locate the breaker marked “water heater” or “WH.” Move it fully into the OFF position.
Wait briefly, then switch it back on.
A breaker may appear on while actually sitting in a tripped position. Fully resetting it ensures the internal mechanism reconnects.
Watch what happens afterward.
A breaker that stays on may have tripped from a temporary overload. A breaker that trips again indicates a continuing electrical problem.
Leave it off until the circuit receives further testing.
Step 5: Check the High-Limit Reset
Turn off shore power and the water heater breaker. Open the exterior access panel.
Locate the thermostat and ECO area shown in your manual. Some models have reset buttons beneath a rubber cover.
Press the applicable button gently. A noticeable click suggests it had tripped.
Restore power only after replacing every protective cover.
When the reset trips repeatedly, do not treat the button as the repair. Something is causing excessive temperature or incorrect control operation.
Step 6: Inspect Visible Wiring and Terminals
Disconnect every possible AC power source before touching electrical components.
This includes:
- Shore power
- Generator power
- Inverter output
- Automatic generator systems
- Applicable battery control power
Look for loose, corroded, melted, or darkened terminals. Pay special attention near the heating element, relay, and exterior switch.
Gently check whether connectors remain secure. Do not pull heavily on old or brittle wiring.
Replace heat-damaged connectors rather than tightening them and hoping they hold.
Step 7: Test the Heating Element
Turn off all power and confirm the circuit is dead.
Access the element terminals and photograph the wiring. Remove at least one wire before testing resistance.
Place the multimeter probes across both element terminals. An open or infinite reading normally indicates a failed element.
The expected resistance depends on voltage and wattage. Compare your reading with the heater’s service specifications.
Do not test resistance while the circuit is energized.
Step 8: Check the Element for a Short to Ground
A heating element can fail internally and contact the grounded metal tank.
With the element wires disconnected, place one probe on an element terminal. Place the other probe on the metal flange or tank.
Repeat the test using the other terminal.
Continuity between a terminal and the grounded tank may indicate a failed element. This condition can trip the breaker and create a shock risk.
Replace the element before restoring power.
Step 9: Test the Thermostat and Emergency Cutoff
The thermostat should pass power while the water remains below its target temperature.
The ECO should interrupt operation when unsafe temperatures occur.
Testing these components depends on their design and current tank temperature. Follow your model’s wiring diagram and service instructions.
Make sure each thermostat remains pressed tightly against the tank. Loose mounting can produce inaccurate readings.
Replace failed temperature controls with exact compatible parts.
Step 10: Test the Relay and Control Board Output
When the element and power supply are good, the relay becomes a likely suspect.
A technician can check whether the control board sends the correct relay signal. They can then verify whether 120-volt power exits the relay.
This diagnosis may require energized testing around exposed components.
Do not attempt it without proper equipment and electrical experience.
How to Test an RV Water Heater Element Safely
Element testing is often straightforward after complete power isolation. Your measurements must be taken with the circuit fully de-energized.
Tools You May Need
- Digital multimeter
- Insulated screwdriver
- Correct socket or element wrench
- Safety glasses
- Protective gloves
- Replacement element gasket
- Flashlight
- Model-specific wiring diagram
- Non-contact voltage tester
Resistance Test
Disconnect shore power and switch off the generator. Disable inverter output when it can supply the RV panel.
Switch off the dedicated water heater breaker. Confirm no voltage remains before touching terminals.
Remove the element cover and photograph the connections. Disconnect at least one wire from the element.
Set the multimeter to resistance mode. Touch one probe to each element terminal.
A working element should show a measurable resistance value. The exact number depends on its wattage and voltage rating.
An infinite or open reading usually means the internal element has broken.
Ground-Fault Test
Keep both element wires disconnected.
Place one multimeter probe on the first terminal. Touch the other probe to the metal element flange.
Repeat the test using the second terminal.
A good element should not show meaningful continuity to the grounded metal tank.
A continuity reading may indicate internal insulation failure. Replace the element rather than continuing to use it.
When Not to Perform the Test Yourself
Stop testing and contact a technician when:
- Wiring appears melted
- You smell burned insulation
- The breaker trips repeatedly
- The electrical compartment is wet
- You cannot isolate every power source
- The tank is leaking
- Propane odors are present
- You are unsure about multimeter operation
- The wiring differs from your service diagram
There is no benefit in taking unnecessary electrical risks. A technician can usually complete these measurements quickly.
How to Replace a Burned-Out Heating Element
Replacing an element can be manageable on many tank heaters. Correct power isolation and tank preparation remain essential.
Turn Off Every Energy Source
Disconnect shore power completely. Do not rely only on the interior electric switch.
Turn off the water heater breaker and generator. Disable inverter output when applicable.
Close the propane supply and switch off propane mode. Disconnect applicable battery power when required by the manufacturer.
Confirm the water has cooled before continuing.
Drain and Depressurize the Tank
Turn off city water and the onboard water pump. Open a hot faucet to relieve system pressure.
Allow the tank to cool before removing any plug, anode rod, or element.
Hot pressurized water can cause serious burns.
Drain the tank according to the manufacturer’s procedure. Be prepared for sediment and remaining water.
Remove the Old Element
Remove the electrical cover and photograph the wire positions.
Disconnect the element wires carefully. Inspect their terminals for heat damage or corrosion.
Use the correct element wrench or socket. Turn the element counterclockwise until it releases.
Clean the opening without damaging the tank threads.
Install the Correct Replacement
Match the replacement element with the original specifications.
Check these details:
- Voltage
- Wattage
- Thread size
- Element length
- Element shape
- Gasket type
- Manufacturer compatibility
Do not install a higher-wattage element without written manufacturer approval. The wiring and breaker may not support the additional load.
Install a new gasket and tighten the element correctly. Excessive force can damage the tank or seal.
Reconnect the wires exactly as shown in your photograph and diagram.
Refill Before Restoring Power
Close the drain opening and return the bypass valves to normal operation.
Turn on the water supply and open a hot faucet. Keep it open until water flows steadily without air.
Inspect the new element area for leaks.
Only restore electric power after confirming the tank is completely full.
This final step prevents another dry-fired element.
Why the Water Heater Breaker Keeps Tripping
A tripping breaker is protecting the RV from excessive current. Never replace it with a larger breaker to stop the problem.
The Element Is Shorted to Ground
A damaged element can send current toward the metal tank.
This fault may trip the breaker immediately after electric mode starts. It can also create a serious shock hazard.
Test the element for continuity to ground. Replace it when the insulation has failed.
Wiring Is Loose or Heat-Damaged
A loose connection increases electrical resistance. That resistance generates heat around the terminal.
The resulting damage may cause intermittent operation, arcing, or breaker trips.
Replace burned terminals and damaged wire sections. Tightening a heavily damaged connector is not a reliable repair.
The Circuit Is Overloaded
Many traditional elements draw around 12 amps at 120 volts. Exact demand depends on the element rating.
The water heater should normally have a properly sized circuit. Problems can occur when modifications place other loads on that circuit.
An overloaded adapter or weak power source may also contribute.
Check the circuit design before replacing any breaker.
The Breaker Is Weak or Defective
Circuit breakers can wear out after years of heat and repeated tripping.
A weakened breaker may trip below its rated load. However, other faults must be ruled out first.
Replace the breaker only with the approved type and rating. Never increase the amperage without manufacturer authorization.
Moisture Has Entered the Electrical Compartment
Rain, leaks, washing, and condensation can reach electrical connections.
Moisture may cause corrosion, current leakage, and short circuits.
Allow the compartment to dry completely. Find and repair the source of water entry before restoring power.
Does Electric Mode Require Shore Power?
A conventional RV water heater element normally requires 120-volt AC electricity. Shore power or a generator usually provides that electricity.
Your house batteries supply 12-volt DC power. They may operate indicator lights, switches, relays, and the control board.
They usually do not power the standard heating element directly.
An inverter can convert battery power into 120-volt AC electricity. However, water heating places a substantial demand on the batteries.
A typical electric element can quickly drain a small battery bank. The inverter, wiring, and batteries must also support the load safely.
For most RV owners, propane is more practical while boondocking. Electric mode makes better sense when full hookups are available.
Can You Use Gas and Electric Modes Together?
Many dual-mode tank heaters allow propane and electric heating simultaneously. This provides faster recovery during showers or heavy water use.
Check the manufacturer’s instructions before using both modes. Not every water heater supports simultaneous operation.
The tank must remain completely full. The RV also needs suitable electrical capacity and safe propane operation.
Using both modes will not repair a weak electric system. A failed element will remain failed even when propane assists heating.
You may not notice the electrical problem because propane heats the tank quickly. Test each mode separately when checking performance.
Brand and Model Differences to Check
Water heater designs differ considerably between models. Identify the manufacturer and model number before following component-specific advice.
Suburban Tank Water Heaters
Many Suburban tank models have an exterior electric rocker switch. It usually sits behind the outside access door.
These units commonly use a replaceable 120-volt element. They may also have accessible thermostat and ECO reset buttons.
Suburban steel tanks often use replaceable anode rods. Inspect the anode during routine tank maintenance.
Dry-fired elements are especially common after draining or winterizing these heaters.
Dometic and Atwood Tank Water Heaters
Dometic and Atwood designs vary between production years. Some models route electric operation through relays and electronic control boards.
The exterior layout may differ from a traditional Suburban heater. Do not assume every unit has the same hidden switch.
Some Atwood tanks use aluminum construction and do not require traditional anode rods.
Use the exact model number when ordering thermostats, relays, elements, or circuit boards.
Tankless RV Water Heaters
Many RV tankless heaters use propane as the actual heat source. Electricity may only operate controls, sensors, fans, and ignition.
Therefore, the phrase “works on gas but not electric” may not apply normally. Your unit may not include an electric water-heating element.
Some tankless systems do offer multiple energy options. Check the rating label and manual before troubleshooting.
Residential-Style RV Water Heaters
Large fifth wheels and motorhomes may have residential electric heaters. Others use hydronic heating or diesel-fired systems.
These installations can include different voltages, breakers, thermostats, and control arrangements.
Do not apply standard six-gallon RV heater procedures without confirming the system design.
Common Troubleshooting Mistakes to Avoid
These mistakes can damage the heater or create serious safety risks.
- Assuming working lights confirm shore power
- Activating electric mode before filling the tank
- Checking only the interior control switch
- Forgetting the exterior rocker switch
- Resetting a breaker repeatedly
- Testing resistance on an energized circuit
- Testing an element without disconnecting its wires
- Ordering parts without checking the model number
- Installing an incorrect element wattage
- Removing a drain plug while water remains hot
- Opening a pressurized tank
- Bypassing a thermostat or ECO
- Installing a larger circuit breaker
- Assuming every heater uses identical wiring
- Ignoring melted or darkened terminals
- Restoring power before replacing protective covers
A careful diagnosis saves time and prevents unnecessary parts replacement.
How to Prevent Future Electric Water Heater Problems
Simple operating habits can prevent most element and connection failures. Include these checks in your regular RV maintenance routine.
Fill and Purge the Tank Before Heating
Always confirm the tank is full before activating either heating mode.
Open a hot faucet after connecting the water supply. Wait for a steady stream without air.
This practice keeps the electric element fully submerged. It also prevents uneven propane heating inside an empty tank.
Keep the Electric Switch Off During Draining
Turn off electric mode before draining, sanitizing, winterizing, or flushing the tank.
Consider switching off the circuit breaker as additional protection. This prevents someone from accidentally activating the element.
Leave the switch off while the RV remains in storage.
Inspect Wiring and Terminals Regularly
Check the exterior compartment several times each camping season.
Look for corrosion, looseness, insect nests, damaged insulation, and water entry.
Inspect the power cord and campground plug as well. Heat discoloration can indicate a poor connection.
Address small issues before vibration and resistance cause larger failures.
Flush Sediment From the Tank
Mineral deposits collect inside the tank over time. Heavy sediment can reduce heating efficiency and trap heat around components.
Drain and flush the tank according to the manufacturer’s schedule.
Campground water hardness affects how quickly sediment builds. Frequent travelers may need more regular flushing.
Maintain the Anode Rod When Applicable
Many Suburban steel tanks use a sacrificial anode rod. The rod corrodes instead of the tank.
Inspect it during tank draining and replace it when heavily depleted.
Not every water heater uses an anode rod. Never force one into a tank not designed for it.
Protect the RV From Low Voltage
Low campground voltage can overheat motors, wiring, and appliance components.
An electrical management system can detect unsafe voltage and wiring conditions. It may disconnect power before damage occurs.
A basic surge protector may not provide complete low-voltage protection. Check the device’s actual features before relying on it.
When Should You Call an RV Technician?
Some problems require live testing or specialized electrical repairs. Stop troubleshooting when the risk exceeds your experience.
- The breaker trips repeatedly.
- The wiring or connectors have melted.
- You smell burned insulation.
- You smell propane near the heater.
- The element tests shorted to ground.
- Water has entered the electrical compartment.
- The reset button continues tripping.
- The tank is leaking or heavily corroded.
- Correct voltage reaches the unit without heating.
- The relay requires energized testing.
- The control board may have failed.
- You cannot confirm complete power isolation.
- The wiring does not match the available diagram.
Live 120-volt electricity can cause severe shock, fire, or death. Propane leaks can also create fire and explosion hazards.
A qualified technician can test the circuit under load and verify every safety control.
Is It Worth Repairing the Electric Mode?
Repairing electric mode is usually worthwhile when the tank remains structurally sound.
Switches, breakers, relays, thermostats, and heating elements are often replaceable. These repairs may cost far less than replacing the complete heater.
Electric mode also helps conserve propane at full-hookup campsites. It provides quiet heating without running the propane burner.
Replacement may make more sense when the tank leaks or has severe corrosion. Extensive wiring damage and several failed components can also increase repair costs.
Consider the heater’s age, condition, parts availability, and repair estimate. Compare those costs with a compatible modern replacement.
Do not replace the entire heater before confirming the actual failure. A forgotten exterior switch can imitate a major equipment problem.
Final Troubleshooting Checklist
Use this order to avoid missing simple causes.
- Confirm the water heater tank is full.
- Verify the bypass valves are correctly positioned.
- Confirm the RV has stable 120-volt power.
- Check the campground pedestal breaker.
- Check the interior electric water heater switch.
- Check the exterior electric rocker switch.
- Reset the dedicated breaker correctly.
- Press the applicable high-limit reset once.
- Inspect wiring for heat and corrosion.
- Test the element after disconnecting power.
- Check the element for a ground fault.
- Test the thermostat and ECO.
- Inspect the relay and control circuit.
- Call a technician for live voltage testing.
Most problems become clear before reaching the final steps. Start simple and move carefully.
Final Thoughts
When your RV water heater works on gas but not electric, begin with the power supply. Check the switches, breaker, tank water level, and shore power before testing parts.
A burned heating element is common, especially after draining or winterizing. Work carefully, avoid live electrical components, and contact a technician whenever the diagnosis requires energized testing.
Related FAQs
How Long Does an RV Water Heater Take to Heat on Electric?
Heating time depends on tank size, element wattage, incoming water temperature, and recent water use. Electric mode generally heats more slowly than propane, so allow adequate recovery time before assuming it has failed.
Will an RV Water Heater Work on Electric Without Propane?
A dual-mode RV water heater can normally operate on electric power without propane. The tank must be full, electric mode must be enabled, and suitable 120-volt AC power must be available.
Why Is My Electric Water Heater Switch On but the Water Is Cold?
The switch can remain illuminated even when the element receives no usable power. Common causes include a tripped breaker, failed element, bad relay, open thermostat, loose connection, or missing shore power.
Can a Burned-Out Heating Element Trip the Breaker?
A heating element that fails open may simply stop heating without tripping anything. An element that shorts internally or contacts the grounded tank can cause the circuit breaker to trip repeatedly.
Where Is the Electric Switch on an RV Water Heater?
The main switch may be on the RV’s interior control panel. Some models, especially certain Suburban heaters, also have a small electric rocker switch behind the exterior water heater access door.
Does an RV Water Heater Have a Fuse?
The 120-volt heating element normally receives protection through a circuit breaker. The 12-volt control board, switches, ignition system, or relay circuit may also use a separate fuse.
Why Does My RV Water Heater Work on Electric Only Sometimes?
Intermittent heating often points toward loose wiring, a worn switch, low campground voltage, a failing relay, or poor thermostat contact. Inspect connections before the intermittent fault becomes permanent.
Can I Leave My RV Water Heater on Electric All the Time?
Many owners leave electric mode active while connected to reliable shore power. The tank must remain full, the heater must operate correctly, and the manufacturer must allow continuous thermostat-controlled operation.
What Happens If I Turn On the Electric Water Heater With an Empty Tank?
The electric element may overheat and burn out very quickly because water is not surrounding it. Always fill the tank and purge air from a hot faucet before restoring electric power.
Should I Replace the Thermostat and Heating Element Together?
You do not normally need to replace both parts automatically. Test each component separately and replace only the failed part unless heat damage or model-specific guidance supports replacing both.
Why Does My Water Heater Work on Propane During a Power Outage?
The propane burner supplies the actual heat, while the RV battery powers its control board and ignition. The battery cannot normally operate the much larger 120-volt electric heating element.
Can Low Campground Voltage Stop Electric Water Heating?
Low voltage can reduce heating performance and increase current-related heat in connections. An electrical management system can help identify unsafe campground voltage before it damages RV equipment.
Why Is My RV Water Heater Warm but Not Hot on Electric?
The water may still be recovering after recent use. Other possibilities include low voltage, high hot-water demand, a failing element, a thermostat problem, or cold water entering through an incorrectly positioned bypass valve.
Can I Test the Heating Element Without Draining the Tank?
You can usually test the element’s resistance without draining the tank. Disconnect every power source and remove at least one element wire before taking resistance or ground-fault measurements.
Is Gas or Electric Faster for an RV Water Heater?
Propane mode generally heats water faster than electric mode. Using both modes may provide faster recovery when your heater’s manufacturer specifically allows simultaneous operation.

David Marshall shares travel route insights, mileage planning tips, and road-tested advice. His writing helps travelers understand distance, timing, and equipment choices. Every article is built around clarity and real-world usefulness.











