
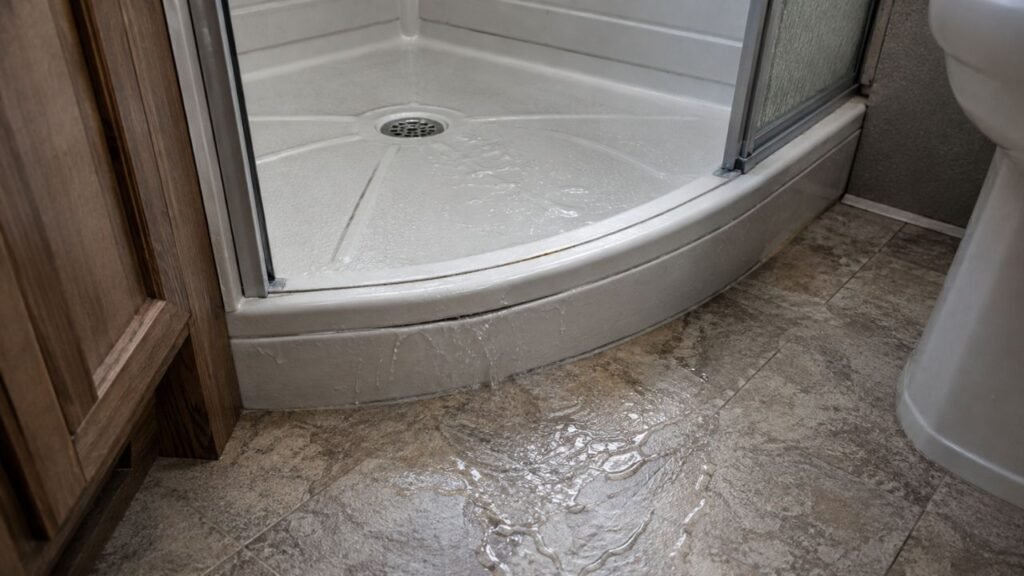
Your RV shower likely leaks only when you stand in it because your weight flexes the shower pan. That movement can open a hairline crack, separate old caulk, loosen the drain seal, or pull a plumbing connection slightly apart.
I know this type of leak can feel confusing because everything may stay dry during a normal inspection. I’ll help you test the shower under realistic conditions, locate the actual source, and choose a repair that lasts.
Key Takeaways
- Body weight can flex an unsupported RV shower pan.
- Flexing may open cracks that remain closed when the pan is empty.
- The drain gasket can separate when the pan moves downward.
- Failed caulk can open around corners, tracks, and wall joints.
- Water may travel before appearing on the RV floor.
- Fixing the movement is more important than simply adding sealant.
- Stop using the shower if the surrounding floor feels soft.
- Test every repair while someone stands inside the shower.
Why Does My RV Shower Leak Only Under My Weight?
An RV shower can look completely watertight until someone steps inside. Your weight pushes the lightweight shower pan downward, especially if the pan lacks proper support underneath.
That small amount of movement may be enough to open a hidden gap. The gap could be around the drain, inside a hairline crack, or along the wall-to-pan seam.
Once you step out, the pan returns to its original position. The crack or gap may close again, making the problem difficult to see during a normal inspection.
The visible puddle may also mislead you. Water can travel along the underside of the pan, drainpipe, flooring, or trim before reaching an open area.
For that reason, I recommend tracing the first wet spot instead of assuming the puddle marks the leak.
Most Common Causes of an RV Shower That Leaks When You Stand in It
Several shower problems can react to your weight. However, pan flex, drain movement, failed sealant, and hidden cracks are the most common causes.
The Shower Pan Flexes Under Your Weight
Most RV shower pans are made from lightweight plastic, ABS, acrylic, or fiberglass. These materials keep the RV lighter, but they need solid support underneath.
If the support is missing, uneven, or compressed, the pan may bend when you stand on it. You might notice squeaking, popping, softness, or visible movement around the drain.
This movement can repeatedly stress nearby joints. Even fresh sealant may eventually split if the pan continues flexing.
The Shower Pan Has a Hairline Crack
A thin crack may remain tightly closed while the shower is empty. When you step inside, the pan bends and pulls the crack open.
Water can then pass through the opening and collect beneath the shower. Once you step out, the crack closes and becomes difficult to find.
Hairline cracks often appear near the drain, along molded corners, or around areas that feel soft underfoot.
The Drain Gasket or Locknut Is Loose
The shower drain usually has a flange above the pan and a gasket underneath. A locknut holds the parts together and creates a watertight seal.
When the pan moves downward, it can disturb that seal. A dry gasket, loose nut, damaged washer, or misaligned drainpipe may then begin leaking.
This is especially likely when water appears directly beneath the drain or around the P-trap.
Caulk Has Separated Around the Shower Base
Old caulk can become dry, brittle, stained, or detached from the shower surface. Movement from the pan can stretch these weak joints further.
Common problem areas include the wall-to-pan joint, shower corners, door tracks, mounting rails, and the entry lip.
The seam may look acceptable when empty but open slightly under body weight.
The Shower Door or Curtain Lets Water Escape
Not every leak comes from beneath the pan. Water may be splashing outside the enclosure and traveling behind the shower trim.
Standing inside can change the direction of the shower curtain. Your body may also redirect water toward a door track, corner, or poorly sealed rail.
A missing splash guard or short curtain can allow water to escape only during actual use.
A Plumbing Connection Moves Beneath the Shower
The shower drainpipe, P-trap, or nearby fitting may be under sideways pressure. When the pan moves, the fitting can shift and open a small gap.
A loose compression nut or poorly aligned pipe may stay dry during a simple water test. It may leak only when your weight moves the pan and drain together.
The Floor Beneath the Shower Is Soft
Previous leaks can weaken the subfloor supporting the shower. As the floor deteriorates, the pan begins moving more than before.
You may notice softness near the shower entrance, darkened flooring, swollen trim, a musty odor, or increased creaking.
This problem needs prompt attention because continued moisture can spread into framing, cabinets, insulation, and the underbelly.
How to Find Where the RV Shower Is Leaking
The easiest way to find this leak is to test one area at a time. Avoid soaking the entire shower immediately because that makes the source harder to isolate.
Turn Off the Water and Dry Everything
Begin by turning off the water pump and disconnecting city water. Dry the shower pan, walls, surrounding floor, and accessible plumbing.
Remove any wet towels or bathmats. Open the shower access panel if your RV has one.
Place dry paper towels beneath suspected fittings. Even a small drip will leave a clear mark.
Inspect the Shower Without Running Water
Step into the completely dry shower while another person watches the pan. Shift your weight slowly around the center, corners, entrance, and drain.
Look for visible bending or gaps opening along the seams. Listen for squeaking, cracking, or popping sounds.
Ask the other person to watch the drain fitting underneath. The pipe should not move sharply when your weight changes position.
Test the Drain Without Wetting the Walls
Use a cup, jug, or small container to pour water directly into the drain. Keep the shower walls and pan edges dry.
First, test it while nobody stands inside. Then repeat the test while someone stands near the drain.
If it leaks only during the weighted test, the drain seal or pipe alignment is probably involved.
Test the Shower Pan Surface
Dry the area again before testing the pan itself. You can temporarily cover the drain and add a shallow amount of water.
Do not fill the pan deeply. RV shower pans are not designed to hold large amounts of standing water.
Watch underneath while someone carefully steps into the shower. If water appears away from the drain, inspect the pan for a crack.
Skip this test if the pan feels severely weak or the surrounding floor is soft.
Test the Wall Seams and Corners
Use a small cup or handheld sprayer to wet one wall section at a time. Begin low and work upward slowly.
Test the wall-to-pan joint, vertical corners, door frame, curtain rail, and shower controls separately.
Allow enough time between tests to see whether water appears outside.
Inspect Beneath the Shower
Use a flashlight to inspect through any plumbing access opening. You may find access through a cabinet, removable panel, storage compartment, or shower apron.
Look for fresh droplets, mineral trails, dark wood, swollen flooring, damp insulation, or rusty fasteners.
Try to identify the first wet location. Water found farther away may simply have traveled there.
Quick RV Shower Leak Diagnosis Table
The clues below can help you narrow down the cause before removing parts or applying new sealant.
| What You Notice | Most Likely Cause | How to Confirm It | Likely Repair |
| Pan bends or squeaks underfoot | Weak or missing pan support | Watch the base while someone steps inside | Add suitable support beneath the pan |
| Water appears around the drain | Loose gasket, flange, or locknut | Pour water directly into the drain | Reseal or replace the drain components |
| Leak occurs only with weight | Hairline pan crack | Inspect while the pan is flexed | Support and patch or replace the pan |
| Water appears beside the enclosure | Failed caulk or door track seal | Wet one seam at a time | Remove and replace the failed sealant |
| Water runs from a shower corner | Curtain or splash problem | Observe water movement during use | Reposition the curtain or add a splash guard |
| Drainpipe moves when stepped on | Misaligned P-trap or fitting | Watch the plumbing during a dry weight test | Realign and tighten the plumbing |
| Floor feels soft around the shower | Water-damaged subfloor | Check for softness, staining, and odors | Repair the damaged structure |
How to Fix an RV Shower Pan That Flexes
Resealing the shower will not provide a lasting repair if the pan continues moving. You need to reduce the movement before repairing cracks, drains, or seams.
Check How Much the Pan Moves
Stand in several positions and note where the pan feels weakest. Pay close attention around the drain and near the shower entrance.
A very small amount of movement may be normal in some RV showers. However, visible bending or opening seams needs correction.
Find Access Beneath the Pan
Look for a removable access panel near the shower. Some RVs provide access through a nearby cabinet, closet, storage compartment, or decorative apron.
Avoid cutting the wall or floor until you understand what is behind it. Hidden wiring, water lines, or framing may be nearby.
Add Proper Support Beneath the Pan
The best support method depends on the pan design and available access. Rigid blocking, manufacturer-approved supports, or carefully applied low-expansion foam may be suitable.
The support should contact the underside evenly without forcing the pan upward. Concentrated pressure can create new stress points.
Be especially careful with expanding foam. Too much foam can lift, bow, or distort the shower base.
When possible, follow the shower or RV manufacturer’s recommended support method.
Keep the Drain Properly Aligned
Supporting the pan may slightly change its position. Make sure the drain remains centered over the P-trap without sideways tension.
The drainpipe should not pull the flange downward or sideways. Misalignment can create another leak even after the pan becomes stable.
Retest the Pan Before Sealing It
Step into the shower again after adding support. Shift your weight across the entire floor.
Confirm that the pan feels stable and the drainpipe remains still. Only then should you reseal the drain, repair cracks, or replace caulk.
How to Repair a Cracked RV Shower Pan
A cracked pan can sometimes be repaired, but the correct method depends on its material and condition. Always stop the flexing before patching the damaged area.
Clean and Mark the Crack
Dry the pan completely and clean away soap film, dirt, and old sealant. A clean surface makes the crack easier to inspect.
Mark both ends with removable tape or a washable marker. This helps you see whether the crack grows later.
Identify the Shower Pan Material
RV shower pans may be made from fiberglass, acrylic, ABS, or another plastic. Repair products are not always compatible with every material.
Check the RV manual, manufacturer information, or markings beneath the pan. Using the wrong product can result in poor bonding.
Support the Area Beneath the Crack
A surface patch cannot survive repeated bending. Add support beneath the damaged area before completing the cosmetic repair.
The pan should feel firm when you stand near the crack. Avoid creating a hard pressure point directly beneath it.
Repair a Small Crack
Small, stable cracks may be repaired with a compatible shower-pan repair kit. Follow the preparation, curing, and temperature instructions carefully.
Some repairs involve epoxy, fiberglass cloth, plastic welding, or a two-part compound. The correct choice depends on the pan material.
Allow the repair to cure completely before applying weight or water.
Replace a Severely Damaged Pan
Replacement is usually safer when the crack is long, spreading, located around the drain, or surrounded by weak material.
You should also consider replacement when the pan has several cracks or previous patches keep failing.
A new shower pan still needs proper support. Otherwise, the same problem may return.
How to Reseal a Loose RV Shower Drain
A shower drain must stay sealed while handling normal movement and vibration. Dry gaskets, loose nuts, and misaligned pipes often cause weight-related leaks.
Inspect the Drain Flange From Above
Look for a gap around the drain flange. Gently check whether the flange turns, rocks, or lifts by hand.
Cracked sealant or movement around the flange suggests the seal has failed.
Do not force the flange if the surrounding pan feels brittle.
Inspect the Gasket and Locknut Below
Use the access opening to inspect the underside. Most drains use a rubber gasket, friction washer, and large locknut.
Look for a folded gasket, loose nut, dried rubber, or damaged threads. Check whether the drainpipe is pulling sideways.
Remove and Clean the Drain Assembly
If the seal has failed, remove the drain according to its design. Clean away old putty, silicone, residue, and mineral buildup.
Avoid scraping aggressively with metal tools. Thin plastic pans can scratch or crack easily.
Replace Damaged Sealing Parts
Install a new gasket or washer when the existing one feels hard, cracked, flattened, or distorted.
Use a sealing product compatible with both the drain and shower-pan materials. Some drain manufacturers specify plumber’s putty, while others require silicone.
Tighten the Drain Carefully
Tighten the locknut enough to compress the gasket evenly. Do not overtighten it.
Too much force can distort the gasket, damage the threads, or crack the shower pan.
Keep the drainpipe aligned while tightening. It should not place sideways pressure on the fitting.
Test Before Closing the Access Panel
Pour water directly into the drain while watching below. Repeat the test while someone stands inside.
Test several foot positions because movement may vary across the pan.
Leave the access area open until everything remains completely dry.
How to Replace Failed Caulk Around an RV Shower
New caulk will not bond properly to loose sealant, soap residue, or moisture. Take your time preparing the surface before applying a fresh bead.
- Remove all loose or deteriorated caulk.
- Use a plastic scraper to protect the shower surface.
- Clean away soap film and adhesive residue.
- Allow the joint to dry completely.
- Stabilize the shower pan before resealing it.
- Choose a flexible, waterproof, compatible sealant.
- Apply one continuous bead without breaks.
- Push the sealant firmly into the joint.
- Smooth the bead without making it too thin.
- Follow the complete curing time before showering.
- Test the seam while someone stands inside.
Do not simply spread new silicone over old caulk. The top layer may look clean while remaining poorly attached underneath.
Also remember that some shower tracks need drainage openings. Avoid sealing intentional weep holes that allow trapped water to escape.
Could Water Be Escaping From the Shower Door or Curtain?
Water outside the enclosure can look exactly like a plumbing leak. It may flow under trim, behind the shower apron, or beneath nearby flooring.
Watch the curtain while someone showers. It should remain inside the pan and extend low enough to control splashing.
Check whether the shower spray hits the curtain directly. Air movement from a roof vent can also pull a lightweight curtain outward.
For a shower door, inspect the lower track, corners, screws, seals, and drainage holes. A loose track can allow water underneath.
Look for missing sealant where the enclosure meets the wall and shower pan. Pay particular attention to the lower corners.
A small splash guard may help if water repeatedly escapes from one corner. However, it will not repair a cracked pan or leaking drain.
What Should I Check Beneath the RV Shower?
Hidden moisture can cause more damage than the visible puddle suggests. Inspect the area carefully before closing any access panel.
- Loose P-trap connections
- Cracked plastic drain fittings
- Misaligned drainpipes
- Drips from supply-line connections
- Damp or compressed insulation
- Swollen plywood or particleboard
- Dark stains on wood
- Rusted screws or metal brackets
- Mold or musty odors
- Water trails along pipes
- Sagging underbelly material
- Soft flooring near the shower
- Previous patches or sealant repairs
Dry the area thoroughly after finding the leak. A fan or dehumidifier can help remove lingering moisture where air can circulate safely.
Replace soaked insulation when it cannot dry properly. Wet insulation may hold moisture against the floor for a long time.
Can I Keep Using the Shower Until It Is Repaired?
I would avoid using the shower until you identify the leak. Even a small amount of water can spread into areas you cannot easily see.
Repeated showering may soak the subfloor, wall panels, cabinetry, framing, or enclosed underbelly. Repair costs can increase quickly once wood begins swelling or rotting.
Drying the visible puddle does not mean the hidden space is dry. Water may remain trapped beneath the pan or inside insulation.
Using campground shower facilities temporarily is inconvenient, but it can prevent a much larger repair.
Temporary Fixes Versus Permanent Repairs
Temporary measures may help confirm the source or control splashing. However, they should not replace repairs to structural movement, plumbing, or damaged materials.
| Temporary Measure | What It May Help With | Why It Is Not Permanent |
| Installing a splash guard | Water escaping around a door or curtain | It cannot repair a cracked or flexing pan |
| Applying waterproof tape | Testing a suspected seam | Adhesion may fail in heat and moisture |
| Avoiding one section of the pan | Reducing pressure on a crack | The unsupported area can continue weakening |
| Tightening an accessible fitting | A slightly loose connection | Worn gaskets may still need replacement |
| Adding sealant over existing caulk | Briefly slowing a seam leak | New sealant may not bond to old material |
| Using campground showers | Preventing further water exposure | The original defect remains unresolved |
A proper repair should address both the leak and the reason it developed.
Tools and Materials You May Need
The exact tools depend on the source of the leak. Gather only what you need after completing the diagnosis.
- Flashlight or inspection light
- Dry paper towels
- Plastic cup or small water container
- Screwdrivers
- Adjustable pliers
- Drain wrench
- Plastic scraper
- Compatible waterproof sealant
- Replacement drain gasket
- Shower-pan repair kit
- Moisture meter
- Suitable pan-support material
- Cleaning cloths
- Rubbing alcohol, when material-safe
- Protective gloves
- Eye protection
Check material compatibility before using cleaners, adhesives, foam, epoxy, or silicone.
Mistakes to Avoid When Repairing the Leak
A rushed repair may hide the symptom without solving the movement underneath. These common mistakes often lead to another leak.
Sealing the Pan Before Adding Support
Fresh sealant may look perfect while the shower is empty. Once you step inside, the unsupported pan can pull the new bead apart.
Correct the flexing before resealing the seams.
Applying New Caulk Over Old Sealant
Old caulk may contain moisture, soap, mildew, or loose edges. New sealant cannot form a reliable bond over that surface.
Remove the failed material and clean the joint thoroughly.
Overtightening the Drain
Tightening the drain more is not always the answer. Too much force can crack the pan or squeeze the gasket out of position.
Use controlled pressure and confirm the gasket compresses evenly.
Filling the Entire Cavity With Expanding Foam
Expanding foam can create strong upward pressure. Excessive foam may lift the pan, alter the slope, or misalign the drain.
Use a suitable low-expansion product only when appropriate. Apply it carefully through controlled access points.
Assuming the Puddle Shows the Leak Location
Water often follows the easiest path. It may travel along a pipe, floor edge, trim piece, or underbelly sheet.
Trace the first wet area instead of beginning repairs at the final puddle.
Patching a Crack Without Stopping the Flex
A patch over a moving crack will remain under stress. It may separate, split, or leak again.
Support the pan before applying any crack repair.
Closing the Access Panel Too Soon
A repair may remain dry during one quick test but leak under full body weight.
Test it repeatedly before reinstalling trim, panels, or insulation.
How to Prevent the RV Shower From Leaking Again
A few simple inspections can help you catch movement and seal failure before water reaches the floor.
- Check the shower pan for movement several times each season.
- Inspect the drain flange for looseness.
- Look for gaps around shower corners and wall panels.
- Keep door-track drainage openings clear.
- Make sure the curtain remains inside the pan.
- Dry escaped water immediately.
- Avoid concentrated pressure near a weak drain area.
- Inspect plumbing after rough travel.
- Check beneath the shower after winter storage.
- Replace brittle sealant before it separates.
- Repair soft flooring promptly.
- Use cleaners that will not damage the pan or caulk.
Pay attention when the shower begins squeaking more than usual. Increased noise can be an early sign that support is weakening.
When Should I Call an RV Technician?
You may be able to replace caulk or a drain gasket yourself. However, some shower leaks require more extensive access and repair.
Call an RV technician when the subfloor feels soft, the shower pan must be removed, or the drain cannot be reached safely.
Professional help is also wise when the crack is large, the floor is rotten, mold is present, or water has entered an enclosed underbelly.
You should also seek help when plumbing needs realignment. Forcing a misaligned drain into place can create stress and future leaks.
Final Thoughts
When an RV shower leaks only while you stand inside, movement is the strongest clue. Begin by checking the pan support, drain assembly, hairline cracks, and surrounding seams.
Take your time and test one area at a time. Once you correct the movement causing the leak, your sealant, gasket, or pan repair has a much better chance of lasting.
Related FAQs
Why Does My RV Shower Pan Creak When I Stand on It?
Creaking usually means the shower pan is rubbing against uneven support or bending under your weight. Inspect beneath the pan before cracks or drain leaks develop.
Can I Use Silicone to Fix a Cracked RV Shower Pan?
Silicone may seal some joints, but it is not usually a reliable structural repair for a moving crack. Stabilize the pan and use a material-compatible repair product.
Should an RV Shower Pan Flex?
A small amount of movement may occur in lightweight RV showers. Noticeable bending, squeaking, opening seams, or movement around the drain should be investigated.
How Do I Know Whether My RV Shower Drain Is Leaking?
Pour water directly into the drain without wetting the walls or pan edges. Repeat the test while someone stands inside and watch the connection underneath.
Can a Loose P-Trap Leak Only When Someone Showers?
Yes. Your weight can move the shower pan and pull a poorly aligned P-trap or loose fitting apart enough to release water.
What Sealant Should I Use Around an RV Shower?
Use a waterproof, flexible sealant compatible with the shower pan, wall panels, and enclosure materials. Always check the product label before applying it.
Can Expanding Foam Support an RV Shower Pan?
Low-expansion foam may support some shower pans when applied correctly. Too much foam can lift or distort the pan, so use it cautiously.
How Much Does It Cost to Repair an RV Shower Leak?
Simple caulk or gasket repairs may cost very little. Pan replacement, plumbing work, and damaged subfloor repairs can become considerably more expensive.
Can an RV Shower Leak Damage the Underbelly?
Yes. Water can soak the flooring, insulation, framing, and enclosed underbelly material. Trapped moisture may cause odors, mold, swelling, and structural damage.
Why Is Water Appearing Far From My RV Shower?
Water can travel along pipes, flooring, trim, framing, or underbelly material before becoming visible. The puddle may be several feet from the actual leak.

David Marshall shares travel route insights, mileage planning tips, and road-tested advice. His writing helps travelers understand distance, timing, and equipment choices. Every article is built around clarity and real-world usefulness.











