
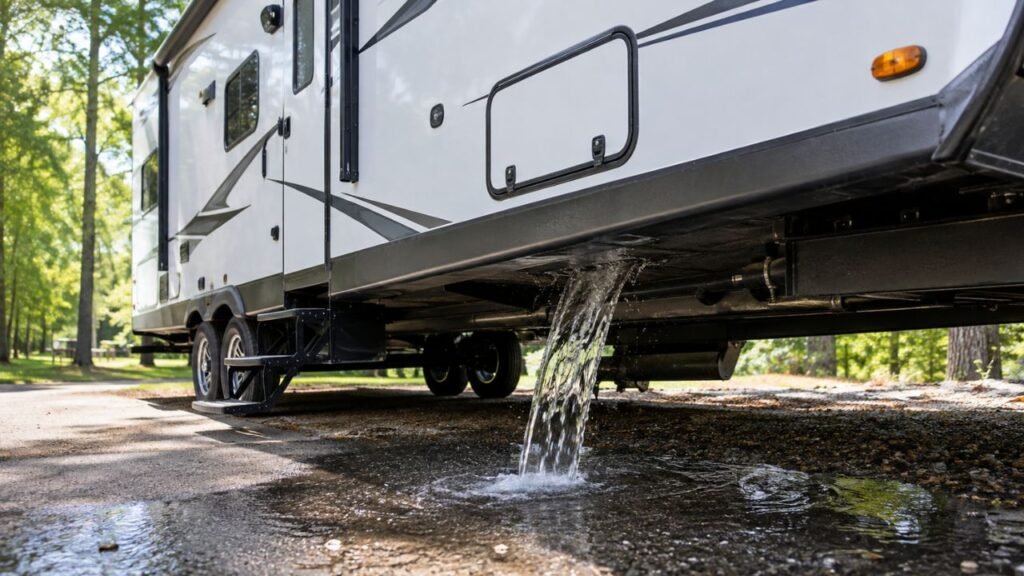
When water pours from your RV underbelly, immediately disconnect city water, switch off the water pump, and open a faucet to relieve pressure. Stop using your sinks, shower, and toilet until you identify whether the leak involves fresh, gray, or black water.
I know seeing water suddenly rush from beneath your RV can feel alarming. I’ll help you stop the flow, locate the source, drain trapped water safely, and protect your RV from further damage.
Key Takeaways
- Disconnect city water and turn off your water pump immediately.
- Open a faucet to release pressure from your RV plumbing.
- Stop using sinks, showers, and toilets until identifying the leak.
- Determine whether the water is fresh, gray, black, or rainwater.
- Never stand beneath a sagging underbelly filled with trapped water.
- Remove saturated or contaminated insulation before closing the underbelly.
- Repair and test the plumbing before reinstalling the bottom covering.
- Call a professional when wastewater, electricity, or structural damage is involved.
Why Is Water Pouring From My RV Underbelly?
Water pouring from the underbelly usually means a plumbing line, tank, drain connection, water heater component, or exterior seal has failed. The visible exit point may not be directly beneath the actual leak.
Your RV’s enclosed underbelly can hide water for quite some time. Water may travel across insulation, frame rails, pipes, ducts, and wiring before finally escaping.
That means a leak near your kitchen might drip several feet away. The same thing can happen with leaks near your water heater or bathroom.
A sudden rush of water often means the underbelly was holding it. Once the material sagged, tore, or opened around a fastener, the trapped water escaped.
Do not assume the problem has stopped because the pouring slows down. A damaged pipe or tank may continue leaking whenever you restore water pressure.
What Should I Do Immediately?
Your first priority is stopping more water from entering the underbelly. You can investigate the exact failure after the system is safely shut down.
Turn Off Every Water Source
Disconnect your city-water hose or close the campground spigot immediately. Do not depend entirely on an interior selector valve.
Next, switch off your RV’s 12-volt water pump. The pump may keep feeding a broken fitting or damaged pipe.
Also stop filling your fresh water tank. If your RV has an automatic tank-fill system, turn that feature off.
Check that nobody inside continues using the plumbing. Even one flushed toilet or running faucet can add more water.
Relieve the Plumbing Pressure
Open a cold-water faucet after shutting off the water supply. Let it run until the water flow completely stops.
You can open a second faucet to help the pressure release faster. Open both hot and cold sides when you suspect a water-heater leak.
Do not remove a water-heater drain plug while the tank is hot. Never loosen pressurized fittings before releasing system pressure.
Stop Using Plumbing Fixtures
Avoid using your kitchen sink, bathroom sink, shower, toilet, dishwasher, or washing machine. You do not yet know which system is leaking.
Using a fixture could send more water into a broken drain pipe. It could also overfill a damaged gray or black tank.
Place a temporary note near the bathroom when other people are present. That small reminder may prevent an accidental toilet flush.
Protect the Electrical System
Disconnect shore power when water is near electrical wiring or equipment. Switch off the generator and inverter when necessary.
Do not touch wet outlets, exposed wiring, converter components, or electrical panels. Water may have traveled beyond the visible wet area.
You should also keep water away from battery terminals and heating equipment. Call a qualified technician when electrical components have become wet.
Identify What Type of Water Is Leaking
The water’s smell, appearance, temperature, and timing can reveal useful clues. However, wear gloves and avoid direct contact until you know what it is.
Fresh Water
Fresh water is usually clear and mostly odorless. It may feel warm when the leak involves your water heater.
Possible fresh-water sources include:
- Pressurized hot or cold water lines
- Loose faucet or toilet supply connections
- A damaged water pump or strainer
- A leaking fresh water tank
- A disconnected overflow hose
- A cracked exterior shower fitting
- A leaking city-water inlet
- A failed water-heater fitting
A fresh-water leak often increases while the pump runs. It may also worsen after connecting to campground water.
Gray Water
Gray water comes from sinks, showers, washing machines, and some appliances. It may appear cloudy, soapy, greasy, or slightly discolored.
The odor is usually unpleasant but different from sewage. Food particles, shampoo, soap, and grease may also appear.
Gray water underneath your RV could indicate:
- A loose P-trap
- A separated drainpipe
- A cracked shower drain
- A loose tank fitting
- A damaged gray tank
- An overflowing gray tank
- A failed tank vent connection
Stop using every sink and shower until locating the leak. A partially full tank can release several gallons very quickly.
Black Water
Black water contains toilet waste and requires more caution. It may have a strong sewage odor or contain toilet paper.
Do not continue using the toilet when black water is possible. Keep children and pets away from the affected area.
Wear disposable gloves, eye protection, and protective clothing. Wash contaminated skin immediately with soap and clean water.
A leaking black-water system may involve:
- A cracked black tank
- A damaged toilet flange
- A separated toilet drain
- A loose tank outlet fitting
- A broken dump-valve connection
- A damaged tank vent fitting
Professional cleanup is usually the safest choice for significant contamination.
Rainwater or Air-Conditioner Condensation
Not every puddle underneath an RV comes from plumbing. Air conditioners normally create condensation during warm, humid weather.
Rainwater can also enter around roof vents, windows, slide-outs, wall openings, and damaged exterior seals. It may then collect inside your underbelly.
Consider when the water first appeared. A leak after heavy rain may point toward exterior water entry.
Water appearing only while the air conditioner runs may be condensation. However, a blocked drain path can direct that moisture somewhere unusual.
Quick Water Identification Table
Use the following clues to narrow your search before opening the underbelly. These signs are helpful, but a complete inspection is still necessary.
| Water clue | Likely source | Stop using | First inspection area |
| Clear water while connected to city water | Pressurized pipe or fitting | City-water connection | Inlet, water heater, fixtures, and supply lines |
| Clear water while the pump operates | Fresh-water plumbing leak | Water pump | Pump, strainer, tank, and pressure lines |
| Warm or hot water | Water-heater system | Water heater and water supply | Drain plug, valves, fittings, and tank |
| Soapy or cloudy water | Gray-water system | Sinks, shower, and appliances | P-traps, drains, gray tank, and fittings |
| Water with a sewage odor | Black-water system | Toilet | Toilet flange, black tank, and outlet connections |
| Water after rain | Roof or exterior seal | Not always fixture-related | Roof, windows, slide-outs, and wall openings |
| Water during tank filling | Overflow, vent, or fill system | Fresh-tank fill | Overflow hose, vent, fill line, and tank fittings |
| Water only when one fixture runs | Fixture supply or drain | That individual fixture | Connections directly beneath that fixture |
Where Should I Look for the Leak?
Begin directly above the wettest underbelly section, but inspect surrounding areas too. Water often travels before becoming visible underneath your RV.
Under Sinks and Inside Cabinets
Open every cabinet containing plumbing. Use a flashlight to inspect both supply lines and drain connections.
Feel around faucet fittings, valves, P-traps, and hose connections. A dry paper towel can reveal tiny leaks more easily.
Look for swollen wood, stains, damp flooring, or peeling material. These signs may lead you toward the original leak.
Around the Toilet and Shower
Inspect the toilet’s water supply connection and flush valve. Check whether the floor feels soft near the toilet base.
Look beneath accessible shower panels when your RV has them. A loose shower drain can release significant water beneath the floor.
Also inspect the shower pan for cracks. Small cracks may leak only while someone is standing inside.
Near the Water Pump and Strainer
Your water pump is a common leak location. Inspect the pump housing, inlet strainer, hose connections, and outlet fitting.
Clear plastic strainer bowls can crack during freezing weather. Their seals may also leak after cleaning or reinstallation.
Look for water collecting beneath the pump. A loose threaded adapter can spray water whenever the pump builds pressure.
Around the Water Heater
Inspect every visible fitting near the water heater. Check the bypass valves, hot outlet, cold inlet, and pressure-relief valve.
Look outside around the drain plug or anode rod. A loose plug or damaged washer can leak continuously.
Water may also escape from a corroded tank seam. Tank replacement is normally required when the tank itself has failed.
Around the Fresh Water Tank
Inspect the fresh tank while it contains some water. Look around seams, mounting points, fill hoses, vents, and drain fittings.
A leak near the top may appear only when the tank is full. A bottom fitting may leak even with very little water.
Check whether the overflow hose is still connected. A disconnected hose can empty water directly into the underbelly.
Around the Gray and Black Tanks
Wastewater tanks can crack or separate from their fittings. Damage may appear after road impacts, freezing, or overfilling.
Inspect tank outlets, vent connections, drainpipes, and mounting supports. A tank may leak only when its weight increases.
Never crawl beneath an unsupported or sagging tank. A full wastewater tank can be extremely heavy.
Near Slide-Outs, Roof Penetrations, and Exterior Openings
Inspect exterior areas when the leak follows rain or washing. Check roof seams, vents, windows, slide-outs, and service openings.
Rainwater can enter near the roof and appear underneath later. This sometimes makes an exterior leak look like plumbing damage.
Look for interior stains above the affected area. Damp walls or cabinets may reveal the water’s path.
Common Causes of Water Pouring From an RV Underbelly
Several failures can send water into an enclosed RV underbelly. Knowing the common causes can help you investigate more efficiently.
A Loose or Separated Plumbing Fitting
Road vibration can loosen threaded fittings, clamps, and plastic connectors. A fitting may remain dry until the system becomes pressurized.
Sometimes tightening the connection solves the problem. However, do not overtighten plastic fittings because they can split.
Replace damaged washers, cracked adapters, or deformed seals. Use fittings designed for your specific RV plumbing system.
A Split or Frozen Water Line
Water expands as it freezes inside pipes and fittings. The resulting crack may remain hidden until spring.
A frozen line can split behind cabinets, inside walls, or above the underbelly. The leak may appear only after reconnecting city water.
Inspect neighboring fittings too. Freeze damage often affects more than one component.
A Failed Water-Heater Component
Water-heater leaks can develop around valves, plugs, fittings, and tank seams. The escaping water may be warm or hot.
A leaking pressure-relief valve can indicate excessive pressure or temperature. Do not simply plug or disable that safety valve.
Check the manufacturer’s procedures before repairing your water heater. Gas and electrical connections require additional caution.
An Overflowing Fresh Water Tank
A fresh tank can overflow through a blocked or disconnected vent system. Incorrect selector-valve positions may also cause unexpected filling.
Some RVs allow city water to fill the fresh tank. A faulty check valve may send water into the tank continuously.
Watch the tank level while connected to city water. Unexpected level increases suggest a fill-system or check-valve problem.
A Cracked Fresh, Gray, or Black Tank
Plastic tanks can crack from impact, freezing, stress, or poor support. Small cracks may open wider as the tank fills.
A tank leak may stop after its level falls. This does not mean the damage has repaired itself.
Tank repair suitability depends on the plastic type and crack location. Replacement is often safer for large or stressed cracks.
A Loose Drain or Tank Connection
Drainpipes and tank fittings can shift during travel. A pipe may pull away from its rubber grommet or threaded connection.
These leaks frequently appear while using one specific fixture. Running each drain separately can help identify the source.
Support repaired drainpipes properly. Unsupported pipes may separate again during future travel.
Rainwater Trapped Above the Underbelly
Damaged roof or sidewall seals may allow rainwater inside. The water can slowly move downward and collect beneath the floor.
This type of leak may continue dripping after the rain stops. Wet insulation can hold moisture for several days.
Repair the entry point before closing the underbelly. Otherwise, the same problem will return during the next storm.
How Can I Tell Whether the Leak Is Pressurized?
A pressurized leak normally appears while city water or the pump supplies pressure. It often slows after both sources are turned off.
Common signs include:
- The water pump runs with every faucet closed.
- The pump cycles on every few minutes.
- Water flow increases after connecting city water.
- The leak stops after opening a faucet.
- A plumbing pressure gauge shows an unexplained drop.
- You hear spraying or hissing behind a wall.
- Water appears without anyone using a drain.
- The affected water is clear and mostly odorless.
You can test the pump after exposing the suspected area. Add enough water to the fresh tank, then run the pump briefly.
Watch every visible connection while pressure builds. Turn the pump off immediately when water appears.
Do not leave the system pressurized during testing. A small leak can quickly soak replacement insulation.
Should I Puncture a Sagging RV Underbelly?
A sagging underbelly may contain several gallons of trapped water. Releasing that weight is important, but blindly puncturing the material can cause more damage.
Plumbing lines, tanks, electrical wiring, propane lines, and heating ducts may sit directly above the covering. A knife or drill could strike one of them.
Whenever possible, partially remove the underbelly from an accessible edge. This gives you more control over the water release.
When a controlled drainage opening becomes unavoidable, first study the component layout. Choose the lowest safe location away from known equipment.
Make only a small opening and enlarge it gradually when necessary. Place a large container underneath before releasing the water.
Never stand directly beneath the sagging section. The material or wet insulation may suddenly fall.
How to Open and Drain the RV Underbelly Safely
Take photographs before removing panels, fasteners, tape, or insulation. Those pictures will make reassembly much easier later.
Prepare the Work Area
Before opening anything:
- Park the RV on firm, level ground.
- Apply the parking brake.
- Chock the wheels securely.
- Disconnect city water.
- Turn off the onboard pump.
- Relieve plumbing pressure.
- Disconnect shore power when appropriate.
- Keep children and pets away.
- Wear gloves and eye protection.
- Place containers beneath the lowest area.
- Prepare towels and absorbent material.
- Use jack stands when lifting is required.
Never rely only on a hydraulic or scissor jack. Support the RV correctly before working underneath it.
Release the Trapped Water
Begin through an existing opening whenever possible. You may loosen a corner, remove a fastener, or lower one edge.
Support the sagging material as you work. The combined weight of water and insulation can be surprising.
Release water slowly into containers. Do not allow contaminated water to spread across your campsite.
Follow campground and local disposal rules. Gray and black water must enter approved disposal systems.
Lower the Underbelly Material Gradually
Remove fasteners in a controlled sequence. Support the sheet so it does not tear around remaining screws.
Wet fiberglass insulation may drop when the covering opens. Wear protective clothing and avoid breathing disturbed fibers.
Label unusual fasteners or brackets during removal. Different sections may use different attachment methods.
Photograph the Exposed Area
Take wide photographs before moving plumbing or insulation. Then capture close views of every damaged connection.
Photographs help you remember:
- Wire routing
- Pipe placement
- Insulation thickness
- Tank support locations
- Fastener positions
- Overlapping panel edges
- Heating duct placement
- Original tape locations
These records are also useful for warranty or insurance claims.
How Do I Find the Exact Leak Source?
Keep the underbelly open while testing each water system separately. Testing everything together can make the source harder to identify.
Test the Water Pump System
Add a limited amount of water to the fresh tank. Make sure every faucet and drain remains closed.
Switch on the pump and observe the exposed plumbing. Listen for spraying, dripping, hissing, or repeated pump cycling.
Turn the pump off immediately after finding the leak. Mark the location before the area becomes wetter.
Test the City-Water System
Only test city water after inspecting exposed plumbing. Install a water-pressure regulator before reconnecting the hose.
Begin with low pressure and increase it gradually. Have another person watch the suspected connections.
Do not leave the hose unattended. Shut the supply off immediately when water appears.
Test One Fixture at a Time
Operate each fixture separately so you can isolate its supply and drain connections:
- Kitchen sink
- Bathroom sink
- Shower
- Toilet
- Exterior shower
- Washing machine
- Dishwasher
- Ice-maker line
- Outdoor kitchen sink
Use only a small amount of water during each test. Allow time for hidden drips to appear underneath.
Test the Drain System
Test drains after ruling out pressurized lines. Pour a small amount of water into one fixture.
Watch the P-trap, drainpipe, tank connection, and underbelly area. Repeat the process with each remaining fixture.
A drain leak normally appears only while water passes through it. A tank leak may appear after water collects inside.
Use Food Coloring Carefully
Food coloring can help trace water from specific drains. Use a different color for separate fixtures when necessary.
For example, add one color to the kitchen sink. Use another color in the shower drain.
Do not add coloring to your fresh-water plumbing. It may stain tanks, fixtures, or internal components.
Avoid using food coloring in the toilet when contamination already exists. Professional inspection may be safer in that situation.
Can I Repair the Leak Myself?
Some underbelly leaks are simple, while others require tank removal or structural work. Your repair choice should depend on access, contamination, and personal experience.
Repairs Many RV Owners Can Handle
You may be comfortable handling:
- Tightening an accessible plumbing fitting
- Replacing a cracked flexible hose
- Replacing a water-pump strainer bowl
- Installing a new fitting washer
- Replacing a damaged hose clamp
- Repairing an accessible P-trap
- Reconnecting an overflow hose
- Replacing an accessible drainpipe section
- Resealing a removable underbelly panel
- Replacing uncontaminated insulation
Always confirm the system is depressurized before beginning. Use parts approved for potable water where required.
Repairs That Usually Need Professional Help
Professional service is usually better for:
- Cracked gray or black tanks
- Failed water-heater tanks
- Hidden leaks beneath flooring
- Damaged structural framing
- Water-soaked electrical equipment
- Large areas of mold growth
- Plumbing behind sealed walls
- Tank removal or replacement
- Damaged propane components
- Warranty-covered plumbing failures
A technician may locate the leak with less disassembly. That can reduce additional damage to your RV.
How Do I Dry the RV Underbelly After a Leak?
Fixing the leaking component is only the first part. Every wet material must dry before you close the underbelly again.
Remove Saturated Insulation
Pull out insulation that is dripping, compressed, contaminated, or moldy. Wet fiberglass often holds moisture against the floor and frame.
Do not assume thick insulation will dry while sealed inside. The outer surface may feel dry while deeper layers remain wet.
Bag contaminated insulation separately. Follow local disposal rules when gray or black water was involved.
Increase Airflow
Position fans or air movers toward the exposed underbelly. Keep access areas open to create cross-ventilation.
Warm, dry weather can help accelerate the process. However, avoid applying unsafe heat near wiring, plastic, or insulation.
Move fans periodically to reach hidden corners. Water may remain around tank supports or framing joints.
Use a Dehumidifier
Run a dehumidifier inside the RV when moisture reached the floor or cabinetry. Close windows and doors while using it indoors.
Empty the collection tank regularly. Continue operating it until moisture levels stabilize.
A dehumidifier will not replace direct airflow underneath. Use both methods when the affected area is extensive.
Check the Subfloor and Framing
Inspect wood for swelling, discoloration, softness, and separation. Probe questionable areas gently with a blunt tool.
Look for rust on steel framing and fasteners. Surface rust should be cleaned and treated before closing the underbelly.
Also inspect wiring connections and metal terminals. Corrosion may develop after the visible moisture disappears.
Confirm Everything Is Dry
Use a moisture meter when one is available. Compare the affected area with known dry sections nearby.
Do not judge dryness only by touching the surface. Wood and insulation can remain damp internally.
Allow additional drying time when you still notice:
- Musty odors
- Cool, damp surfaces
- Condensation
- Darkened wood
- Flexible or swollen flooring
- Moisture around fasteners
- Damp insulation fibers
Close the underbelly only after the readings and conditions remain stable.
When Is Wet Insulation Unsafe to Keep?
Replace underbelly insulation when drying cannot restore its performance or cleanliness.
Remove insulation that is:
- Saturated or dripping
- Compressed and misshapen
- Contaminated by gray water
- Contaminated by black water
- Producing a musty odor
- Showing visible mold growth
- Separating from its facing
- Holding moisture after extended drying
- Mixed with dirt or road debris
- Touching corroded electrical components
- Damaged by rodents or insects
- Unable to return to its original thickness
Replacing questionable insulation costs less than repairing hidden rot later.
How to Repair and Reseal the Underbelly
Repair the leak and pressure-test the system before replacing insulation. Closing too early can hide another failed connection.
Replace Damaged Insulation
Match the original insulation type and approximate thickness. Do not tightly compress fiberglass because compression reduces its effectiveness.
Keep insulation away from hot exhaust components and prohibited areas. Follow the RV manufacturer’s original arrangement whenever possible.
Secure insulation without pinching water lines or electrical wiring. Leave valves and serviceable fittings accessible when practical.
Repair Small Coroplast Openings
Clean and dry the area before applying underbelly repair tape. Dirt, moisture, and oil can prevent reliable adhesion.
Round the corners of patch material to reduce peeling. Extend the patch beyond every side of the damaged opening.
Large tears may need mechanical support. A patch alone might not hold wet or heavy insulation.
Reinstall the Underbelly Cover
Lift the covering gradually and confirm nothing becomes trapped. Check plumbing, wiring, ducts, and tank supports before installing fasteners.
Replace missing or damaged washers. Wide washers distribute pressure and reduce tearing around screw holes.
Avoid overtightening fasteners. Crushing the Coroplast can weaken it and create future openings.
Seal Edges and Penetrations
Seal repaired seams using materials suitable for RV underbellies. Overlap tape carefully to direct water away from openings.
Close gaps around wires, pipes, and frame penetrations. However, never block required vents, drains, or overflow outlets.
Confirm that overflow hoses extend outside the underbelly. They should not discharge above insulation or structural materials.
What Damage Can Trapped Water Cause?
Water hidden inside your RV can continue causing damage after the visible leak stops. Quick drying is just as important as repairing the source.
Possible damage includes:
- Rotten subflooring
- Mold and mildew growth
- Rusted steel framing
- Corroded electrical connections
- Damaged insulation
- Swollen cabinets
- Warped flooring
- Delaminated panels
- Loose underbelly fasteners
- Damaged heating ducts
- Unpleasant odors
- Pest attraction
- Stained interior materials
- Reduced resale value
The longer materials stay wet, the more extensive repairs may become. Open and inspect the area rather than waiting for outside dripping to stop.
When Should I Stop Troubleshooting and Call a Professional?
Some conditions create health, electrical, or structural risks. Do not continue disassembly when the situation exceeds your experience.
Call a professional when:
- Black water is involved.
- Gray water has soaked a large area.
- Water reached electrical equipment.
- The leak continues with supplies off.
- A holding tank appears cracked.
- A tank support has shifted or failed.
- The underbelly is extremely heavy.
- The floor feels soft or swollen.
- Mold covers more than a small area.
- The leak remains hidden.
- Plumbing repairs require tank removal.
- Propane equipment may be affected.
- The RV remains under warranty.
- You cannot safely support the RV.
- Wastewater is spreading across the campsite.
There is no shame in stopping before the damage worsens. A careful professional repair can save money and protect your RV.
How Much Could the Repair Cost?
Repair costs depend on the failed component, accessibility, contamination, and hidden damage. Opening the underbelly often requires more labor than replacing the actual fitting.
| Repair type | Relative cost level | Main cost factor |
| Tightening an accessible fitting | Low | Short labor time |
| Replacing a hose or connector | Low | Part cost and accessibility |
| Replacing a pump or strainer component | Low to moderate | Pump location and replacement parts |
| Opening and resealing the underbelly | Moderate | Labor and covering materials |
| Replacing wet insulation | Moderate | Size and contamination level |
| Repairing an accessible drainpipe | Low to moderate | Pipe location and damage |
| Repairing a gray or black tank | Moderate to high | Tank material and accessibility |
| Replacing a holding tank | High | Tank removal and plumbing reconnection |
| Repairing subfloor or framing | High | Extent of structural damage |
| Mold remediation | Moderate to high | Size and depth of affected area |
| Repairing electrical damage | Moderate to high | Components affected and labor |
Ask for a written estimate before approving extensive work. Request separate pricing for leak repair, drying, insulation, and structural restoration.
Will RV Insurance or a Warranty Cover the Damage?
Coverage depends on what caused the leak and how quickly you responded. Sudden accidental damage may receive different treatment than gradual deterioration.
Insurance may exclude damage caused by neglected seals, freezing, poor maintenance, or long-term leakage. Every policy uses different conditions and exclusions.
A manufacturer’s warranty may cover a defective tank, fitting, or plumbing component. Modifications or improper winterization may affect that coverage.
Before major disassembly:
- Photograph the leak and surrounding damage.
- Record when you discovered the problem.
- Save damaged parts when possible.
- Keep receipts for emergency supplies.
- Document conversations with repair facilities.
- Contact the insurer or manufacturer promptly.
- Ask before authorizing permanent repairs.
Emergency actions that prevent further damage are usually sensible. However, obtain guidance before discarding important evidence.
How Can I Prevent Another Underbelly Water Leak?
You cannot prevent every unexpected failure, but routine inspections reduce the risk. Pay special attention after freezing weather and difficult roads.
Use a Water-Pressure Regulator
Campground water pressure can exceed what your RV plumbing safely handles. High pressure places extra stress on plastic fittings and valves.
Install an adjustable regulator with a gauge whenever possible. Set it within the range recommended by your RV manufacturer.
Do not assume every campground uses consistent pressure. Pressure can also change throughout the day.
Inspect Plumbing Connections Regularly
Look beneath sinks and around the water pump monthly during regular use. Check the water heater, toilet, shower, and exterior connections too.
Run a dry paper towel around fittings. It often reveals moisture before a visible drip develops.
Tighten loose fittings carefully. Replace damaged seals instead of repeatedly tightening a failing connection.
Watch for Unexplained Pump Cycling
Your pump should stop after the plumbing reaches pressure. Repeated cycling may indicate a leak or failing check valve.
Investigate immediately when the pump runs without fixture use. A tiny hidden leak can eventually saturate the underbelly.
Listen to the pump while the RV remains quiet. Short cycles are often easier to notice at night.
Inspect Tank Supports and Fittings
Look underneath for loose straps, shifted tanks, and damaged brackets. Road impacts can stress tank seams and outlet fittings.
Check after traveling across potholes, gravel roads, or steep entrances. Also inspect the underbelly for fresh scrapes or dents.
Repair loose supports before filling the tank completely. Additional weight can worsen existing movement.
Winterize Before Freezing Weather
Drain and winterize your plumbing before temperatures remain below freezing. Water can become trapped in valves, pumps, and fittings.
Follow the correct procedure for your specific RV. Do not forget exterior showers, washing machines, ice makers, and tank-flush lines.
Inspect the system carefully after de-winterizing. Freeze damage may not appear until pressure returns.
Check the Underbelly After Difficult Roads
Walk around your RV after rough travel. Look for hanging material, missing fasteners, dents, tears, or exposed insulation.
Pay attention to areas near tanks and axles. Road debris may strike the covering without causing an immediate leak.
Repair small openings before water and dirt enter. Minor underbelly damage is easier to fix early.
Investigate Small Drips Immediately
A small drip may be your only warning. Do not wait for water to begin pouring underneath.
Check pump cycling, tank levels, cabinets, flooring, and exterior connections. Early repairs usually require less disassembly.
Keep a flashlight and dry towels inside your RV. These simple tools make routine inspections much easier.
A Simple Troubleshooting Checklist
Follow these steps in order when water suddenly appears beneath your RV:
- Disconnect the city-water supply.
- Turn off the onboard water pump.
- Open a faucet and relieve pressure.
- Stop using all drains and toilets.
- Disconnect shore power when water threatens electrical equipment.
- Identify the water by smell, color, and timing.
- Check cabinets and visible plumbing connections.
- Inspect the pump, water heater, and fresh tank.
- Inspect wastewater tanks and drainpipes.
- Safely drain any sagging underbelly section.
- Open enough covering to view the affected area.
- Remove dripping or contaminated insulation.
- Test the pump system briefly.
- Test city water at regulated pressure.
- Test each fixture separately.
- Test drains one at a time.
- Repair the damaged component.
- Pressure-test the complete plumbing system.
- Dry the framing and subfloor completely.
- Replace damaged insulation.
- Reinstall and seal the underbelly covering.
- Recheck the area after your next trip.
Final Thoughts
When water pours from your RV underbelly, stopping the water source quickly can prevent expensive damage. Shut down the supply, relieve pressure, and identify the water before opening anything.
Take your time while draining and drying the area. Do not close the underbelly until the leak is repaired, tested, and completely dry. Bring in a professional whenever wastewater, electricity, structural damage, or inaccessible tanks are involved.
Related FAQs
Why Is Clear Water Dripping From My RV Underbelly?
Clear water may come from a pressurized supply line, fresh tank, water heater, overflow hose, exterior shower, air-conditioner condensation, or rain intrusion. Check whether the leak changes when you turn off the pump and disconnect city water.
Can an RV Underbelly Hold Several Gallons of Water?
Yes, an enclosed RV underbelly can hold several gallons before sagging or tearing. Insulation absorbs some moisture, while the Coroplast covering may trap the rest until it escapes through a seam or fastener opening.
Why Does Water Leak Under My RV Only When the Pump Is On?
A leak appearing only while the pump runs usually indicates a pressurized freshwater problem. Inspect the pump outlet, supply lines, water heater, toilet connection, faucets, and any appliances connected to the freshwater system.
Why Does My RV Leak Underneath Only on City Water?
City-water pressure may expose a loose fitting, cracked line, damaged inlet, or weak connection that does not leak at lower pump pressure. Disconnect the hose and retest later using a properly adjusted water-pressure regulator.
Can a Full Gray Tank Leak Into the Underbelly?
Yes, a cracked gray tank, separated drainpipe, loose outlet fitting, or damaged vent connection may leak only when the tank becomes full. The increased water weight can also widen an existing crack.
Can a Fresh Water Tank Overflow Into the Underbelly?
Yes, this can happen when the overflow hose disconnects, the vent becomes blocked, the fill hose cracks, or a city-water check valve allows continuous tank filling. Inspect the tank area before reconnecting water.
Does Wet RV Insulation Need to Be Replaced?
Wet insulation should be replaced when it remains saturated, compressed, contaminated, moldy, or unable to dry completely. Gray- or black-water contamination usually makes replacement the safest option.
How Long Does an RV Underbelly Take to Dry?
Drying may take several days, depending on humidity, temperature, airflow, insulation type, and water volume. Keep the area open and use fans until framing, flooring, and insulation spaces are completely dry.
Can I Drive With Water Trapped in the Underbelly?
Driving with trapped water is risky because the weight can tear the covering, damage wiring, shift insulation, or stress plumbing. Drain the water, secure loose material, and inspect the affected components before traveling.
Is Water Under My RV Always a Plumbing Leak?
No, air-conditioner condensation and fresh-tank overflow can create normal puddles. Rainwater may also drain beneath your RV. However, continuous water, sagging material, unusual odors, or unexplained pump cycling should always be investigated.

David Marshall shares travel route insights, mileage planning tips, and road-tested advice. His writing helps travelers understand distance, timing, and equipment choices. Every article is built around clarity and real-world usefulness.











