
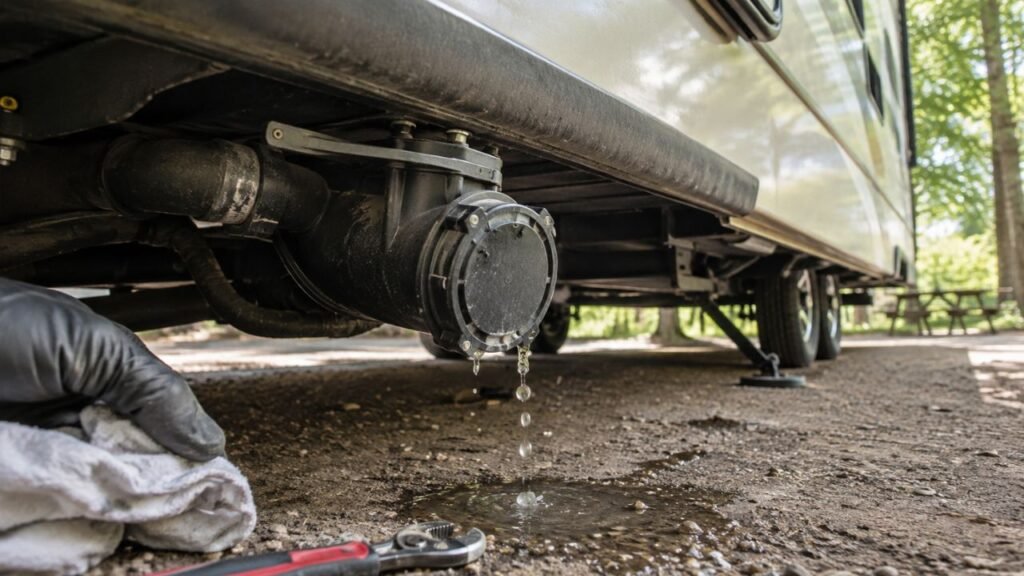
An RV gray-tank valve usually leaks after dumping because soap scum, food particles, hair, grease, or grit prevents the gate blade from closing completely. Worn rubber seals, a poorly adjusted cable, valve misalignment, or water remaining inside the outlet pipe can cause similar dripping.
I know finding gray water behind the sewer cap can be frustrating and unpleasant. I’ll help you determine whether the valve is genuinely leaking, locate the cause, fix it safely, and prevent the problem from returning.
Key Takeaways
- Debris inside the valve groove is the most common cause.
- A few delayed drops may simply be residual pipe drainage.
- Repeated water behind the sewer cap suggests internal valve seepage.
- Soap scum, grease, hair, and food particles can block the blade.
- A remote cable may close the handle without fully closing the valve.
- Flushing and cycling the valve may remove loose contamination.
- Torn seals or a cracked housing usually require replacement.
- Never force a stiff valve using pliers or excessive pressure.
- An add-on sewer valve can contain seepage temporarily.
- Keeping the gray valve closed between dumps reduces future buildup.
What Does a Gray-Tank Valve Leak After Dumping Mean?
Your gray-tank valve should form a watertight barrier after you push its handle closed. When that seal fails, gray water moves past the blade and collects inside the outlet pipe.
You may discover the problem when removing the sewer cap. Instead of finding a dry outlet, you receive a small rush of unpleasant water.
That does not always mean the valve itself has failed. Water may remain inside a long or slightly sagging pipe after dumping. This leftover water can slowly travel toward the cap.
A genuine valve leak usually keeps returning. You may drain the outlet, replace the cap, and find more water there later.
You should also determine whether the water is leaking internally or externally. Internal seepage passes through the closed blade and remains behind the cap. An external leak appears around the valve body, flange, bolts, or nearby plumbing.
Internal seepage is more common and usually easier to manage. External leakage deserves faster attention because a housing, gasket, or pipe connection may be damaged.
Is It a Real Valve Leak or Residual Water?
Before removing the valve, let’s make sure you have a genuine sealing problem. The timing and location of the dripping can tell you a lot.
Residual Water From the Outlet Pipe
Your gray tank may empty quickly, while some water remains downstream from the valve. Long horizontal pipes, low spots, and slightly sagging sewer plumbing can hold several ounces.
That trapped water may continue dripping for several minutes. Moving the RV or changing its level can release another small amount.
Residual drainage normally becomes slower and then stops. Once the outlet pipe empties, additional water should not collect behind the cap.
Water Passing Through the Closed Valve
Ongoing dripping usually means water is getting around the gate blade. You may also find a small amount behind the cap every time you remove it.
Try draining the outlet completely and closing the valve firmly. Replace the sewer cap and wait about 15 to 30 minutes.
Carefully remove the cap with a container underneath. If fresh water has accumulated again, the valve is probably allowing seepage.
Leakage Around the Valve Body
Water appearing outside the valve body indicates a different problem. Look around the four-bolt flange, adjoining pipes, cable connection, and plastic housing.
Moisture around the bolts can indicate a displaced or pinched gasket. Water coming through the housing may indicate a crack caused by freezing, impact, or excessive plumbing stress.
An external leak should not be ignored. It can worsen suddenly when the tank becomes fuller.
Quick Gray-Tank Valve Leak Diagnosis
The symptom you notice can point toward the most likely cause. Use this table before taking anything apart.
| What You Notice | Most Likely Cause | What to Try First |
| Dripping stops within several minutes | Residual water inside the outlet pipe | Wait, drain the pipe, and monitor |
| Water repeatedly collects behind the sewer cap | Debris or damaged valve seals | Flush and cycle the valve |
| Handle stops before reaching its normal position | Material trapped inside the gate groove | Rinse while opening and closing the valve |
| Handle closes normally, but water still passes | Worn, folded, or torn rubber seals | Inspect and replace the seals |
| Remote handle closes, but the blade remains open | Loose, stretched, or misadjusted cable | Inspect and adjust the cable |
| Handle feels stiff throughout its movement | Dry seals, cable resistance, or valve distortion | Lubricate and inspect the mechanism |
| Water appears around the valve bolts | Pinched gasket or loose flange | Empty the tank and inspect the seals |
| Water leaks through the plastic valve body | Cracked or frozen housing | Replace the complete valve |
| Leak started after plumbing repairs | Misaligned pipes or uneven bolt tightening | Realign and support the plumbing |
| Valve works better when operated directly | Remote cable problem | Adjust or replace the cable |
Why Does My RV Gray-Tank Valve Leak After Dumping?
Several problems can produce the same messy symptom. However, contamination inside the blade groove remains the most common explanation.
Soap Scum and Debris in the Seal Groove
Gray water contains much more than plain water. Your shower sends soap, body oils, hair, dirt, and skin particles into the tank.
Bathroom sinks add toothpaste, soap, hair, and cleaning residue. Kitchen sinks contribute grease, tiny food particles, and other organic material.
Some of this contamination settles near the tank outlet. When you dump, the flowing water carries it directly toward the gate valve.
The blade must slide into a narrow groove to close completely. A small clump of soap or food residue can prevent it from reaching the bottom.
The handle may look fully closed from outside. However, the blade may remain slightly raised inside the valve.
Even a very small opening can allow water to seep through slowly.
Worn or Damaged Rubber Seals
A typical gate valve has two rubber seals around its plastic blade. These seals create the watertight connection when the blade closes.
Over time, the rubber may become hard, flattened, cracked, or torn. A seal can also fold inward or roll out of its proper position.
Long storage periods can dry the seals. Harsh drain chemicals and petroleum lubricants may also damage or swell the rubber.
If the blade moves freely but the valve still leaks after cleaning, the seals may no longer be serviceable.
A Blade That Does Not Fully Close
The gate blade must complete its entire travel before sealing. A bent pull rod, dirty track, shifted valve body, or obstructed groove may stop it early.
You may feel the handle hit resistance before reaching its normal position. Sometimes the difference is only a fraction of an inch.
Do not force it. Excessive pressure can bend the rod, tear a seal, crack the housing, or damage the tank connection.
A Misadjusted or Damaged Remote Cable
Some gray-tank valves use a remote cable instead of a direct pull handle. This design makes the handle easier to reach, but adds another failure point.
The cable can stretch, corrode, kink, or develop excess slack. Sharp bends in the cable housing can also create resistance.
The exterior handle may reach its closed position while the blade remains slightly open. That makes the leak appear mysterious because everything outside looks normal.
If possible, compare the handle movement with the movement at the valve body. A cable adjustment may restore the blade’s full travel.
Dry or Sticking Valve Components
Dry rubber creates friction against the sliding blade. You may feel resistance when opening or closing the valve.
When the valve becomes difficult to push inward, you might stop before it seats completely. That small gap can allow gray water through.
A rubber-safe silicone lubricant or RV-approved valve lubricant can improve movement. Lubrication will not repair torn seals, but it can help healthy seals operate correctly.
Warped Valve Flanges or Misaligned Plumbing
The valve sits between two plumbing flanges. Those flanges must remain parallel and evenly supported.
Overtightened bolts can distort the plastic valve body. Unsupported pipes may also pull sideways against the assembly.
Road vibration, underbody impact, or previous repairs can shift the plumbing. A twisted valve may pinch the blade or compress one side more than the other.
When reinstalling the valve, support the pipes and tighten the bolts gradually. Uneven pressure can create another leak immediately.
A Cracked Valve Housing or Pipe Connection
Freezing water can expand inside the valve and crack its plastic housing. Road debris, impact, and excessive force may produce similar damage.
A housing crack generally causes external leakage. You may see moisture dripping directly from the valve instead of collecting behind the cap.
Small cracks rarely repair reliably. Replacing the complete assembly is usually the safer solution.
How to Find the Exact Source of the Leak
Let’s identify the leak before buying replacement parts. Perform these checks only after emptying the tank at an approved dump location.
Empty and Rinse the Gray Tank
Dump the gray tank completely and rinse it with clean water. Keep the sewer hose connected while flushing.
Gray water can contain bacteria and decomposing organic matter. Wear disposable gloves and eye protection during inspection.
Avoid working beneath a full tank. A fuller tank places more pressure against the valve and creates a larger spill risk.
Dry the Valve and Nearby Plumbing
Use paper towels or clean rags to dry the valve body, flanges, outlet pipe, and surrounding area.
A dry surface makes new moisture much easier to locate. Pay close attention to the bottom of the valve and each bolt.
Close the Valve and Add Clean Water
Close the valve using normal hand pressure. Add several gallons of clean water through the kitchen sink, bathroom sink, or shower.
You do not need to fill the entire tank. A small test volume is usually enough to expose ongoing seepage.
Wait approximately 15 to 30 minutes before checking again.
Check Behind the Sewer Cap
Place a container underneath the termination outlet. Carefully loosen the cap while keeping your face and clothing away from the opening.
A small one-time release may be leftover water. Repeated accumulation after draining the pipe points toward an internal valve leak.
Inspect the Valve Body and Flanges
Check for moisture around the bolts, flange joints, pull rod, cable connection, and housing.
Water around the flange may indicate a pinched gasket or loose connection. Water coming through the plastic body usually indicates cracking.
You can place dry paper towels around suspected areas. The first towel becoming wet may reveal the leak’s exact location.
How to Fix a Gray-Tank Valve That Leaks After Dumping
Start with the simplest solution and move gradually toward disassembly. Many fresh leaks are caused by loose debris rather than permanent valve damage.
Fully Close the Handle
Push the handle straight inward using firm but controlled hand pressure. Make sure you are not pushing sideways against the rod.
Look for a gap between the handle and its normal resting position. A small difference may indicate incomplete closure.
Never kick the handle or strike it with a tool. Do not use pliers to create additional force.
Rapidly Cycle the Valve
Reconnect the sewer hose before operating the valve. Add several gallons of clean water to the gray tank.
Open and close the valve several times while water is draining. The moving blade and water flow may dislodge soap clumps, hair, or food particles.
Use controlled movements rather than slamming the valve. Aggressive operation may damage the seals.
After cycling, close the valve and repeat the clean-water test.
Flush the Tank Thoroughly
A weak trickle may not carry debris away from the valve. Add enough clean water to create a stronger flow when dumping.
Drain the tank, close the valve, and repeat the process several times. Multiple flushes may gradually remove soft buildup.
Avoid pouring harsh drain cleaners into the tank. These chemicals may damage seals and create dangerous splashes during disassembly.
Backflush the Valve Area
A clear sewer elbow with an RV-approved rinse connection can direct water back toward the valve area.
Backflushing may loosen material trapped near the blade groove. Follow the flushing device’s instructions and keep the sewer hose secured.
Use moderate campground water pressure. Excessive pressure can stress tank fittings or force water into unwanted areas.
Lubricate the Valve Safely
Use an RV dump-valve lubricant according to its instructions. These products are designed to move through the tank and reach the valve seals.
For an accessible pull rod or exposed seal, use rubber-safe silicone lubricant. Apply only a small amount.
Avoid petroleum grease, penetrating oils, engine lubricants, and harsh solvents. They can damage rubber or attract more dirt.
Lubrication may improve a stiff valve. It cannot restore a seal that is torn, flattened, or displaced.
Inspect the Handle Rod
A direct pull rod should remain straight and move smoothly. Look for bending, corrosion, or dirt around the rod entry point.
Clean the exposed rod using a soft cloth. Apply a small amount of silicone lubricant when appropriate.
A bent rod may push the blade at an angle. Replacing the valve is often easier than attempting to straighten a severely damaged mechanism.
Inspect the Remote Cable
Check the entire cable route when accessible. Look for sharp bends, crushed sections, loose brackets, rust, or excessive slack.
The cable should move the blade through its complete range. If the handle stops early, the cable may require adjustment.
Cable designs vary between manufacturers. Follow the adjustment method used for your specific valve.
If the cable feels rough or remains stiff after adjustment, replacement may be necessary.
Remove and Clean the Gate Valve
Persistent debris may require removing the valve from between its flanges. This is common when dried soap and grease have hardened inside the groove.
The gray tank must be completely empty before disassembly. Expect some remaining water inside the pipes, even after dumping.
Remove the four bolts and carefully slide the valve from between the flanges. Avoid pulling or bending the surrounding plumbing.
Clean the blade, rubber seals, and recessed grooves using warm water and a soft brush. A toothbrush works well around narrow channels.
Do not scrape rubber seals with screwdrivers or sharp metal tools. One cut can create a new leak.
Replace the Rubber Seals
Replace both seals when either one appears torn, flattened, hardened, swollen, or misshapen.
New seals are inexpensive compared with repeating the entire repair. Reusing one old seal may create uneven pressure around the blade.
Confirm that the replacement seals match your valve model and pipe size. Similar-looking valves may use different gasket shapes.
Install each seal in its correct direction. A thin coating of silicone grease can help keep it positioned during reassembly.
Replace the Complete Valve
Replace the entire valve when the blade is warped, deeply scratched, detached, or difficult to move after cleaning.
You should also replace it when the housing is cracked or the bolt holes are damaged.
Match the new valve’s pipe diameter, bolt pattern, handle style, and cable arrangement. Do not assume every gray-tank valve uses the same size.
Replacing a complete four-bolt valve is often straightforward when the plumbing remains accessible. Enclosed underbellies and tight pipe runs can make the repair more difficult.
How to Remove and Service an RV Gray-Tank Gate Valve
An accessible four-bolt valve can often be serviced without cutting pipes. Work slowly because twisted seals and stressed plumbing can create immediate leaks.
Gather Your Supplies
- Matching replacement valve or seal kit
- Disposable gloves
- Safety glasses
- Catch pan or bucket
- Absorbent towels
- Socket or wrench set
- Screwdriver, when required
- Soft toothbrush
- Clean water
- Rubber-safe silicone grease
- Replacement bolts and nuts, when corroded
Empty and Flush the Tank
Dump the gray tank at an approved location. Rinse it several times using clean water.
Let the tank drain completely. Park with the valve side slightly lower only when the location is level and safe.
Remember that water may remain inside low sections of plumbing. Keep a catch pan underneath the valve.
Support the Plumbing
The valve may be helping support nearby drainpipes. Once removed, those pipes can drop or pull against the tank outlet.
Use temporary support to hold the plumbing in its natural position. Do not lift it enough to distort the tank connection.
Supporting the pipes also makes it easier to reinstall the valve without pinching its seals.
Remove the Four Valve Bolts
Hold the bolt head while loosening the nut on the opposite side. Remove the bolts gradually.
Keep one hand near the valve because the assembly may shift when the last bolt comes out.
Spread the adjoining flanges only enough to slide the valve free. Excessive movement can crack old pipes or fittings.
Remove the Valve and Seals
Carefully slide the valve from between the flanges. Note how both rubber seals are positioned before removing them.
Take a photograph when helpful. Correct orientation becomes important during reassembly.
Inspect the blade for scratches, warping, chips, or uneven wear. Check the housing for fine cracks around the bolt holes.
Clean the Blade and Seal Grooves
Wash the blade using warm water and a soft brush. Remove greasy residue, dried soap, hair, and food particles.
Pay special attention to the lower groove where the blade sits. Hardened buildup often collects in this area.
Use a plastic tool for stubborn deposits when necessary. Avoid sharp metal tools that could scratch the sealing surfaces.
Inspect or Replace the Seals
Flexible seals may be reusable when they remain smooth and undamaged. However, replacing them is usually sensible once the valve has been removed.
Look for torn lips, flattened edges, swelling, cracking, and permanent folds.
Replace both seals as a pair. Mixed old and new seals may not compress evenly.
Install the Seals Correctly
Clean the flange surfaces before installing the seals. Any grit left underneath can create an external leak.
Apply a very thin layer of silicone grease. Too much lubricant may attract dirt and make the seals harder to position.
Seat each gasket evenly inside its flange. Make sure no section folds inward while inserting the valve.
Reinstall the Valve
Slide the valve carefully between the flanges without dislodging the seals. Align the bolt holes without forcing the plumbing sideways.
Insert all four bolts before tightening any one bolt completely.
Tighten them gradually using a crossing pattern. This distributes pressure evenly across the plastic housing.
Do not overtighten. Excessive bolt pressure can warp the valve and make the blade difficult to operate.
Test the Repair
Operate the handle several times before adding water. The blade should move smoothly without binding.
Close the valve and add several gallons of clean water. Wait and inspect both the outlet and the valve housing.
Test again before reinstalling underbelly panels or protective covers. Fixing a small alignment issue is easier while everything remains accessible.
Should You Clean, Repair, or Replace the Valve?
The valve’s condition should determine your next step. This table can help you avoid unnecessary parts or repeated repairs.
| Valve Condition | Recommended Action |
| Leak appeared suddenly after one dump | Flush and cycle the valve |
| Handle feels slightly stiff but still seals | Clean and lubricate the valve |
| Handle will not reach its normal closed position | Clear the groove and inspect the mechanism |
| Remote handle closes before the blade does | Adjust or replace the cable |
| Valve leaks after several thorough rinses | Remove and inspect the seals |
| Seals are torn, hard, or permanently folded | Replace both seals |
| Blade has deep scratches or visible warping | Replace the complete valve |
| Plastic housing has a crack | Replace the complete valve immediately |
| Plumbing pulls sideways on the assembly | Support and realign the pipes |
| Flange leaks after a recent repair | Reposition the gaskets and retighten evenly |
| Valve repeatedly fails after seal replacement | Replace the complete assembly |
Can an Add-On Sewer Valve Stop the Leak?
A twist-on secondary sewer valve can contain gray water that passes through the original valve. It attaches near the termination outlet and creates another barrier before the cap.
This accessory can prevent an unpleasant spill when removing the sewer cap. It is especially useful during a trip when immediate disassembly is not practical.
However, it does not repair the original valve. Gray water will still collect inside the outlet plumbing between both valves.
Treat an add-on valve as temporary protection or additional backup. Clean, adjust, or replace the original valve when possible.
You should also ensure the added valve cannot strike the road, drag on the ground, or place excessive weight on the outlet fitting.
Why Does the Gray-Tank Valve Keep Leaking Again?
Recurring leaks usually mean the valve groove is being contaminated repeatedly, or the original mechanical problem was never corrected.
- The gray valve remains open while connected to the sewer.
- Food particles regularly pass through the kitchen sink.
- Grease and cooking oils enter the gray tank.
- The tank is dumped when it contains very little water.
- The blade groove was not cleaned completely.
- Damaged seals were reused during reassembly.
- A remote cable still prevents complete closure.
- Valve bolts were tightened unevenly.
- Unsupported pipes are pulling against the valve.
- The wrong lubricant is damaging the seals.
- The valve body is slightly warped.
- Freezing weather has damaged the housing.
- The replacement seals do not match the valve.
- The tank contains heavy soap and organic buildup.
Should You Leave the Gray-Tank Valve Open at a Campsite?
Keeping the gray valve open may seem convenient when connected to a sewer. Water drains automatically, and you do not need to monitor the tank level.
The problem is that liquid leaves faster than heavier contamination. Soap residue, grease, hair, dirt, and food particles can remain behind.
These materials may gradually move toward the gate valve. They can settle inside the blade groove and dry into a stubborn layer.
When you finally close the valve, the blade may press that material deeper into the groove. The valve then struggles to seat completely.
Keeping the valve closed allows water to collect inside the tank. When you dump, the larger volume creates a stronger flow that carries more contamination away.
Dump the tank periodically rather than leaving the valve continuously open. This approach also keeps some water inside the tank, reducing the chance of material drying onto its surfaces.
How to Prevent Gray-Tank Valve Leaks
Prevention mainly involves keeping debris away from the valve and maintaining smooth blade movement. A few simple habits can save you from another messy repair.
Keep Food Out of the Kitchen Drain
Use a fine sink strainer whenever washing dishes. Empty it into the trash rather than rinsing collected debris down the drain.
Even small food particles can combine with grease and soap. Over time, this mixture may settle near the tank outlet.
Wipe plates, pans, and cooking utensils before washing them. This reduces both food debris and grease inside the tank.
Avoid Pouring Grease Down the Drain
Cooking grease sticks to tank walls, plumbing, and valve surfaces. It also traps hair, soap residue, and food particles.
Collect liquid grease in a disposable container. Wipe oily cookware with paper towels before washing.
Hot water may temporarily move grease through the sink. However, the grease can cool and harden farther inside the plumbing.
Keep the Gray Valve Closed Between Dumps
A closed valve allows water to accumulate. That water helps keep debris suspended until the next dump.
A stronger dump flow carries more material toward the sewer hose. A constantly open valve often leaves heavier contamination behind.
Monitor the tank level and dump before it becomes overfilled.
Dump With Enough Water in the Tank
Repeatedly dumping tiny amounts creates weak flow. That flow may leave soap and sediment around the valve area.
Whenever practical, let the tank collect a reasonable amount of water before dumping.
Do not intentionally overfill the tank. Use the monitor panel together with your actual water usage.
Rinse the Gray Tank Periodically
Add clean water after dumping and drain the tank again. This simple rinse can remove contamination remaining near the outlet.
Occasional deeper cleaning may help when the tank develops odors or drains slowly. Use only products intended for RV holding tanks.
Avoid caustic household drain cleaners. They can harm seals and create dangerous repair conditions.
Use Appropriate Drain Screens
Place screens over the shower and bathroom sink drains. These screens help catch hair before it reaches the tank.
Clean them regularly. A clogged screen may slow drainage, but that is easier to solve than a contaminated gate valve.
Exercise the Valve During Storage
A valve left untouched for months may become stiff. When temperatures permit, operate the empty valve occasionally using gentle pressure.
Do not cycle a frozen valve. Ice inside the housing can damage the blade, seals, or plastic body.
Winterize the waste plumbing according to your RV manufacturer’s instructions.
Use Rubber-Safe Lubrication
An RV-approved valve lubricant can help seals remain flexible. Follow the product directions rather than adding excessive amounts.
Use silicone lubricant on accessible parts only when it is compatible with the rubber.
Avoid petroleum-based products. They may swell or weaken the seals over time.
Inspect the Cable and Plumbing Supports
Check cable routing during routine underbody inspections. Correct sharp bends, loose mounting brackets, or crushed cable sections.
Inspect hangers supporting the drainpipes. A loose hanger can transfer plumbing weight to the valve body.
Look for road damage, stress marks, missing bolts, and cracking around the outlet assembly.
Common Mistakes That Can Make the Leak Worse
A small seepage problem can become a major repair when excessive force or unsuitable chemicals are used.
- Forcing the handle with pliers
- Kicking or hammering a stuck handle
- Pulling the handle at an angle
- Pouring harsh drain cleaner into the tank
- Using petroleum grease on rubber seals
- Disassembling the valve before emptying the tank
- Allowing unsupported pipes to hang during removal
- Scraping seal grooves with sharp metal tools
- Reusing torn or permanently flattened seals
- Installing the seals in the wrong direction
- Pinching a seal during valve installation
- Tightening one bolt completely before the others
- Overtightening bolts until the housing bends
- Assuming an add-on valve permanently fixes the problem
- Ignoring external moisture around the valve body
When Should You Stop Using the Tank and Get Professional Help?
Minor internal seepage may sometimes be contained temporarily. Structural leaks, inaccessible valves, and damaged tank outlets require faster attention.
- The valve housing is visibly cracked.
- Gray water is leaking directly onto the ground.
- The handle cannot close the blade.
- The handle moves without operating the valve.
- The tank outlet appears loose or damaged.
- The valve is hidden behind major underbelly components.
- The plumbing must be cut to remove the valve.
- The underbelly contains pooled gray water.
- The leak continues after new seals are installed.
- The pipes are badly misaligned.
- Freezing damage is suspected.
- The tank itself appears cracked.
- You cannot safely empty the tank before repair.
A mobile RV technician may be helpful when the valve is enclosed or the tank outlet is stressed. Replacing a simple valve is manageable, but repairing a damaged tank flange requires greater care.
Final Thoughts
Your RV gray-tank valve usually leaks after dumping because debris prevents the blade from seating or the rubber seals can no longer hold water. Residual pipe drainage can look similar, so confirm that water keeps returning before removing the valve.
Start by flushing and gently cycling the valve. Then inspect the cable, blade travel, and external housing. If clean water still passes through, replacing the seals or complete valve should give you a dependable fix.
Related FAQs
Why Is Water Behind My RV Sewer Cap?
Water behind the sewer cap usually means the gray or black gate valve is allowing seepage. However, a small one-time amount may simply be leftover water draining from the shared outlet pipe.
How Long Can Residual Water Drip After Dumping?
Residual water may drip for several minutes after dumping, especially when the outlet pipe is long, nearly level, or slightly sagging. Dripping that continues or returns later suggests a valve leak.
Can Soap Scum Make a Gray-Tank Valve Leak?
Soap scum can combine with grease, hair, dirt, and food particles inside the blade groove. This buildup prevents the gate from fully seating and allows water to pass through.
Can I Lubricate an RV Gray-Tank Valve?
You can use an RV-approved valve lubricant or rubber-safe silicone lubricant. Avoid petroleum grease, penetrating oil, and harsh solvents because they may damage the rubber seals.
Can I Replace Only the Gray-Tank Valve Seals?
Many four-bolt RV gate valves allow you to replace only the rubber seals. The blade and housing must still be smooth, straight, and free from cracks or serious damage.
Why Is My Gray-Tank Valve Hard to Close?
A gray-tank valve may become hard to close because of debris, dry seals, a pinched gasket, bent hardware, plumbing misalignment, or resistance inside a remote cable.
Why Does My Valve Handle Close but the Tank Still Leaks?
The handle may reach its stop before the internal blade closes fully. This commonly happens with a stretched, loose, kinked, or poorly adjusted remote cable.
Will a Twist-On Waste Valve Fix the Original Leak?
A twist-on valve can contain water passing through the original valve, but it does not repair the underlying problem. The original gate valve still needs cleaning, adjustment, or replacement.
Should I Leave My Gray Valve Open When Connected to Sewer?
Keeping the valve closed between dumps is generally better because accumulated water creates stronger flow. Leaving it open can allow soap, grease, hair, and food residue to remain inside the tank.
How Often Should I Clean My RV Gray Tank?
Cleaning frequency depends on usage, cooking habits, and water quality. Rinse the tank periodically and clean it sooner when you notice odors, slow drainage, inaccurate sensors, or valve seepage.
How Do I Know Whether the Valve Seals Are Bad?
The seals are probably damaged when the valve continues leaking after thorough flushing and correct cable adjustment. Torn, hardened, swollen, folded, or permanently flattened seals should be replaced.
Can Freezing Weather Damage a Gray-Tank Valve?
Water trapped inside the valve can freeze, expand, and crack the housing or displace its seals. A leak appearing after freezing weather may require complete valve replacement.
Should I Force a Stuck Gray-Tank Valve?
You should never force a stuck valve with pliers, hammers, or excessive pulling. Strong force can tear the seals, bend the rod, crack the housing, or damage the tank outlet.
How Much Does an RV Gray-Tank Valve Replacement Cost?
The valve and seal kit are usually relatively inexpensive, but labor varies significantly. Accessibility, enclosed underbellies, cable systems, and misaligned plumbing can make the repair more costly.

David Marshall shares travel route insights, mileage planning tips, and road-tested advice. His writing helps travelers understand distance, timing, and equipment choices. Every article is built around clarity and real-world usefulness.











