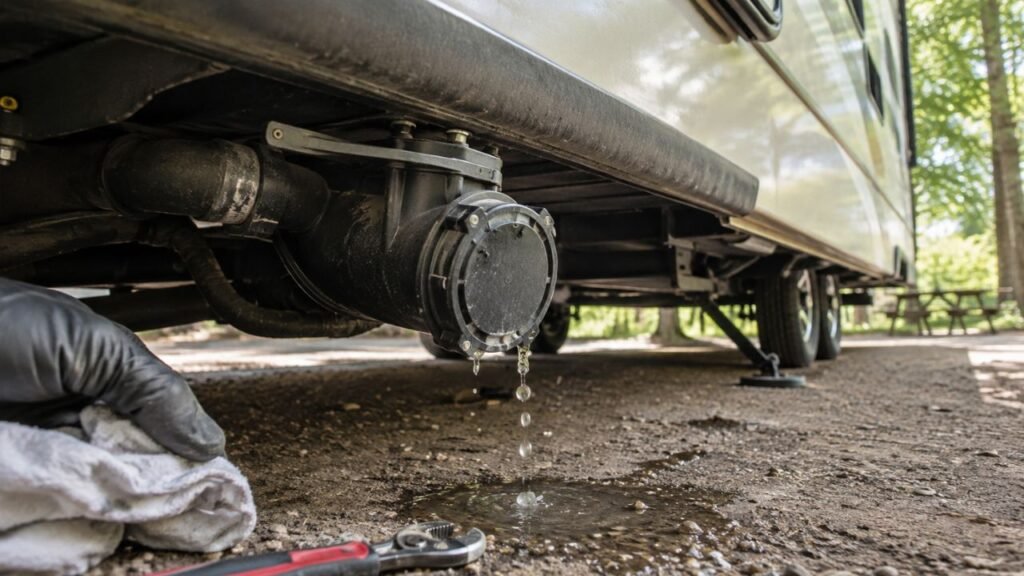
You can stop an RV water pump from losing prime by sealing air leaks between the fresh water tank and pump inlet. Tighten loose fittings, inspect the intake hose, clean the strainer, check valve positions, and replace damaged O-rings or check valves.
This guide explains why your pump keeps losing prime, how to locate the problem, and how to restore steady water flow without replacing working parts unnecessarily.
Key Takeaways
- Suction-side air leaks cause most repeated priming problems.
- Inspect the strainer bowl, O-ring, hose clamps, and intake fittings first.
- Keep enough water inside the fresh tank during testing.
- Confirm winterization and tank selector valves are positioned correctly.
- Purge every hot and cold outlet after repairing an air leak.
- A bad check valve may let water drain backward overnight.
- Avoid running the pump dry for extended periods.
- Test the plumbing before assuming the pump needs replacement.
What Does It Mean When an RV Water Pump Loses Prime?
An RV water pump is primed when its internal chambers and intake line contain enough water to create suction. Once primed, the pump pulls water from the fresh tank and sends it toward your faucets.
When the pump loses prime, air replaces some or all that water. The motor may continue running, but the pump cannot create enough suction to lift water from the tank.
You may hear the pump humming while nothing reaches the faucet. You might also notice sputtering, weak pressure, or frequent bursts of air.
A one-time loss of prime often happens after winterization, storage, or an empty tank. Repeated prime loss usually means air is entering the intake system or water is draining backward.
That distinction matters because simply repriming the pump will not fix an ongoing leak.
Why Does My RV Water Pump Keep Losing Prime?
A pump that repeatedly loses prime normally has an intake leak, restricted water supply, incorrect valve position, or worn internal component. Start with the simple external causes before opening the pump.
A Loose Intake Hose or Fitting
The hose between your fresh tank and pump operates under suction. This means a loose fitting may pull air inward without leaking water outward.
Because everything looks dry, you may assume the connection is fine. However, even a tiny gap can break the vacuum needed for priming.
Check every hose clamp, threaded connector, elbow, and adapter. Road vibration can gradually loosen these parts during travel.
Tighten connections carefully and avoid forcing plastic fittings. Excessive pressure can create cracks that make the problem worse.
A Cracked Inlet Strainer Bowl
Most RV water pumps have a clear plastic strainer near the inlet. It catches dirt before debris reaches the pump chambers.
The bowl can develop tiny cracks from age, freezing temperatures, or overtightening. These cracks may be difficult to see unless you inspect them closely.
A damaged bowl allows the pump to pull air instead of water. Replace it when you notice cloudiness, stress lines, cracks, or damaged threads.
A Damaged or Misaligned Strainer O-Ring
The O-ring inside the strainer creates an airtight seal between the bowl and housing. If it twists, flattens, dries out, or slips from its groove, air enters the system.
Remove the bowl and inspect the O-ring carefully. It should remain flexible, smooth, and evenly shaped.
Clean the sealing groove before reinstalling the ring. A small amount of food-safe silicone grease can help keep it seated.
Never use petroleum-based lubricants on drinking-water system seals.
A Partially Open Winterization Valve
During winterization, many RVs use a valve that redirects the pump toward an antifreeze pickup hose. If this valve remains partly open, the pump may draw air through that unused hose.
Confirm the valve points fully toward the fresh water tank. It should not rest halfway between operating positions.
Also inspect the pickup hose cap and connection. A damaged cap can create another hidden air-entry point.
An Incorrectly Positioned Tank Selector Valve
Some RVs have multiple tanks, fill modes, or selector valves. A valve pointing toward an empty tank may prevent the pump from receiving water.
Other selectors can sit between city-water and tank-fill settings. A partially turned valve may restrict flow or allow air inside.
Follow the labels near the valve panel when available. Confirm every handle has reached its intended operating stop.
A Low Fresh Water Tank Level
A tank monitor may show remaining water even when the pickup becomes exposed. RV tank sensors are not always accurate.
The problem becomes more noticeable when the RV sits on uneven ground. Water can move away from the pickup opening inside the tank.
Add more water before testing the pump. Filling beyond one-quarter capacity often eliminates pickup exposure during diagnosis.
A Split, Kinked, or Collapsed Intake Hose
An old intake hose may become soft, brittle, or internally damaged. Suction can flatten a weak hose even when its exterior looks normal.
Sharp bends can also restrict water before it reaches the pump. Look for pinched sections, discoloration, splits, and flattened areas.
Replace damaged tubing with food-safe hose designed for potable-water systems. Match the original inside diameter and fitting type.
A Faulty Pump Check Valve
The pump contains a one-way valve that helps prevent water from flowing backward. When debris holds this valve open, water may slowly return toward the tank.
The pump might work properly after priming but lose prime overnight. You may also hear it cycle briefly without anyone using water.
Cleaning or replacing the valve assembly may solve the problem. Some pumps have serviceable valve kits, while others require a replacement head.
Worn Pump Diaphragms or Internal Valves
The pump diaphragm creates the movement that pulls water from the tank. Worn diaphragms or warped valve plates reduce suction.
The pump may become louder, take longer to prime, or produce unstable flow. External connections may remain airtight while the pump still struggles.
Internal wear becomes more likely after ruling out hoses, valves, strainers, and tank-level problems.
RV Water Pump Prime-Loss Symptoms and Likely Causes
Different symptoms often point toward different sections of the plumbing system. Use this table to decide where your inspection should begin.
| Symptom | Most Likely Cause | First Check |
| Pump runs but no water appears | Empty intake line or trapped air | Tank level and nearest faucet |
| Water sputters repeatedly | Suction-side air leak | Strainer, O-ring, and hose clamps |
| Pump primes but loses flow quickly | Restricted inlet or low tank level | Intake hose and tank pickup |
| Pump loses prime overnight | Backflow through a check valve | Pump valve and selector valves |
| Strainer remains partly empty | Air entering before the pump | Bowl, gasket, and inlet fitting |
| Pump becomes louder after storage | Dry chambers or stuck valves | Reprime and inspect the inlet |
| Flow changes when the RV tilts | Fresh tank pickup becomes exposed | Tank level and RV position |
| Pump will not prime after winterization | Valve remains in winterize mode | Winterization valve and pickup hose |
| Pump frequently restarts with faucets closed | Pressure loss or internal backflow | Plumbing leaks and check valves |
| Pump produces weak pulsing flow | Air, restriction, or diaphragm wear | Strainer, hose, and pump head |
How to Stop an RV Water Pump From Losing Prime
Work through these steps in order. Most priming problems come from simple valve, strainer, or intake connection issues.
1. Turn Off Power and Relieve Water Pressure
Switch off the water pump before disconnecting any plumbing connection. Disconnect the city-water supply if it is attached.
Open a cold faucet to release pressure from the lines. Place towels and a small container underneath the pump area.
Keep water away from electrical terminals, wire connectors, and nearby control boards.
2. Add Enough Water to the Fresh Tank
Add enough water so the tank pickup remains fully submerged. Do not rely entirely on the monitor panel.
A tank may appear partly full while water sits away from the pickup. This happens frequently when the RV is parked unevenly.
Level the RV when possible and retest the pump.
3. Confirm Every Water Valve Is Correctly Positioned
Incorrect valve settings can prevent the pump from drawing tank water. Inspect all accessible controls before removing hoses.
Check these common valves:
- Fresh water tank supply valve
- Winterization or antifreeze pickup valve
- City-water and tank-fill selector
- Multi-tank selector valve
- Water heater bypass valves
- Low-point drain valves
Move each valve fully into its operating position. Avoid leaving handles between settings.
4. Inspect the Entire Suction Line
Trace the intake plumbing from the fresh tank toward the pump. Focus on everything before the pump inlet.
Look for:
- Loose hose clamps
- Split or hardened tubing
- Cracked elbows and adapters
- Flattened hose sections
- Sharp bends or kinks
- Loose threaded fittings
- Damaged valve bodies
- Missing plugs or caps
- Air bubbles inside clear components
A suction leak may remain completely dry. Do not dismiss a connection simply because no water appears around it.
5. Clean and Reseal the Pump Strainer
Turn off the pump and place a towel beneath the strainer. Carefully unscrew the clear bowl by hand.
Remove dirt, slime, or sediment from the mesh screen. Rinse the bowl and screen using clean water.
Inspect the bowl for fine cracks and damaged threads. Examine the O-ring for flattening, cuts, stiffness, or distortion.
Clean the O-ring groove and reinstall the seal evenly. Tighten the bowl by hand until secure.
Overtightening can distort the bowl or damage its sealing surface.
6. Tighten or Replace Leaking Intake Connections
Gently tighten loose hose clamps using the correct screwdriver or nut driver. Stop once the hose feels secure around the fitting.
Replace clamps that have rusted, stripped, or lost tension. Replace cracked barbed connectors instead of trying to seal them externally.
Threaded connections require the correct sealing method for their design. Some fittings use O-rings rather than thread seal tape.
Inspect the original connection before adding any sealing product. Using the wrong material can prevent proper seating.
7. Close the Winterization Pickup Line
Locate the winterization hose near the pump. Confirm its selector valve points away from the antifreeze pickup tube.
Check whether the hose has a secure cap. A missing or cracked cap may allow air into the intake path.
If the valve feels loose or turns without resistance, its internal seal may be worn.
8. Purge Air From Every Water Outlet
After sealing the intake system, remove trapped air from the plumbing lines.
- Open the cold faucet closest to the water pump.
- Switch on the pump.
- Let the faucet run until sputtering decreases.
- Open the hot side at the same fixture.
- Repeat the process at every indoor faucet.
- Run the shower until its stream becomes steady.
- Open the outdoor shower if your RV has one.
- Flush the toilet several times.
- Close each outlet after air stops escaping.
Do not forget unused fixtures. Air trapped inside an outdoor shower line can remain unnoticed.
9. Reprime the Pump Manually
Fill the fresh tank and open the nearest cold faucet. Switch on the pump and listen for water movement.
If no water arrives, turn the pump off before loosening anything. Place a towel and container beneath the outlet connection.
Carefully loosen the pump outlet fitting enough to release trapped air. Retighten it once water begins reaching the pump outlet.
Switch the pump on again and allow the open faucet to purge remaining air.
Do not use your mouth to pull water through a potable-water hose. This can introduce contamination into the plumbing system.
10. Test Whether the Pump Holds Prime
After steady water reaches every fixture, close all faucets. Allow the pump to build pressure and shut off.
Leave the system unused for several hours when practical. Then check:
- Whether the pump restarts by itself
- Whether the strainer bowl loses water
- Whether the next faucet sputters
- Whether bubbles return inside the intake
- Whether water drains backward toward the tank
- Whether any fittings become damp
If prime disappears again, continue testing for air entry or internal backflow.
How Can I Find a Suction-Side Air Leak?
Suction leaks can be difficult to spot because they pull air inward. Several simple tests can help isolate the faulty section.
Check for Moving Air Bubbles
Watch the clear strainer while the pump operates. A few bubbles during initial priming may be normal.
Continuous bubbles usually indicate air entering somewhere before the pump. Inspect the nearest connections first.
A transparent section of intake hose can also make bubbles easier to identify.
Use a Temporary Water-Container Test
Disconnect the normal tank intake hose from the pump. Attach a short, clean hose to the pump inlet.
Place the other end inside a container of clean water. Keep the hose opening completely submerged.
Turn on the pump and open a nearby faucet. Observe whether the pump primes and delivers steady water.
If it works normally, the fault probably sits between the fresh tank and pump. Inspect the tank pickup, selector valve, and original hose.
If it still cannot prime, inspect the strainer, inlet fitting, and pump head.
Isolate Intake Components One at a Time
A plumbing system may contain several hoses, valves, elbows, and adapters. Any one component can admit air.
Bypass individual sections temporarily using clean, correctly sized hose. Test the pump after each change.
This method prevents replacing several good parts while overlooking one damaged valve.
Inspect Connections After Travel
Rough roads create continuous vibration around pumps and plumbing fittings. A connection that worked before departure may loosen during travel.
Inspect the pump area after long drives, gravel roads, and off-road routes. Pay special attention to the strainer bowl and hose clamps.
How Do I Reprime an RV Water Pump After It Runs Dry?
When the fresh tank empties, the pump and intake line fill with air. Refill the system before allowing the pump to run again.
- Add plenty of clean water to the fresh tank.
- Confirm the fresh tank outlet valve remains open.
- Close the winterization pickup valve completely.
- Open the cold faucet nearest the pump.
- Switch the water pump on.
- Allow air and water to escape through the faucet.
- Turn the pump off if water never reaches it.
- Inspect the strainer and intake connections again.
- Purge the remaining fixtures after steady flow begins.
A healthy, sealed pump should begin lifting water without prolonged dry operation. Stop troubleshooting if the housing becomes unusually warm or smells overheated.
Why Does My RV Water Pump Lose Prime Overnight?
Overnight prime loss usually means water drains backward or air slowly enters the intake. These problems may develop gradually after the pump shuts off.
Water Is Draining Back Into the Fresh Tank
A worn pump check valve may allow water to move backward. This slowly empties the intake hose and pump chambers.
The next morning, the pump must pull water through an air-filled line. You may notice delayed flow and several seconds of sputtering.
A Selector Valve Is Allowing Backflow
Tank selector and winterization valves contain internal seals. Worn seals can create small internal pathways between water and air.
The outside of the valve may remain completely dry. Replacing the valve may be necessary when tightening connections changes nothing.
The Strainer Seal Is Slowly Drawing Air
A cracked bowl or flattened O-ring may leak air gradually. The pump can still work during normal use but lose prime after sitting.
Inspect the strainer immediately after the problem occurs. A partly empty bowl provides an important clue.
The Fresh Tank Pickup Is Becoming Exposed
Water can move away from the pickup while the RV remains tilted. This becomes more likely as the tank level drops overnight.
Adding water or leveling the RV may temporarily solve the problem. Repeated issues with adequate water may indicate a damaged pickup tube.
The Pump Head Cannot Hold a Vacuum
Worn diaphragms and valve plates may stop sealing after the motor shuts down. Water then drains backward through the pump.
A repair kit may restore proper operation when the motor remains healthy. Otherwise, pump replacement may be more practical.
Can a Clogged Strainer Make the Pump Lose Prime?
A clogged strainer does not always create a direct air leak. However, it can restrict water enough to make priming difficult.
The pump may pull against the restriction and create a partial vacuum. Flow becomes weak, noisy, or uneven as the pump struggles for water.
A dirty strainer can also make the bowl appear partly empty. Clean the screen before testing expensive pump components.
If debris returns quickly, flush the fresh tank and inspect the fill system.
Can RV Position or Tank Level Affect Pump Priming?
RV position can strongly affect pump performance when the fresh tank is low. Water naturally moves toward the lowest side of the tank.
If the pickup sits on the opposite side, it may begin drawing air. The pump then loses prime even though the monitor shows remaining water.
Tank sensors can also become inaccurate because of residue or irregular tank shapes. Add water and level the RV before assuming a mechanical failure.
Repeated prime loss with a nearly full tank points toward a different problem.
How Can I Tell Whether the Pump or Plumbing Is Faulty?
A temporary water-container test can separate pump problems from tank-side plumbing faults. The result helps you avoid unnecessary replacement.
| Test Result | What It Suggests | Next Action |
| Pump works from a nearby water container | Tank hose, pickup, or selector problem | Inspect plumbing before the pump |
| Pump still cannot prime | Strainer, inlet fitting, or pump problem | Test or service the pump |
| Pump primes but loses prime later | Air leak or internal backflow | Inspect seals and check valves |
| Pump delivers water but cycles afterward | Pressure-side plumbing leak | Check fixtures and connections |
| Pump becomes hot without moving water | Dry running or severe restriction | Turn it off immediately |
| Pump leaks around the head | Damaged gasket, diaphragm, or housing | Repair or replace the pump |
| Pump works only with a full tank | Pickup exposure or restricted lift | Inspect tank pickup and RV position |
| Pump remains weak from both sources | Worn internal pump components | Service or replace the pump |
When Should I Repair or Replace the RV Water Pump?
Most prime-loss problems come from external plumbing. Replace the pump only after testing the intake system and valve positions.
Repair the Existing Pump When
Repair may be worthwhile when:
- The strainer bowl or O-ring is damaged.
- Debris is holding an internal valve open.
- A compatible diaphragm kit remains available.
- The motor runs smoothly without overheating.
- The pump housing has no freeze damage.
- Electrical current remains within its rated range.
- Replacement parts cost much less than a new pump.
- The pump has otherwise delivered reliable performance.
A valve or diaphragm kit can extend the pump’s service life. Follow the pump manufacturer’s assembly instructions during internal repairs.
Replace the Pump When
Replacement becomes more practical when:
- The plastic housing has freeze cracks.
- The motor smells burned or overheats quickly.
- The motor grinds, stalls, or draws excessive current.
- Internal repair kits repeatedly fail.
- The pump cannot create suction from a nearby container.
- The pump leaks near electrical components.
- Replacement parts are no longer available.
- Corrosion has spread across the motor or terminals.
- The pump’s output no longer supports normal RV use.
Choose a replacement that matches your RV’s voltage, plumbing connections, flow requirements, and electrical circuit.
How Can I Prevent My RV Water Pump From Losing Prime Again?
Preventing prime loss means protecting the intake path from air, debris, freezing, and dry operation. A few regular checks can prevent most repeat problems.
- Keep enough water above the fresh tank pickup.
- Avoid running the pump after the tank becomes empty.
- Clean the inlet strainer several times each season.
- Inspect the strainer bowl for cracks and cloudiness.
- Replace flattened, hardened, or damaged O-rings.
- Use food-safe silicone grease on compatible seals.
- Check hose clamps after driving on rough roads.
- Replace old, soft, or discolored intake tubing.
- Label winterization valve positions clearly.
- Keep unused pickup hoses properly capped.
- Flush construction debris and sediment from the tank.
- Winterize the pump before freezing temperatures arrive.
- Test the water system before every extended trip.
- Carry spare O-rings, clamps, and a strainer bowl.
- Turn off the pump during long periods away.
Common Mistakes to Avoid While Repriming the Pump
Many priming problems become worse because of overtightening, extended dry running, or incorrect valve settings. Avoid these common mistakes during troubleshooting.
- Running the pump dry for several minutes
- Overtightening the plastic strainer bowl
- Ignoring the winterization pickup hose
- Trusting an inaccurate tank monitor
- Replacing the pump before checking the inlet
- Using non-potable plumbing sealants
- Applying seal tape to O-ring connections
- Testing while the RV remains heavily tilted
- Forgetting the toilet and outdoor shower
- Ignoring continuous bubbles inside the strainer
- Forcing brittle valves or plastic connectors
- Leaving loose towels near electrical terminals
- Assuming every sputter comes from normal trapped air
When Should I Call an RV Technician?
Contact an RV technician when the pump remains inaccessible behind fixed panels or major appliances. Professional help also makes sense when water appears near electrical wiring.
You may need service when the fresh tank pickup seems damaged. Repairing internal tank components can require underbelly removal or tank lowering.
Call for help if hidden leaks appear inside walls, floors, or insulated panels. Moisture in these areas can cause structural damage before becoming visible.
A technician can also pressure-test the intake, inspect complex selector systems, and verify electrical performance.
Final Thoughts
An RV water pump usually loses prime because air enters before the pump. Loose clamps, damaged O-rings, cracked strainers, and incorrect valve positions are common causes.
Start by adding water, leveling the RV, and checking every valve. Then inspect the suction line and clean the pump strainer.
Once repairs are complete, purge every fixture and confirm the pump holds pressure. Test with a separate water container when the source remains unclear.
Replace the pump only after ruling out external plumbing problems. A careful inspection often solves the issue without an expensive repair.
Related FAQs
Why Does My RV Water Pump Need Priming Every Time?
Your pump probably has a suction-side air leak or faulty check valve. Inspect the strainer, O-ring, clamps, winterization valve, and tank pickup before replacing the pump.
How Long Should an RV Water Pump Take to Prime?
A sealed pump should normally begin moving water fairly quickly. If it runs without producing water, turn it off and inspect the tank level, valves, strainer, and intake hose.
Can a Bad Check Valve Cause the Pump to Lose Prime?
Yes, a damaged or debris-filled check valve can let water drain backward. The pump may work initially but lose prime after sitting for several hours.
Should the RV Water Pump Strainer Stay Full of Water?
The strainer often remains mostly filled when the intake system stays sealed. Repeated emptying can indicate an air leak, low tank level, or backflow.
Why Does the Pump Prime With a Full Tank but Not a Low Tank?
The tank pickup may become exposed as the water level drops. Uneven parking can move remaining water away from the pickup opening.
Can a Loose Strainer Bowl Cause Faucet Sputtering?
Yes, a loose bowl allows air into the pump intake. The pump then pushes an air-and-water mixture through the faucets, creating sputtering and unstable flow.
Can Cold Weather Make an RV Pump Lose Prime?
Freezing water can crack the strainer, fittings, pump housing, or intake hose. Even a small freeze crack can allow enough air to break prime.
Will an Accumulator Tank Stop the Pump From Losing Prime?
No, an accumulator tank can smooth pressure and reduce cycling. It cannot seal an intake leak, repair a valve, or prevent water from draining backward.
Can City Water Help Prime an RV Water Pump?
City water can fill the pressure-side plumbing, but it may not prime the tank-to-pump intake. The pump still needs a sealed path from the fresh tank.
Why Does My Pump Work After Tightening the Strainer?
Tightening the strainer restores the airtight seal needed for suction. If the problem returns, inspect the O-ring, threads, and bowl for damage.

David Marshall shares travel route insights, mileage planning tips, and road-tested advice. His writing helps travelers understand distance, timing, and equipment choices. Every article is built around clarity and real-world usefulness.