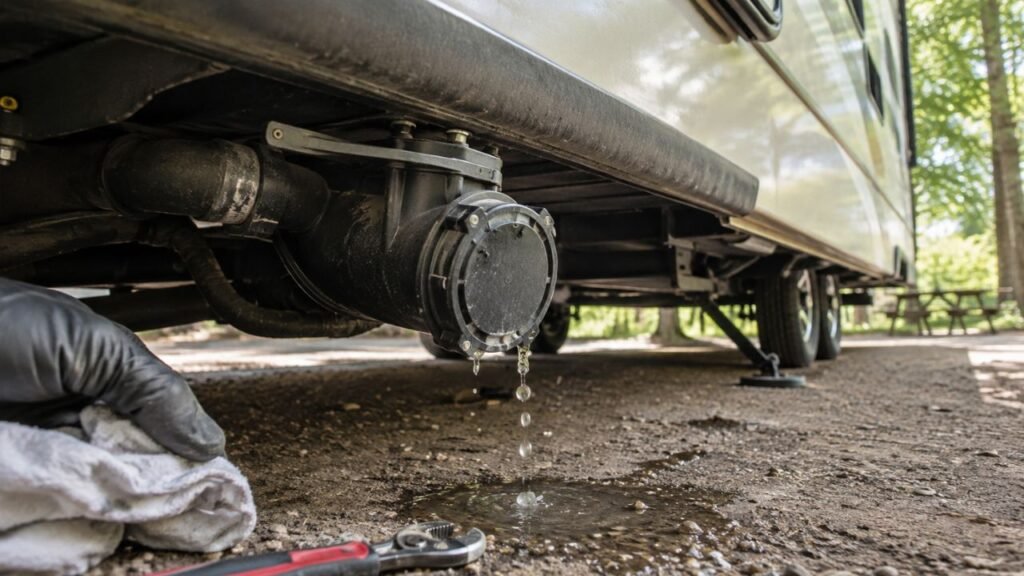
Your RV water pump runs every few minutes because the plumbing system is slowly losing pressure. A dripping fixture, leaking toilet valve, loose fitting, faulty check valve, or pump problem can cause the pressure drop.
This guide explains how the system works, where pressure escapes, and how to find and fix the actual cause without replacing parts unnecessarily.
Key Takeaways
- A pump should remain off when every water fixture is closed.
- Repeated cycling usually means water pressure is escaping somewhere.
- Toilets, faucets, outdoor showers, and drains are common leak points.
- A failing pump check valve can allow water to flow backward.
- Loose intake fittings may draw air without leaking visible water.
- A faulty pressure switch can imitate a plumbing leak.
- Frequent cycling can shorten the pump’s service life.
- Begin with simple inspections before opening or replacing the pump.
Is It Normal for an RV Water Pump to Run Occasionally?
A brief pump run after using water is completely normal. The pump must restore pressure after you close a faucet or flush the toilet.
You may also hear it run after filling the water heater. Air leaving the plumbing can create a temporary pressure change.
What is not normal is repeated cycling without water use. The pump should pressurize the lines, switch off, and remain silent.
Temperature changes can occasionally affect plumbing pressure. However, predictable cycling every few minutes usually indicates a leak or internal pressure loss.
What Does It Mean When the Pump Runs With Faucets Closed?
An RV water pump operates by monitoring pressure inside the plumbing lines. It starts when pressure falls below its activation point.
The pump continues running until the system reaches its shutoff pressure. It should then remain off until someone uses water.
When the pump starts without water use, pressure has dropped again. The pump is simply responding to that change.
This behavior is different from rapid cycling during water use. Knowing the difference can prevent you from checking the wrong components.
- Intermittent cycling means the pump starts occasionally while every fixture remains closed.
- Rapid cycling means the pump switches on and off repeatedly while water flows.
- Normal operation means the pump runs during water use and stops afterward.
Residential well-pump advice does not always apply here. Most RV demand pumps do not use large household pressure tanks.
Common Reasons an RV Water Pump Runs Every Few Minutes
Pressure may escape through a plumbing fixture, hidden fitting, internal valve, or loose intake connection. The following causes are the most common places to begin your inspection.
A Faucet or Shower Is Dripping
A very slow drip can trigger repeated pump cycling. The leak may seem insignificant, but it gradually lowers system pressure.
Check the kitchen faucet, bathroom faucet, and indoor shower. Look closely around handles, spouts, and hose connections.
Do not forget the outdoor shower or exterior spray port. These fixtures are often left partially open after use.
Some outdoor showers have separate hot and cold handles. The showerhead valve may stop visible flow while the main handles remain open.
That setup can create unusual pressure behavior. Fully close both handles before testing the pump again.
The Toilet Water Valve Is Leaking
A leaking RV toilet valve is a common hidden cause. Water may slowly enter the bowl without making much noise.
Dry the toilet bowl before starting your test. Then watch for a rising water level near the bottom.
Also inspect behind the toilet with a flashlight. A valve connection may drip onto the floor instead of entering the bowl.
Place a dry paper towel around the supply connection. Even a tiny leak will leave a visible wet mark.
A Plumbing Fitting or Water Line Is Leaking
RV plumbing experiences movement, vibration, heat, and cold. These conditions can loosen fittings or damage plastic lines.
Inspect the areas beneath both sinks. Check every visible connection while the system remains pressurized.
Look around the water heater, pump compartment, shower plumbing, and storage bays. Use your hand carefully to feel for moisture.
A cracked fitting may only leak under pressure. It can appear completely dry while the pump remains switched off.
Enclosed plumbing leaks are more difficult to find. Watch for soft flooring, damp cabinets, musty odors, or unexplained water beneath the RV.
A Low-Point Drain or Winterizing Valve Is Not Fully Closed
Low-point drains allow you to empty the plumbing system. Their caps or valves may seep after winterizing or maintenance.
Travel vibration can also loosen a drain cap. The resulting drip may fall beneath the RV and remain unnoticed.
Inspect every drain outlet while the pump is running. Look for moisture around valve stems, caps, and threaded connections.
Also check the winterizing valve near the pump. A partially open valve may allow air into the intake line.
The Water Heater Pressure-Relief Valve Is Weeping
Your water heater has a pressure-relief valve for safety. It must never be plugged, capped, or disabled.
Water can occasionally drip from this valve during heating. Expanding water may increase pressure inside the heater.
However, steady seepage can lower plumbing pressure. The pump may then cycle repeatedly to restore it.
Check the valve and discharge area while the system is pressurized. Follow the water heater manufacturer’s instructions before operating the valve manually.
Hot water can cause severe burns. Allow the system to cool before performing any close inspection.
The Pump’s Internal Check Valve Is Leaking
The pump contains a one-way check valve. It helps prevent pressurized water from flowing backward toward the fresh tank.
Debris can stop this valve from sealing properly. Common debris includes plastic shavings, mineral deposits, sand, and tank residue.
The pressure then bleeds backward through the pump. No visible exterior leak may appear.
You may hear the pump start for several seconds. It restores pressure, stops, and repeats the process later.
A damaged check valve may require cleaning or replacement. Some pumps have serviceable valve assemblies, while others do not.
Find the exact pump model before disassembly. The service procedure can differ significantly between brands and models.
The City Water Inlet Check Valve Is Leaking
The exterior city water connection also contains a check valve. It prevents onboard pump pressure from escaping through the inlet.
A damaged seal or trapped debris may let water seep outward. Check the inlet for moisture while using the freshwater tank and pump.
Remove the protective cap and inspect the connection. A drip at this location strongly suggests an inlet valve problem.
Do not press the inlet valve while the system is pressurized. Water may spray outward, and the internal seal may shift.
Switch off the pump and open a faucet first. This safely relieves pressure before inspection or repair.
Air Is Entering the Pump’s Intake Side
An intake-side air leak may not produce visible water. Instead, the pump draws air through a loose or damaged connection.
Common locations include the pump strainer, filter housing, tank outlet fitting, winterizing valve, and intake hose.
A flattened O-ring can cause this problem. A cracked strainer bowl may also pull air into the system.
Possible symptoms include sputtering faucets, inconsistent flow, and delayed pump priming. You may also see bubbles inside clear tubing.
Listen carefully near the pump after it stops. A faint hiss can help identify an improperly sealed connection.
Check the fresh tank level as well. A nearly empty tank may allow the pump to draw air during movement.
The Pressure Switch Is Misadjusted or Failing
The pressure switch tells the pump when to start and stop. Wear, debris, or damaged electrical contacts can affect its operation.
A failing switch may activate the pump even when pressure loss seems minimal. It may also shut the pump off inconsistently.
Other symptoms include delayed shutdown, irregular cycling, and changes after light tapping or vibration.
Do not randomly turn the pressure adjustment screw. Incorrect settings may damage plumbing fixtures or prevent proper pump operation.
Only adjust the switch when the manufacturer provides an approved procedure. Replacement is often safer than repeated adjustment.
The Pump Diaphragm or Internal Seals Are Worn
Demand pumps use flexible diaphragms and internal seals. These parts wear down after repeated use.
Worn internal components may allow pressure to bypass inside the pump. The exterior plumbing can remain completely dry.
An older pump may also become louder or slower. It may struggle to reach shutoff pressure.
Some models have replacement pump heads or rebuild kits. Others are more economical to replace as a complete unit.
What the Cycling Interval Can Tell You
Timing the pump will not identify the exact failed part. However, the interval can indicate how quickly your plumbing loses pressure.
| Pump Behavior | Likely Meaning | First Places to Check |
| Runs every few seconds | Major leak or severe internal pressure bypass | Open fixture, toilet valve, drain, pump check valve |
| Runs every 30 to 60 seconds | Moderate pressure loss | Toilet, outdoor shower, fittings, city inlet |
| Runs every few minutes | Slow leak, intake air leak, or valve seepage | Faucets, relief valve, strainer, pump connections |
| Runs only after water use | Usually normal repressurization | Confirm it stops and remains off |
| Cycles quickly while water flows | Restricted flow or unstable pump control | Strainer, aerator, water level, pressure switch |
| Runs continuously without pressure | Empty tank, lost prime, major leak, or pump damage | Tank level, intake line, winterizing valve, diaphragm |
These intervals are only general clues. Plumbing volume, pump design, temperature, and accumulator tanks can change cycling behavior.
A ten-minute interval does not always mean the leak is harmless. Small hidden leaks can still damage cabinets, floors, and insulation.
How to Find the Cause of Intermittent Pump Cycling
Start with the easiest external checks before opening the pump. A logical process saves time and reduces unnecessary part replacement.
- Check the freshwater tank level.
Make sure the pump has enough water to maintain a steady supply. - Disconnect the city water hose.
Test one water source at a time to avoid confusion. - Close every water fixture.
Include indoor faucets, showers, toilets, and exterior connections. - Check the outdoor shower handles.
Fully close both handles, even when the showerhead appears off. - Let the pump build pressure.
Wait until it reaches pressure and stops automatically. - Time the cycling interval.
Record how often it starts and how long it runs. - Inspect every visible fixture.
Look for drips around faucets, valves, showerheads, and toilets. - Use dry paper towels around fittings.
Paper reveals tiny leaks that your eyes may miss. - Inspect beneath the RV.
Check drains, tank connections, and the water heater discharge area. - Listen around the pump.
Hissing or bubbling may indicate an intake-side air leak. - Inspect the strainer and O-ring.
Confirm the bowl is secure and the seal is properly seated. - Switch the pump off after pressurizing.
Open a faucet later and observe how much pressure remains. - Check the city water inlet.
Look for seepage while the onboard pump supplies pressure. - Inspect internal pump components last.
Follow the exact service instructions for your pump model.
Keep the pump switched off when opening plumbing connections. Open a faucet first to release trapped pressure.
Disconnect 12-volt power before opening the pump housing. Keep towels and a small container nearby for spilled water.
How to Isolate a Hidden RV Plumbing Leak
Some leaks only appear when the plumbing remains pressurized. Others drain into enclosed spaces and become visible much later.
Use Dry Paper Towels Around Connections
Wipe each connection completely dry before testing. Wrap a fresh paper towel around the fitting.
Leave the system pressurized for several minutes. A damp mark can reveal a leak too small to drip visibly.
This method works well beneath sinks and behind toilets. It also helps around the pump and water heater.
Check One Plumbing Zone at a Time
Divide the RV into separate inspection areas. Begin with the kitchen, bathroom, toilet, outdoor fixtures, and utility compartment.
Inspect one area thoroughly before moving forward. This prevents small details from being overlooked.
Some RVs have shutoff valves for specific fixtures. Closing one valve may help isolate the pressure loss.
Do not add temporary shutoff valves without confirming their pressure rating. Use components approved for potable RV plumbing.
Watch the Toilet Bowl Water Level
Dry the bowl and mark the existing water level. Avoid flushing during the test.
Return after the pump cycles several times. A rising level suggests the toilet valve is passing water.
Water collecting behind the toilet points toward a fitting leak. Repair that leak before it damages the floor.
Inspect the RV’s Underbelly
An enclosed underbelly can hide leaks for hours. Insulation may absorb water before drips appear outside.
Look for sagging underbelly material or wet seams. Check for water around screws, access panels, and frame openings.
Do not puncture the underbelly to drain water without a plan. Wiring, plumbing, and insulation may sit directly above it.
A technician may need to open the material properly. Early inspection can prevent mold and structural damage.
Use a Pressure Gauge When Appropriate
A pressure gauge can confirm whether system pressure drops after shutdown. It may also reveal unstable pressure-switch behavior.
Use a gauge designed for potable-water plumbing. Connect it at a compatible fixture or test point.
Pressurize the system and record the reading. Then watch whether pressure falls while every fixture remains closed.
A falling reading confirms pressure loss. It does not identify where that loss occurs.
Never exceed the pressure ratings of your RV plumbing. Follow the pump and RV manufacturer’s limits.
How to Fix an RV Water Pump That Keeps Kicking On
The correct repair depends on where the pressure escapes. Fix the confirmed problem instead of replacing parts based on guesses.
Tighten or Reseal Loose Plumbing Connections
Begin by switching off the pump and relieving pressure. Tighten loose fittings according to their design.
Many RV connections use hand-tightened plastic fittings. Excess force can crack the fitting or distort the seal.
Replace damaged washers, cones, and O-rings. Use thread sealant only where the component manufacturer allows it.
Do not apply plumbing tape to connections that seal with a rubber washer. Tape can interfere with proper seating.
Repair a Dripping Faucet or Shower Valve
A leaking faucet may need a new cartridge, washer, or O-ring. The correct part depends on the fixture model.
Turn off the pump before removing handles or cartridges. Open the fixture to release pressure first.
Clean mineral deposits from sealing surfaces. Replace any cracked or hardened rubber components.
Outdoor shower fixtures often receive less attention. Inspect them closely after freezing weather or winter storage.
Replace a Leaking Toilet Water Valve
Many RV toilet valves can be replaced separately. You may not need an entirely new toilet.
Shut off the pump and drain pressure. Place towels around the toilet before disconnecting the water line.
Inspect the supply fitting and valve together. A loose fitting can look similar to a failed valve.
Use the correct replacement kit for the toilet model. Test several flushes before reinstalling access covers.
Close or Repair Low-Point Drains
Confirm each cap is tight and properly seated. Replace missing washers or cracked caps.
A valve that continues leaking may have debris inside. It may also have freeze damage around the body.
Replace damaged drain valves with matching potable-water components. Support the plumbing while loosening threaded parts.
Clean the Pump Strainer
A dirty strainer restricts flow and may damage pump components. A poorly sealed strainer can also draw air.
Follow these basic steps:
- Switch off the water pump.
- Disconnect power when access is close to wiring.
- Open a faucet to release pressure.
- Place towels beneath the strainer.
- Remove the clear strainer bowl carefully.
- Clean the screen with fresh water.
- Inspect the bowl for fine cracks.
- Check the O-ring for flattening or damage.
- Reinstall the O-ring in its correct groove.
- Hand-tighten the bowl securely.
- Restore power and inspect for leaks.
Avoid overtightening the clear bowl. Excessive force can crack it or deform the O-ring.
Clean or Replace the Internal Check Valve
First, verify that visible plumbing is not leaking. Then check whether your pump has a serviceable valve assembly.
Switch off the pump and disconnect electrical power. Relieve pressure before opening any part of the pump.
Inspect the valve for plastic shavings, grit, or mineral deposits. Remove debris without scratching sealing surfaces.
Replace worn springs, seals, or valve components when parts are available. Reassemble everything in the correct order.
If the pump still loses pressure, the valve seat may be damaged. A replacement pump head or complete pump may be needed.
Repair the City Water Inlet Check Valve
A city water inlet may be serviceable or replaceable. The best approach depends on its design and accessibility.
Relieve pressure before touching the internal valve. Do not force the valve stem with sharp tools.
A displaced O-ring may sometimes be repositioned. However, damaged springs or seals usually require inlet replacement.
Seal the replacement inlet according to the RV manufacturer’s instructions. Inspect behind the fitting for water intrusion afterward.
Correct an Intake-Side Air Leak
Begin at the fresh tank outlet and follow the intake line. Inspect each fitting before reaching the pump.
Check these components carefully:
- Freshwater tank outlet fitting
- Flexible intake hose
- Hose clamps
- Threaded adapters
- Winterizing siphon valve
- Pump strainer housing
- Strainer O-ring
- Pump inlet connection
Tighten loose clamps and replace cracked tubing. Replace damaged O-rings rather than coating them with excessive sealant.
Make sure the winterizing valve points toward the freshwater tank. A valve left between positions may draw air.
Replace or Adjust the Pressure Switch
A pressure switch may be sold separately or attached to the pump head. Check parts availability for your specific model.
Replacement is usually safer than random adjustment. Incorrect adjustment can cause excessive pressure or continuous operation.
When adjustment is permitted, use small changes only. Test pump shutdown and fixture flow after each adjustment.
Stop immediately if the pump cannot shut off. Restore the original setting when possible.
Replace the Pump When Internal Wear Is Extensive
A complete pump replacement may be appropriate when several internal parts have worn.
Consider replacement when the pump:
- Cannot maintain pressure
- Runs unusually hot
- Has damaged diaphragms
- Makes harsh mechanical noises
- Leaks from the motor or pump head
- Needs unavailable repair parts
- Continues cycling after confirmed repairs
Choose a replacement with compatible voltage, flow, and pressure ratings. More pressure is not always better.
An oversized pump may create noise and plumbing stress. Match the new pump to your RV’s system.
Could an Accumulator Tank Affect Pump Cycling?
An accumulator tank stores a small amount of pressurized water. It reduces pump starts during brief or low-flow water use.
It can smooth water flow and reduce pulsing. It may also make the pump operate more quietly.
However, an accumulator tank does not repair pressure loss. It may only increase the time between unwanted pump cycles.
If the pump restarts with every fixture closed, find the leak first. Do not use an accumulator tank to hide the symptom.
Check the tank’s air precharge according to its manual. Incorrect pressure can reduce its effectiveness.
Can Repeated Cycling Damage the RV Water Pump?
Frequent starting creates additional wear on the pump motor. It also stresses the pressure switch, diaphragm, and electrical contacts.
The pump may overheat during severe cycling. Battery consumption can also increase during dry camping.
Repeated cycling does not usually destroy the pump immediately. However, ignoring it can shorten the pump’s service life.
The greater concern may be hidden water damage. A small leak can affect wood, flooring, insulation, and nearby wiring.
Investigate the problem as soon as practical. Early repairs are usually simpler and less expensive.
Should You Leave the RV Water Pump On?
Demand pumps are designed to remain switched on during normal RV use. They stop automatically when the system reaches pressure.
You can usually leave the pump on while occupying the RV. A healthy system should remain quiet between water uses.
Switch the pump off when leaving the RV unattended. This limits damage if a pipe or fitting suddenly fails.
You should also turn it off when:
- Traveling
- Performing plumbing repairs
- The fresh tank is empty
- A leak remains unresolved
- The pump runs continuously
- The pump becomes unusually hot
- You hear cycling throughout the night
Turning it off overnight can stop the noise temporarily. It does not solve the underlying pressure loss.
How to Prevent the Pump From Cycling Again
Routine inspection helps prevent debris, loose fittings, and damaged seals from creating another pressure problem.
- Install the correct strainer before the pump inlet.
- Clean the pump strainer during regular maintenance.
- Flush debris from new or repaired freshwater tanks.
- Inspect fittings after rough or extended travel.
- Keep the winterizing valve fully closed during normal use.
- Replace flattened, cracked, or swollen O-rings.
- Check the toilet valve for slow seepage.
- Inspect indoor and outdoor showers regularly.
- Examine low-point drains after winterization.
- Use an RV water-pressure regulator on city water.
- Avoid operating the pump with an empty tank.
- Follow the pump manufacturer’s service instructions.
- Drain and winterize the plumbing before freezing weather.
- Repair small leaks before closing walls or access panels.
When Should You Call an RV Technician?
Some pressure-loss problems require access to concealed plumbing or electrical components. Professional diagnosis can prevent accidental damage.
Call an RV technician when:
- Water collects inside a wall or sealed underbelly.
- The floor feels soft near a plumbing fixture.
- Pump wiring becomes hot or smells burned.
- The pump runs continuously without building pressure.
- The water heater relief valve discharges constantly.
- Freezing damage may have cracked hidden plumbing.
- The pump requires internal electrical testing.
- Cycling continues after checking visible leak points.
- You cannot safely access the pump or plumbing.
- The repair involves propane or water heater components.
Hidden leaks become more expensive when left untreated. Professional help is worthwhile when the source cannot be isolated safely.
Final Thoughts
Your RV water pump runs every few minutes because the plumbing cannot hold steady pressure. The pump starts only because it senses that pressure loss.
Begin with the toilet, faucets, outdoor shower, and low-point drains. These areas are easy to inspect and commonly responsible.
Next, examine the pump strainer, intake fittings, city water inlet, and internal check valve. Leave pressure-switch adjustments and pump disassembly until later.
A methodical inspection usually finds the cause without unnecessary replacements. Fixing the issue early also protects the pump and prevents hidden water damage.
Related FAQs
Why Does My RV Water Pump Run for a Few Seconds at Night?
A slow leak or internal valve problem may lower pressure overnight, causing the pump to briefly kick on. The toilet valve, check valve, or water heater are common sources, but temperature changes can also slightly affect system pressure. If it happens regularly, it still points to a small pressure loss that should be checked.
Why Does My RV Water Pump Cycle While a Faucet Is Open?
This usually happens when the faucet flow is too low for the pump’s demand, causing it to pulse as it tries to maintain pressure. A clogged aerator, dirty strainer, low tank level, or weak pressure switch can make it worse. Opening the faucet more fully or checking the strainer often helps identify the issue.
Why Does My RV Water Pump Run After I Turn Off the Faucet?
A short run after closing a faucet is normal because the pump is restoring system pressure. It should shut off within a few seconds once pressure stabilizes. If it keeps running longer, it may indicate air in the lines, a small leak, or a loss of prime.
Can a Bad Check Valve Make the Pump Cycle?
Yes, a faulty check valve can let water flow backward and slowly drop system pressure. When pressure falls, the pump turns back on to restore it, creating repeated cycling. This can happen even when all fixtures are closed.
Can Air in the Water Lines Cause Pump Cycling?
Yes, air in the system can disrupt stable pressure and cause the pump to cycle irregularly. It often enters through loose intake fittings, a bad strainer seal, or a low freshwater tank. You may also notice sputtering faucets or bubbles near the pump.
Why Does My RV Water Pump Run Without Producing Water?
This usually means the tank is empty, the pump has lost its prime, or air is blocking the intake. A closed winterizing valve, cracked hose, or clogged strainer can also stop water flow. Turn the pump off quickly to avoid damage if it cannot prime.
Can a Toilet Cause an RV Water Pump to Run Randomly?
Yes, a leaking toilet valve can slowly let water pass into the bowl or behind the fixture. This gradual pressure loss triggers the pump to turn on unexpectedly. Even a small leak can cause noticeable cycling over time.
Will an Accumulator Tank Stop Random Pump Cycling?
No, an accumulator tank only smooths pressure changes and reduces short cycling during use. It cannot fix leaks or stop pressure loss in the system. The underlying issue still needs to be repaired for proper operation.
Should I Replace the Entire Pump or Only the Check Valve?
If the check valve is accessible and the pump is otherwise in good condition, replacing just the valve is usually enough. However, if the pump is old, worn, or has multiple issues, a full replacement is often more reliable. Availability of parts also plays a role in the decision.
How Long Should an RV Water Pump Hold Pressure?
A healthy system should hold pressure indefinitely when all fixtures are closed. If the pump keeps cycling every few minutes, it means pressure is escaping somewhere. The exact timing varies, but any consistent drop indicates a problem.
Why Does My RV Water Pump Keep Running Continuously?
This usually happens when the tank is empty, the pump has lost prime, or there is a major leak. It can also be caused by a stuck valve or damaged internal pump components. Turn the pump off immediately and inspect the system to prevent damage.
Can High City Water Pressure Damage the Pump Check Valve?
Yes, excessive city water pressure can stress seals, fittings, and the check valve over time. The pump itself is bypassed, but the plumbing system still feels the pressure. Using a pressure regulator helps protect all RV water components.

David Marshall shares travel route insights, mileage planning tips, and road-tested advice. His writing helps travelers understand distance, timing, and equipment choices. Every article is built around clarity and real-world usefulness.