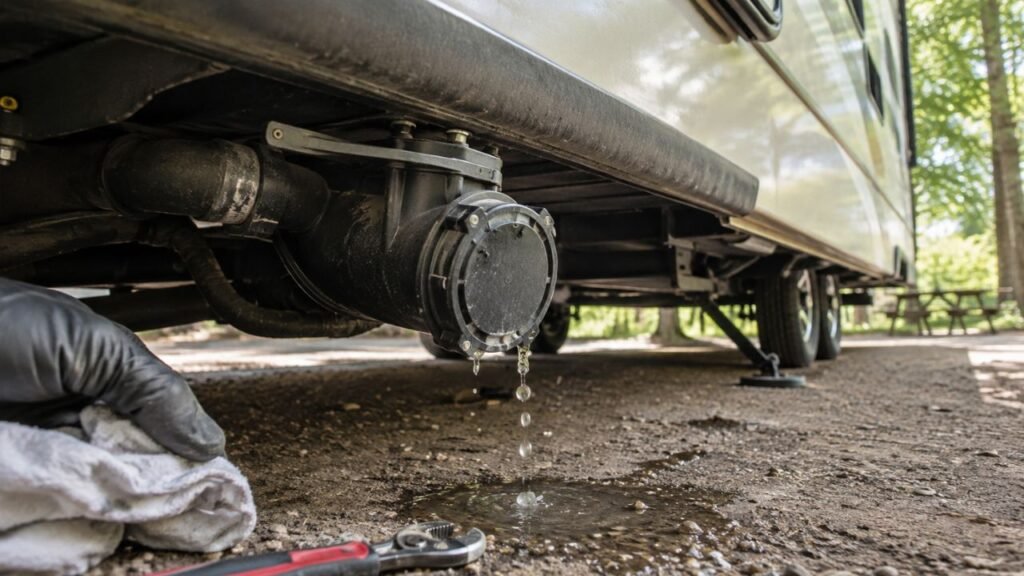
City water usually fills your RV fresh tank because pressurized water is leaking backward through the water pump’s internal check valve. A mispositioned or damaged city-water selector valve can also route water directly into the tank.
This guide explains how to identify the cause, stop the overflow, test each component, and choose the right permanent repair.
Key Takeaways
- A leaking pump check valve is the most common cause.
- A selector valve may be set incorrectly or damaged internally.
- Slow filling often points toward a small check-valve leak.
- Rapid filling usually suggests a selector or routing problem.
- High campground pressure can worsen an existing valve failure.
- Never cap or restrict the fresh tank overflow tube.
- Shut off city water before moving valves or opening plumbing.
- Repeated backflow usually requires cleaning, repair, or replacement.
How Should City Water Flow Through an RV?
Your city-water connection and freshwater tank normally operate as separate water sources. Knowing their normal paths makes the backflow problem easier to understand.
City Water Mode
In city-water mode, the campground supply pressurizes your RV plumbing directly. Water enters through the exterior city-water connection and flows toward your faucets, toilet, shower, and water heater.
Your onboard water pump normally remains turned off during this process. City water should not pass through the pump or enter the freshwater tank.
Some RVs have a simple city-water inlet. Others use a docking station with several valve positions.
Fresh Tank and Water Pump Mode
When you are not connected to city water, your pump draws water from the freshwater tank. The pump then pressurizes your plumbing system.
The pump starts when you open a faucet. It stops once the plumbing reaches its shutoff pressure.
A properly working valve inside the pump prevents pressurized water from flowing backward toward the tank.
How the Water Pump Check Valve Works
Most RV water pumps contain an internal one-way valve. This component allows water to move from the tank toward your fixtures.
It should block water traveling in the opposite direction.
When city water pressurizes your plumbing, the valve should remain sealed. If debris, mineral buildup, wear, or damage prevents that seal, water can move backward through the pump.
That backflow eventually reaches the freshwater tank.
How a City-Water Selector Valve Works
Some RVs use a multi-position selector valve instead of separate connections. The valve may include settings such as:
- City water
- Tank fill
- Normal operation
- Winterizing
- Sanitizing
- Dry camping
Inside the valve, passages direct water toward different plumbing lines. A damaged seal or incorrect position can connect city water directly to the tank.
What Causes City Water to Fill the Fresh Tank?
The exact cause depends on your RV’s plumbing layout. However, most cases involve the pump check valve or a city-water selector system.
Debris Inside the Pump Check Valve
Small debris can become trapped beneath the pump’s internal valve.
Common debris includes:
- Plastic shavings from tank installation
- Mineral deposits
- Sediment from campground water
- Pieces of thread-sealing material
- Rubber fragments from aging plumbing
- Dirt entering through an unprotected hose
Even a tiny particle can prevent the valve from closing completely. City water then slowly leaks backward through the pump.
This problem may appear suddenly after filling, sanitizing, winterizing, or replacing plumbing parts.
A Worn Pump Check Valve
Pump valves and seals naturally wear over time. Repeated pressure cycles can gradually weaken rubber components.
A worn check valve may work normally while the pump operates. However, it may fail when city water applies pressure from the opposite direction.
The tank may fill slowly for several hours before overflowing.
A Damaged Pump Diaphragm or Valve Assembly
RV demand pumps use several internal valves and flexible components. Cracks, distortion, or hardened rubber can affect how these parts seal.
You may notice other symptoms alongside backflow, including:
- Reduced water pressure
- Pulsating flow
- Frequent pump cycling
- Difficulty priming
- Water draining backward
- Unusual pump noise
When several symptoms appear together, replacing the pump may be more practical.
The Selector Valve Is Set to Tank Fill
If your RV has a docking station, check the selector first.
The tank-fill position intentionally sends city water into the freshwater tank. A handle left in that position will continue filling the tank until you change it.
This cause usually fills the tank faster than a leaking pump valve.
Always compare the handle position with the diagram printed on your RV. Labels and valve arrangements vary between manufacturers.
The Selector Valve Is Between Positions
A selector handle may look correctly positioned without being fully seated.
Internal passages may remain partially connected when the valve stops between settings. This can send some city water toward the fixtures and some toward the tank.
Depressurize the system before repositioning the handle. Moving some selector valves under pressure can damage their internal seals.
Worn Selector-Valve Seals
Selector valves contain O-rings, cartridges, or rotating seals. These components separate several water passages inside one housing.
A worn seal can allow water to cross between those passages. City water may then reach the fresh-tank fill line despite the correct handle position.
This problem may become intermittent. The tank may fill on one campground connection but behave normally on another.
Pressure differences can make the leak more noticeable.
Incorrect Winterization Valve Positions
Backflow problems often begin after winterizing or sanitizing the RV.
One or more valves may remain in the wrong position. A bypass valve can also be turned incorrectly during spring setup.
Review every valve involved in:
- Water heater bypassing
- Pump winterization
- Antifreeze suction
- Tank filling
- Sanitizing
- City-water operation
Do not assume every handle returned to its original position.
Incorrect Plumbing After a Repair
Previous repairs may have changed the normal water route.
A hose could be attached to the wrong pump port. An external check valve might also be installed backward.
Inspect recent work involving:
- The water pump
- City-water inlet
- Selector manifold
- Water heater
- Fresh-tank fill line
- Winterization kit
- Plumbing bypasses
Follow the arrows printed on pumps and check valves. Those arrows show the required direction of water flow.
Excessive City-Water Pressure
High pressure usually does not create the backflow path by itself. However, it can force water through a weak valve or damaged seal.
Campground water pressure can change throughout the day. Sudden pressure increases may expose a valve that previously held under lower pressure.
Always use a potable-water pressure regulator suited to your RV. Follow the pressure limit stated in your owner’s manual.
What Do the Symptoms Tell You?
The speed and timing of the problem can help narrow your search. Use the following table as a starting point rather than a final diagnosis.
| Symptom | Most Likely Cause | First Check |
| Tank level rises slowly | Pump check valve leaking | Test the pump and check valve |
| Tank fills very quickly | Selector set to tank fill | Confirm every selector position |
| Problem started after winterizing | Incorrect valve position | Restore normal-use settings |
| Backflow stops after running the pump | Debris temporarily moved | Clean the strainer and valve |
| Problem returns after several trips | Worn pump valve | Service or replace the pump |
| Tank fills despite a new pump | Selector valve or plumbing fault | Trace the fill and city-water lines |
| Water exits the city inlet with pump running | City-inlet check valve failure | Inspect the exterior inlet |
| Overflow continues after disconnecting city water | Overfilled tank or siphoning | Drain water and inspect routing |
| Problem occurs only at high-pressure parks | Weak valve or seal | Test with regulated pressure |
A failed city-water inlet check valve is a related problem. However, it usually causes water to leak outward from the city connection while the onboard pump runs.
It does not commonly cause the fresh tank to fill.
How Can You Confirm the Fresh Tank Is Filling?
Tank-monitor sensors are not always accurate. Confirm the problem before replacing expensive plumbing parts.
- Turn off the onboard water pump.
- Disconnect the city-water hose.
- Open a faucet and release stored pressure.
- Check your selector-valve positions.
- Note the current fresh-tank level.
- Drain some water if the tank is nearly full.
- Close every faucet and drain valve.
- Connect city water through a pressure regulator.
- Avoid using water inside the RV.
- Wait and monitor the tank level.
- Watch the overflow tube beneath the RV.
- Disconnect city water if the level continues rising.
You can also mark the water level on a visible translucent tank. This method may provide better confirmation than the monitor panel.
A continuously running overflow while connected strongly suggests active filling.
What Should You Do If the Tank Is Overflowing?
An overflowing tank should be treated as an active plumbing problem. Stop the water before beginning any diagnosis.
- Turn off the campground spigot immediately.
- Disconnect the potable-water hose.
- Open a cold-water faucet to relieve pressure.
- Turn off the onboard water pump.
- Drain the fresh tank to a safe level.
- Check the enclosed underbelly for trapped water.
- Inspect storage compartments near the tank.
- Look for bulging, loose straps, or damaged fittings.
- Do not reconnect city water until testing is complete.
- Never block, plug, or clamp the overflow tube.
The overflow tube helps the tank vent while filling. Blocking it can create pressure inside a tank that was not designed for pressurization.
How Do You Fix City Water Backfeeding Into the Tank?
Begin with the simplest checks before replacing parts. Many backflow problems come from debris or an incorrectly positioned valve.
Reset the Selector Valve
Start here when your RV has a docking-station selector.
- Shut off the city-water supply.
- Disconnect the hose.
- Open a faucet and relieve pressure.
- Rotate the selector through its normal positions.
- Return it firmly to city-water mode.
- Close the faucet.
- Reconnect regulated city water.
- Watch the fresh-tank level.
Do not force a stiff valve handle. Resistance may indicate internal damage or remaining pressure.
Some valves should not be moved while pressurized. Check your RV manual before operating the selector.
Try to Reseat the Pump Check Valve
Running the pump may dislodge a small particle trapped inside the valve.
- Disconnect city water.
- Turn on the onboard water pump.
- Open one or two cold-water faucets.
- Let water run for about 15 seconds.
- Close the faucets.
- Turn the pump off.
- Reconnect regulated city water.
- Check whether the tank still fills.
This method may provide a temporary reset. It does not repair worn or damaged components.
If the problem returns, inspect the pump instead of repeatedly resetting it.
Clean the Pump Inlet Strainer
Many RV pumps have a small transparent strainer on the inlet side. It protects the pump from larger debris.
Turn off power and depressurize the plumbing before removing it.
Check for:
- Plastic flakes
- Sand
- Mineral deposits
- Slime
- Rust particles
- Damaged screen material
Rinse the screen with clean water. Inspect the housing and sealing gasket before reinstalling it.
Hand-tighten plastic fittings unless the manufacturer states otherwise. Excessive force can crack the strainer housing.
Inspect the Pump Check Valve
First identify the exact pump model. Search for the matching service instructions before opening the pump head.
Basic inspection usually involves:
- Disconnecting shore power.
- Turning off the battery disconnect.
- Removing the pump fuse.
- Shutting off every water source.
- Opening a faucet to relieve pressure.
- Photographing hose and wire positions.
- Removing the pump carefully.
- Inspecting the valve assembly and sealing surfaces.
Look for debris, distortion, cracks, hardened rubber, or damaged springs.
Do not use petroleum products on potable-water seals. Only use cleaners and lubricants approved for the specific component.
Replace the Pump Valve Assembly
Some pumps have replaceable valve kits or complete pump-head assemblies.
A repair kit may be worthwhile when:
- The pump motor remains strong.
- The housing has no cracks.
- The pump holds normal pressure.
- Replacement parts are readily available.
- The valve failure is clearly identified.
Match the service kit to the full pump model number. Similar-looking pumps may use different internal parts.
Replace the Water Pump
Replacing the complete pump may be the better choice when several internal parts are worn.
Consider replacement when:
- Backflow repeatedly returns.
- The pump frequently loses prime.
- Water pressure has declined.
- The motor sounds unusually loud.
- The housing leaks.
- The pump cycles without water use.
- Service parts cost nearly as much.
- The current model is old or unsupported.
Choose a replacement with compatible voltage, flow, pressure, fittings, and electrical requirements.
A larger pump is not automatically better. Excessive flow may create noise, rapid cycling, or plumbing stress.
Service the Selector Valve
When resetting the selector does not help, its cartridge or seals may require service.
Possible repairs include:
- Replacing O-rings
- Replacing the rotating cartridge
- Replacing the valve stem
- Tightening loose fittings
- Replacing the complete selector assembly
- Correcting incorrectly routed hoses
Photograph every connection before disassembly. Several lines may look nearly identical inside a docking station.
Labeling each hose can prevent an incorrect reinstallation.
Correct the Winterization Setup
Review the normal operating positions in your owner’s manual.
Pay close attention to:
- Pump suction valves
- Antifreeze pickup lines
- Tank-fill valves
- Water-heater bypass valves
- Sanitizing connections
- Low-point drains
Return each valve to its normal-use position before reconnecting city water.
Install an External Check Valve
An additional inline check valve can sometimes prevent reverse flow. However, it must be placed in the correct line and direction.
The valve should block pressurized water from returning toward the fresh tank. Its exact location depends on the RV’s plumbing layout.
Do not automatically install it on the pump inlet without tracing the lines. Incorrect placement can restrict pump suction or create additional problems.
Use a potable-water-rated valve with suitable pressure, size, and flow capacity.
An external valve can solve backflow, but it should not hide a failing pump or damaged selector.
Should You Repair or Replace the Pump?
The best choice depends on the pump’s age, condition, and available parts. A simple valve repair can save money when the remaining pump is healthy.
Repair may make sense when:
- The pump is relatively new.
- Debris caused the valve failure.
- Water pressure remains strong.
- The motor operates smoothly.
- A matching service kit is available.
- The pump housing remains undamaged.
Replacement may be better when:
- The backflow problem keeps returning.
- Internal rubber parts are brittle.
- The pump frequently loses prime.
- Water flow is weak or inconsistent.
- The housing has started leaking.
- Replacement parts are difficult to find.
- Several problems appear at the same time.
Consider the labor involved as well. Replacing an accessible pump may be easier than rebuilding an older model.
Can High City-Water Pressure Fill the Fresh Tank?
High pressure alone should not route city water into the freshwater tank. A properly working check valve and selector should block that path.
However, excessive pressure can expose an already weak component. Water may push past a worn pump valve or damaged selector seal.
Use an adjustable or fixed pressure regulator designed for potable water. Install it according to its instructions, usually near the campground spigot.
A regulator also protects:
- PEX fittings
- Faucet connections
- Toilet valves
- Water-heater components
- Flexible supply hoses
- Filter housings
- Appliance connections
Do not assume every RV has the same safe pressure limit. Check your owner’s manual before adjusting the regulator.
Can an Overfilled Fresh Tank Damage the RV?
An overflow tube should release excess water before the tank becomes pressurized. Still, continuous filling can create several problems.
Possible consequences include:
- Water entering the underbelly
- Wet insulation
- Damaged tank supports
- Loose mounting straps
- Leaking tank fittings
- Water entering storage compartments
- Added weight while towing
- Floor or wall damage
- Mold growth in enclosed areas
- Tank deformation
The risk depends on how the tank is mounted. It also depends on where the overflow water exits.
A continuously overflowing tank should never be ignored simply because water appears to drain outside.
How Can You Prevent the Problem From Returning?
Regular plumbing checks can catch backflow before the tank overflows. Pay extra attention after winterizing, sanitizing, or replacing the pump.
- Use a pressure regulator on every campground connection.
- Install a potable-water filter when water contains sediment.
- Clean the pump inlet strainer regularly.
- Keep caps on unused water connections.
- Flush new plumbing before operating the pump.
- Confirm selector positions before pressurizing the system.
- Never force selector handles.
- Avoid moving valves under pressure.
- Inspect the tank level after connecting city water.
- Check again after 15 to 30 minutes.
- Disconnect city water before leaving for long periods.
- Repair recurring backflow instead of relying on temporary resets.
- Inspect the system after winterization or sanitizing.
- Keep the overflow tube open and properly routed.
A quick tank-level check after connecting can prevent hours of unnoticed filling.
When Should You Call an RV Technician?
Some repairs require access to concealed plumbing or complicated selector systems. Professional help may prevent further damage.
Contact an RV technician when:
- The tank fills after replacing the water pump.
- The selector manifold is difficult to access.
- Water has entered the enclosed underbelly.
- The fresh tank appears swollen or displaced.
- Tank supports or straps look damaged.
- Plumbing lines were previously modified.
- You cannot identify the correct water path.
- Electrical wiring near the pump is damaged.
- The RV remains under warranty.
- Water appears inside walls or floors.
- The selector valve requires complete removal.
- Backflow returns after multiple repairs.
Provide the technician with the RV model, pump model, and recent repair history.
Final Thoughts
City water filling your RV fresh tank usually points to a leaking pump check valve. A damaged or incorrectly positioned selector valve is the other likely cause.
Start by shutting off city water and confirming every valve position. Then test the pump, clean its strainer, and inspect the internal check valve. Never block the overflow tube to hide the problem.
Once repaired, use regulated water pressure and monitor the tank after connecting. Those simple habits can prevent hidden leaks, water damage, and an unexpected overflow.
Related FAQs
Will Turning Off the Water Pump Stop the Tank From Filling?
Usually, no. City water can still flow backward through a leaking pump check valve even when the pump is off. Turning off the pump only stops its operation and does not seal a damaged internal valve.
Can I Keep Using City Water While the Tank Fills?
No, you should disconnect city water until the issue is found. Continued use can overflow the tank, damage the underbelly, or stress tank supports, so switch to tank water only if the system is safe.
Why Is Water Coming From My Fresh Tank Overflow Tube?
The tank is likely full, overfilling, or receiving unwanted city water through a faulty valve. A small drip after travel or leveling is normal, but steady flow while connected to city water signals a problem.
Is the Water Pump Check Valve Replaceable?
It depends on the pump model. Some allow replacement of the valve or pump head, while others require full pump replacement, so always check the model number before buying parts.
Can I Add a Second Check Valve?
Yes, an external check valve can help stop backflow if installed correctly. It must match the correct flow direction and plumbing layout, or it may restrict water flow or cause new issues.
Why Did This Start After Winterizing My RV?
A valve may have been left in the wrong position or debris may have shifted during winterizing. Check the suction valve, tank-fill settings, water heater bypass, and all related connections carefully.
Can a Water Filter Prevent Backflow?
A filter can reduce sediment and help protect plumbing components, but it cannot fix worn seals, damaged O-rings, or a failed pump check valve that is already causing backflow.
Is It Safe to Block the Fresh Tank Overflow?
No, never block or cap the overflow tube. It is needed for air release and excess water drainage, and blocking it can create unsafe pressure inside the tank.
Why Does My Fresh Tank Fill Slowly?
Slow filling usually means a small leak in the pump check valve. A tank-fill setting normally fills much faster, but a partially damaged selector valve can also cause slow filling.
Should the Water Pump Be On With City Water Connected?
No, the pump is normally off when using city water since external pressure supplies the system. Always follow your RV manual if your setup has special plumbing configurations.
Why Does the Problem Stop After Running the Pump?
Running the pump can flush debris away from the check valve and temporarily reseat it. If the issue returns, the valve is likely worn and needs cleaning or replacement.
Can a Full Fresh Tank Affect Towing Weight?
Yes, a full tank adds significant weight and can reduce cargo capacity and affect handling. Always drain unnecessary water before travel to maintain safe towing conditions.
Can a Bad City-Water Inlet Cause the Tank to Fill?
Usually no, because a bad inlet check valve typically leaks outward when the pump runs. Fresh tank filling is more often caused by a faulty pump check valve or selector valve issue.

David Marshall shares travel route insights, mileage planning tips, and road-tested advice. His writing helps travelers understand distance, timing, and equipment choices. Every article is built around clarity and real-world usefulness.