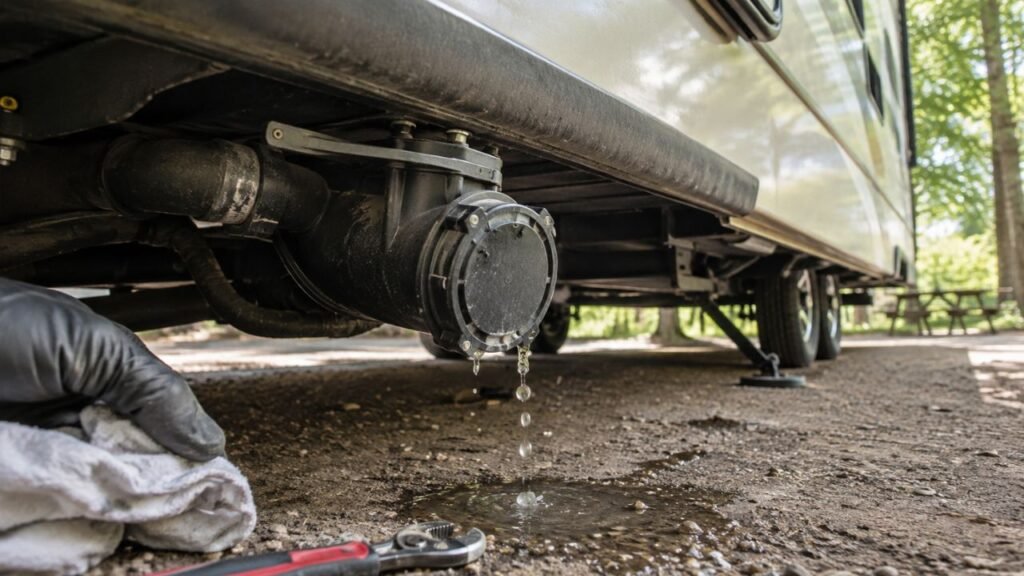
You can prevent RV leaks and structural damage by inspecting exterior seals every three to six months, cleaning the roof regularly, repairing failed sealant immediately, checking plumbing connections, controlling interior moisture, and storing the RV properly. Catching a small leak early can prevent rotted flooring, wall delamination, mold, corrosion, and expensive structural repairs.
This guide explains where RV leaks commonly begin, how to inspect vulnerable areas, which warning signs require attention, and when professional repairs are necessary.
Key Takeaways
- Inspect roof seams, vents, windows, and doors every three to six months.
- Check the RV after storms, long trips, and contact with branches.
- Use sealants approved for your specific roof and exterior materials.
- Investigate stains, odors, bubbling panels, and soft surfaces immediately.
- Monitor plumbing fittings, appliances, and water-pump behavior regularly.
- Control condensation with ventilation and proper moisture management.
- Arrange professional testing when moisture may be hidden inside panels.
Why RV Leaks Can Cause Serious Structural Damage
A small RV leak rarely stays small when ignored. Water can travel behind wall panels, through insulation, and beneath flooring before you see a visible drip.
Once moisture enters the structure, it may remain trapped for weeks. This creates ideal conditions for wood rot, mold growth, corrosion, and adhesive failure.
Many RV walls contain several bonded layers. When moisture weakens the adhesive between those layers, the exterior panel may begin separating. This condition is called delamination.
Water can also soften plywood floors and roof decking. The affected area may feel slightly spongy at first. Over time, it can become unsafe to walk or place weight on.
Electrical components create another concern. Water entering around lights, roof fixtures, or appliances may reach wiring and connectors. This can cause corrosion, short circuits, or unreliable equipment.
The visible stain is not always directly beneath the leak. Water often follows framing, wires, or roof contours before appearing inside. That is why finding the entry point requires a complete inspection.
Where Do RV Leaks Usually Start?
RV leaks can begin at exterior openings, body seams, roof accessories, plumbing connections, or damaged structural joints. Knowing the common entry points makes your inspection much faster.
Roof Seams and Edge Moldings
The seams connecting the roof to the front, rear, and sidewalls receive constant exposure. Sunlight, rain, temperature changes, and road vibration gradually weaken the sealant.
Pay close attention to the front cap, rear cap, roof corners, and side rails. Cracked, peeling, missing, or separated sealant should never be ignored.
Water entering through an edge seam can spread across a large ceiling area. It may then travel down the wall before becoming visible.
Roof Vents, Skylights, and Air Conditioners
Every opening cut into the RV roof creates a potential leak point. This includes plumbing vents, skylights, fans, antennas, and air conditioners.
Inspect the sealant around each fixture closely. Look for cracks, gaps, loose edges, exposed screws, or sections pulling away from the roof.
A rooftop air conditioner may also leak through its gasket. The gasket sits between the air conditioner and roof opening. If it loosens, shifts, or deteriorates, rainwater may enter the ceiling.
Blocked air-conditioner drainage paths can cause problems too. Condensation may back up and spill inside instead of draining across the roof.
Windows, Entry Doors, and Compartment Doors
Windows and doors rely on sealant, rubber seals, and drainage channels. Any of these components can fail as the RV ages.
Inspect the outer frame for gaps, cracked caulk, or loose trim. Check rubber seals for flattening, splitting, hardening, or separation.
Many RV windows contain small drainage openings called weep holes. These openings allow collected water to escape. Dirt or excessive sealant can block them.
Compartment doors deserve the same attention. Water entering a storage bay can soak the floor or travel into nearby walls.
Slide-Out Roofs and Seals
Slide-outs contain several moving seals that must remain flexible and aligned. A torn seal or poorly aligned room can allow rainwater inside.
Check the outer wiper seal and inner bulb seal. The wiper moves across the slide wall, while the bulb seal compresses when the slide closes.
Leaves, branches, dirt, and standing water can collect on the slide roof. Retracting the slide without removing debris may pull moisture inside.
A slide that sits unevenly may not press firmly against its seals. Misalignment should be inspected before adjusting or replacing seals.
Marker Lights and Exterior Attachments
Clearance lights, cameras, ladders, awnings, handles, roof racks, and exterior speakers all use fasteners. Every screw creates a possible water-entry point.
The sealant behind a marker light may fail without obvious exterior damage. Water can then enter through the screw holes and travel behind the wall.
Look for loose fixtures, cracked lenses, rusted screws, and damaged sealant. A small amount of moisture behind a light can cause significant wall damage.
Wall, Floor, and Corner Joints
An RV body twists slightly while traveling. Road bumps, uneven campsites, and temperature changes place stress on joints and fasteners.
Older RVs may develop gaps where walls meet the floor. Road spray can enter these areas during wet travel.
Inspect lower corner moldings, sidewall seams, wheel-well areas, and the bottom edge of the exterior walls. Missing screws or separated trim may indicate movement.
Plumbing Lines and Water Appliances
Not every RV leak comes from outside. Plumbing leaks can remain hidden beneath cabinets, behind walls, or inside the underbelly.
Common sources include loose fittings, cracked hoses, water pumps, toilets, faucets, showers, water heaters, and drain connections.
A plumbing leak may only appear while the system is pressurized. Check the RV while using the pump and while connected to city water.
Underbelly and Storage Compartments
A damaged underbelly can collect water from plumbing leaks, leaking tanks, or road spray. The material may sag when water becomes trapped above it.
Check for bulging sections, dripping water, loose tape, punctures, and missing fasteners. Do not cut the underbelly open until you identify what may be above it.
Exterior storage areas can also reveal early damage. Damp carpeting, swollen wood, musty odors, and rusted hardware often indicate water entry.
How Often Should You Inspect an RV for Leaks?
Your inspection schedule should reflect how often you travel, where you store the RV, and the conditions it experiences. Always follow the maintenance schedule in your owner’s manual.
| Inspection Time | Areas to Check | What to Look For | Recommended Action |
| Before every trip | Roof edges, windows, doors, plumbing | Loose trim, wet areas, damaged seals | Repair visible problems before traveling |
| After heavy rain | Ceiling, cabinets, walls, storage bays | Stains, dampness, odors, dripping water | Locate and contain the leak immediately |
| After long trips | Roof, underbelly, exterior fixtures | Road damage, punctures, loose fasteners | Clean, tighten, repair, or reseal |
| Monthly | Interior corners, plumbing, slide-outs | Condensation, softness, mold, moisture | Dry the area and find the source |
| Every 3–6 months | Roof seams, vents, windows, doors | Cracks, peeling sealant, separation | Reseal with a compatible product |
| Annually | Full body and hidden moisture areas | Elevated moisture inside panels | Consider professional moisture testing |
| Before storage | Roof, plumbing, gutters, cover | Debris, trapped water, freezing risks | Clean, dry, protect, and winterize |
Inspect more frequently when the RV remains outdoors. Strong sunlight, heavy rain, snow, falling branches, and temperature changes can shorten sealant life.
You should also inspect after any roof impact. Even a small branch can puncture a membrane or disturb a fixture.
How to Inspect Your RV Roof and Exterior Seals
A complete exterior inspection involves more than glancing at the roof. Work slowly, use safe access equipment, and examine every opening and seam.
Check Whether the Roof Is Safe to Access
Do not assume every RV roof supports walking. Check the owner’s manual before stepping onto it.
A factory-installed ladder does not always mean every roof area supports your weight. Some roofs have designated walkable sections.
Never walk on a roof that feels soft, brittle, wet, or unstable. Use a secure ladder, inspection camera, or long-handled cleaning tool instead.
Avoid placing pressure near skylights, vents, and unsupported roof edges. These areas may crack or flex under weight.
Examine Every Roof Opening
Start with the vents, skylights, antennas, plumbing stacks, fans, and solar mounts. Inspect the complete perimeter of each fixture.
Look for:
- Cracked or missing sealant
- Loose sealant edges
- Exposed screw heads
- Rusted fasteners
- Tears near the fixture
- Discoloration around the opening
- Movement when gently pressed
Do not pull aggressively on a sealed fixture. You only need enough pressure to identify looseness.
Inspect the Roof Perimeter
Examine the seams along both sidewalls. Then inspect the joints around the front and rear caps.
These areas experience significant movement during travel. Sealant may crack where different materials expand at different rates.
Check corner moldings carefully. Water entering through a corner can spread into both the roof and wall.
Look for Surface Damage
Walk around the RV and view the roof from several angles. Changes in lighting may reveal damage that was previously hidden.
Watch for bubbles, punctures, tears, wrinkles, lifted material, exposed decking, and unusually dark areas.
A small bubble does not always indicate an active leak. However, growing bubbles or soft material require professional evaluation.
Check for Water Pooling
Some water may remain briefly after rain. Large or persistent pools deserve closer attention.
Remove leaves, dirt, and debris from drainage paths. Check gutters and downspouts for blockages.
A sagging roof section may indicate weakened decking or framing. Do not simply cover it with sealant without finding the cause.
Inspect Sidewalls and Exterior Openings
Continue the inspection down the sidewalls. Examine windows, doors, lights, vents, utility connections, and storage compartments.
Look closely around awning brackets and ladder mounts. These components place extra stress on fasteners and surrounding sealant.
Check exterior wall panels for bulging or waviness. New or growing distortion may indicate delamination.
How to Clean and Protect an RV Roof
Cleaning removes dirt, sap, leaves, and organic debris that hide damage. It also gives you a clear surface for inspecting seams and fixtures.
Follow these steps:
- Identify your roof material before choosing a cleaner.
- Review the RV and roof manufacturer’s instructions.
- Remove branches, leaves, and loose debris by hand.
- Protect the RV sides from dirty runoff when necessary.
- Apply a mild cleaner approved for the roof material.
- Scrub gently using a soft-bristle brush.
- Avoid harsh solvents and aggressive pressure washing.
- Rinse carefully without forcing water beneath fixtures.
- Allow the roof to dry completely.
- Inspect every seam after cleaning.
- Apply an approved protectant when recommended.
Rubber, fiberglass, aluminum, and coated roofs may require different products. A cleaner that works on fiberglass may damage a rubber membrane.
Avoid petroleum-based cleaners unless the manufacturer specifically approves them. Petroleum products may swell, soften, or weaken certain roofing materials.
Do not pressure-wash directly against seams or sealant edges. High-pressure water can force moisture beneath materials that appear secure.
Cleaning the roof twice yearly works for many owners. However, RVs parked beneath trees may need more frequent cleaning.
How to Reseal RV Cracks and Failed Seams Correctly
Resealing an RV involves choosing the correct material and preparing the surface properly. Applying random caulk over a dirty seam often creates a temporary patch.
Identify the Surface and Existing Sealant
Determine whether you are working on rubber roofing, fiberglass, aluminum, plastic, glass, or painted metal.
You should also identify the existing sealant when possible. Some products do not bond properly to certain older materials.
Check the manufacturer’s maintenance guide before applying anything. Using an incompatible sealant may damage the surface or affect warranty coverage.
Choose a Compatible RV Sealant
Different areas require different sealant types.
- Use self-leveling sealant on suitable horizontal roof surfaces.
- Use non-sag sealant on vertical walls and side seams.
- Use approved butyl tape beneath removable fixtures.
- Use compatible repair tape for suitable tears and punctures.
- Use approved roof coatings only when the roof requires broader treatment.
Self-leveling sealant flows outward after application. This makes it unsuitable for vertical surfaces.
Non-sag sealant keeps its shape on windows, doors, moldings, and sidewalls. Always confirm compatibility before applying it.
Prepare the Repair Area
Remove dirt, oils, loose sealant, and unstable material. Use a plastic scraper when possible to avoid damaging the roof.
You do not always need to remove every trace of old sealant. Stable material may remain when the new product is compatible.
Loose, cracked, contaminated, or peeling sections should be removed. Sealing over failed material will not create a reliable bond.
Clean the area using an approved cleaner. Allow every surface to dry before applying new sealant.
Apply the Sealant Properly
Follow the product instructions for temperature, bead size, application thickness, and curing time.
Cover the damaged area and extend slightly beyond it. Do not leave gaps around screws or fixture corners.
Avoid smoothing self-leveling products unless instructed. They are designed to spread naturally.
Do not expose uncured sealant to rain, washing, or travel vibration. Give it the complete curing time listed by the manufacturer.
Inspect the Repair After Curing
Check the repair after the sealant cures. Look for gaps, bubbles, lifting, cracking, or incomplete coverage.
Inspect again after rainfall. Check both the exterior repair and nearby interior surfaces.
A successful repair should remain flexible and firmly bonded. Continued moisture means the leak may have another entry point.
How to Prevent Leaks Around Windows and Doors
Windows and doors experience movement whenever the RV travels. Regular cleaning and inspection can prevent small seal failures from damaging the wall.
- Examine the complete outer frame for cracked sealant.
- Check rubber seals for hardening, tearing, and flattening.
- Clean dirt from window tracks and drainage openings.
- Avoid covering designed weep holes with sealant.
- Look for staining beneath window corners.
- Check whether entry doors close evenly.
- Inspect compartment doors and utility panels.
- Replace failed seals instead of repeatedly covering them.
- Check locks and latches for proper compression.
- Inspect after driving through heavy rain.
Water stains often appear beneath the lower corners of a window. However, the water may have entered through the top frame.
When a window repeatedly leaks, removing and resealing the entire frame may be necessary. Adding more caulk around the outside may not address failed butyl tape behind it.
How to Protect RV Slide-Outs From Water Leaks
Slide-outs need clean roofs, flexible seals, and proper alignment. A problem with any one of these areas can let water enter.
Clean the Slide-Out Roof Before Retracting
Inspect the slide roof before bringing the room inside. Remove leaves, branches, dirt, snow, and standing water.
Debris can damage seals during retraction. It may also be pulled into the RV and release water indoors.
A slide topper can reduce debris buildup. However, toppers still require inspection and maintenance.
Inspect Wiper and Bulb Seals
Check the wiper seal along the slide walls and roof. It should contact the surface without large gaps.
Inspect the inner bulb seal while the slide is closed. It should compress evenly around the opening.
Replace seals that are torn, missing, brittle, or permanently flattened. Small gaps can admit wind-driven rain.
Maintain the Seals Correctly
Clean seals with products approved by the manufacturer. Dirt can prevent them from sitting properly against the slide.
Use a seal conditioner only when recommended. Some products attract dust or react poorly with certain rubber compounds.
Avoid petroleum-based lubricants. They may degrade rubber and create a slippery surface that collects debris.
Check Slide Alignment
Watch the slide as it moves. Both sides should extend and retract evenly.
Uneven movement, unusual noises, or visible gaps may indicate alignment problems. Continued operation can damage seals and mechanical parts.
Do not adjust a slide mechanism without understanding the system. Professional service may prevent more expensive damage.
Avoid Water Pooling
Keep the RV reasonably level before extending the slide. Poor positioning may direct water toward the opening.
Inspect the slide roof after heavy rain. Persistent pooling can stress the roof and seals.
Follow your manufacturer’s guidance regarding slide position during storms and storage.
How to Prevent Internal Plumbing Leaks
Internal leaks can damage flooring and cabinets before becoming obvious. Inspect the plumbing while the system is pressurized and operating.
Inspect Water-Line Connections
Open cabinets and access panels containing plumbing lines. Use a flashlight to inspect every visible fitting.
Feel beneath connections using a dry paper towel. A paper towel can reveal small amounts of moisture that fingers may miss.
Check flexible hoses for cracks, bulges, abrasion, and kinks. Inspect clamps and threaded connections for movement.
Do not overtighten plastic fittings. Excessive force can crack the fitting or damage its threads.
Monitor the Water Pump
A water pump should normally stop after the system reaches pressure. Repeated cycling with every faucet closed may indicate a leak or pressure loss.
Check the pump compartment for dampness. Inspect the strainer, inlet fitting, outlet fitting, and nearby hoses.
Listen for changes in pump sound. A pump drawing air or struggling to build pressure may point toward a plumbing issue.
Check Sinks, Showers, and Toilets
Run water through every fixture while inspecting below it. Check faucet bases, supply lines, traps, and drain connections.
Inspect the shower pan and surrounding walls. Water that appears only during showers may come from a cracked pan or failed wall seam.
Check around the toilet base for moisture and movement. Inspect the supply line and flush valve.
A loose fixture can allow water to enter the floor even when the plumbing connection itself remains dry.
Inspect the Water Heater
Check the water-heater compartment from both inside and outside. Look for mineral buildup, corrosion, wet insulation, and dripping fittings.
Inspect bypass valves, pressure-relief areas, drain plugs, and nearby plumbing lines.
Water around the exterior compartment may come from rain, plumbing, or the heater itself. Trace the source before replacing parts.
Control Incoming Water Pressure
Campground water pressure can vary significantly. Excessive pressure may damage fittings, hoses, and appliance valves.
Use a pressure regulator designed for RV water systems. Connect it according to the manufacturer’s instructions.
A regulator cannot repair weak plumbing. Replace cracked hoses and damaged fittings rather than relying on reduced pressure alone.
Winterize Before Freezing Conditions
Water expands when it freezes. Trapped water can split pipes, fittings, faucets, filters, and appliance components.
Drain and winterize the system before freezing temperatures arrive. Follow the instructions for your exact RV.
Do not forget exterior showers, washing-machine connections, water filters, toilets, and low-point drains.
After winter storage, pressurize the system slowly. Inspect every accessible fitting before normal use.
How to Control Condensation Inside an RV
Condensation is not always caused by an exterior leak. However, repeated condensation can damage walls, ceilings, cabinets, and mattresses in similar ways.
- Run the roof vent while cooking.
- Use the bathroom fan during showers.
- Open windows slightly when weather permits.
- Avoid drying wet clothing without ventilation.
- Maintain airflow behind mattresses and furniture.
- Wipe moisture from windows and walls.
- Open cabinets periodically during damp weather.
- Use a dehumidifier when humidity remains high.
- Avoid blocking heating and ventilation outlets.
- Check hidden corners for mold or moisture.
Cooking, showering, breathing, and wet clothing all release moisture. A small RV interior can become humid very quickly.
Condensation often forms on cold windows, metal frames, and poorly ventilated walls. The moisture may then drip into furniture or flooring.
If moisture appears only during cold weather, monitor indoor humidity. However, do not assume every damp area is condensation.
Persistent staining in one location may still indicate an exterior leak.
How Storage and Weather Protection Prevent RV Damage
Long-term exposure to sunlight, rain, snow, dirt, and falling debris accelerates seal deterioration. Proper storage reduces this exposure but does not replace regular inspections.
Store the RV Under a Shelter
Covered storage provides strong protection from sunlight, rain, snow, and falling branches.
An RV port, enclosed facility, or well-anchored shelter can reduce roof wear. Make sure the structure allows adequate clearance and airflow.
Check local wind and snow requirements before installing a temporary shelter. A collapsed shelter can cause more damage than the weather.
Use a Breathable RV Cover Correctly
Choose a cover designed for the RV’s dimensions and climate. It should fit securely without stretching across sharp edges.
Use padding around antennas, gutters, and corners. Wind movement can make loose fabric rub against paint and trim.
Avoid non-breathable plastic tarps. Trapped moisture may create condensation, mold, and surface damage.
Open and inspect the RV periodically. A cover should not prevent you from checking for problems.
Keep the Roof and Gutters Clear
Remove leaves, branches, pine needles, and dirt before storage. Debris can hold moisture against the roof.
Clean gutters and drainage channels. Blocked drainage can direct water toward windows and sidewall seams.
Remove heavy snow according to the manufacturer’s guidance. Uneven loads can stress the roof structure.
Position the RV to Prevent Standing Water
Park on a stable surface that supports the tires and leveling equipment. Avoid deep ruts and areas that collect rainwater.
Follow your manufacturer’s instructions for storage positioning. Do not create an extreme angle that stresses the chassis or appliances.
Check whether water remains on the roof after rain. Persistent pooling may indicate a structural or leveling issue.
Protect the RV From UV Exposure
Sunlight dries and cracks sealants, rubber components, plastic vents, and roof membranes.
Covered storage provides the best protection. Approved UV protectants may help certain materials when used correctly.
Do not apply generic automotive products without checking compatibility. Some contain ingredients that damage RV materials.
Inspect the RV During Storage
Do not leave an RV uninspected for an entire season. Visit it periodically and check the roof, interior, plumbing, and storage compartments.
Look for pest damage, moisture, cover movement, and storm-related problems.
After severe weather, inspect the RV as soon as conditions are safe.
How Aftermarket Accessories Can Create RV Leaks
Solar panels, antennas, cameras, awnings, roof racks, ladders, and satellite equipment can create leak points when installed incorrectly.
Each drilled hole must be sealed with materials compatible with the mounting surface. Fasteners must also be properly supported.
A thick layer of sealant cannot correct a poorly mounted accessory. Movement beneath the sealant may eventually create gaps.
Before modifying the roof, review your warranty terms. Some manufacturers require approved installation methods or professional work.
Plan cable entries carefully. Cables should not pull against sealed openings or create channels that guide water inside.
Inspect every aftermarket installation during routine maintenance. Pay close attention after long trips, storms, and temperature changes.
Keep photographs and invoices from the installation. These records may help with future maintenance, warranty questions, or resale.
What Are the Early Signs of Hidden RV Water Damage?
Hidden water damage often provides small warnings before major structural failure occurs. Use your eyes, hands, and sense of smell during inspections.
- Musty or damp odors
- Brown or yellow ceiling stains
- Bubbling wallpaper or vinyl
- Swollen wall panels
- Loose interior trim
- Spongy or soft flooring
- Soft roof sections
- Rusted screws or staples
- Mold around windows
- Damp cabinets or storage bays
- Warped wood or cabinetry
- Exterior wall delamination
- Peeling interior finishes
- Water-pump cycling without an open faucet
- Unexplained electrical problems near damp areas
Press gently around suspicious areas. Do not apply enough force to break weakened materials.
Use a flashlight inside cabinets, closets, and storage compartments. Leaks often develop in areas that receive little attention.
A moisture meter may help compare suspicious areas. However, readings can be affected by metal, wiring, and wall construction.
Professional moisture testing is more reliable when the damage location remains unclear.
What Should You Do When You Find an RV Leak?
Act quickly when you notice active water or fresh damage. Your first goals are stopping the source, protecting the interior, and drying affected materials.
- Turn off the water supply when plumbing is involved.
- Disconnect shore power when water approaches electrical equipment.
- Move the RV away from continuing exposure when possible.
- Catch dripping water with a container or absorbent towels.
- Inspect likely entry points inside and outside.
- Apply a temporary waterproof patch when necessary.
- Remove wet belongings, cushions, and floor coverings.
- Increase ventilation around the affected area.
- Use fans or a dehumidifier to support drying.
- Photograph the leak and visible damage.
- Review warranty and insurance requirements.
- Arrange a permanent repair.
- Test the repaired area carefully.
- Monitor for returning moisture.
A temporary patch should stop additional water until proper repairs become possible. It should not hide damaged framing or wet insulation.
Do not permanently seal a wet structure without drying and assessing it. Trapped moisture can continue damaging materials after the leak stops.
Avoid directing large amounts of water at the RV while searching for the leak. Controlled testing should begin low and progress gradually upward.
When Does RV Water Damage Require Professional Repair?
Minor sealant cracks may be manageable for experienced owners. Structural problems and hidden moisture usually require professional inspection.
Contact a qualified RV repair technician when:
- The roof feels soft or unstable.
- The floor feels spongy.
- Exterior walls show delamination.
- Water has reached electrical components.
- Mold covers a large or hidden area.
- The source cannot be located.
- A roof fixture must be removed.
- Framing or insulation may be damaged.
- Water remained trapped for an unknown period.
- The leak returns after repeated repairs.
- The RV remains under warranty.
- Large roof, wall, or floor sections require replacement.
Professionals may use moisture meters, controlled water tests, pressure-based leak detection, and thermal imaging.
A technician can also determine whether damaged materials must be removed. Drying the visible surface may not be enough when insulation remains wet.
Professional documentation can support warranty or insurance claims. Take your own photographs before repairs begin.
Can You Completely Prevent RV Leaks?
No RV remains permanently leakproof without maintenance. Temperature changes, sunlight, vibration, movement, and aging gradually affect seals and joints.
Even a properly maintained RV may develop an unexpected leak after storm damage or a roof impact.
However, you can prevent most minor leaks from becoming structural problems. Regular inspections give you time to repair damage before water spreads.
The most important habit is responding quickly. A small seal crack is usually easier to repair than a rotten wall or floor.
Keep a maintenance log containing dates, photographs, products used, and completed repairs. This record helps you identify recurring problem areas.
It may also demonstrate proper maintenance during warranty, insurance, or resale discussions.
RV Leak Prevention Checklist
Use this checklist during routine maintenance:
- Inspect roof seams every three to six months.
- Check the roof after storms and long trips.
- Remove leaves, branches, sap, and debris.
- Clean the roof with compatible products.
- Examine vents, skylights, and air conditioners.
- Inspect front and rear cap seams.
- Check windows, doors, and storage compartments.
- Clean window drainage openings.
- Inspect marker lights and exterior fixtures.
- Check slide-out roofs and seals.
- Remove debris before retracting slides.
- Inspect plumbing fittings and hoses.
- Monitor water-pump cycling.
- Check sinks, showers, toilets, and drains.
- Inspect the water heater compartment.
- Use an RV water-pressure regulator.
- Winterize before freezing weather.
- Control condensation through ventilation.
- Inspect the underbelly for sagging or damage.
- Watch for stains, odors, softness, and delamination.
- Keep dated maintenance photographs.
- Review warranty inspection requirements.
- Arrange professional testing when moisture may be hidden.
Final Thoughts
Preventing RV leaks requires consistent inspections, compatible repair products, plumbing maintenance, moisture control, and proper storage. You do not need to dismantle the RV during every inspection. You only need to notice small changes before they become serious.
Never ignore a stain, musty odor, soft floor, damaged seal, or unexplained pump cycle. Investigating early can protect the RV’s structure, improve its resale value, and prevent a small repair from becoming a major rebuilding project.
Related FAQs
How Often Should I Check My RV for Water Leaks?
Perform a quick interior and exterior check monthly. Inspect roof seams, windows, doors, and fixtures every three to six months. Also check after storms, long trips, freezing weather, or roof impacts.
How Often Should an RV Roof Be Resealed?
There is no fixed schedule for resealing an RV roof because it depends on material, climate, storage, and seal condition. Inspect regularly and reseal when cracks or failures appear instead of waiting a set number of years.
Can I Put New RV Sealant Over Old Sealant?
You can apply new sealant over old material only if the existing layer is stable, clean, and well bonded. Remove any loose, cracked, or peeling sections first and always confirm product compatibility.
What Is the Best Sealant for an RV Roof?
The best sealant depends on the roof type and repair area, with self-leveling products used for horizontal seams and non-sag sealants for vertical surfaces. Always follow manufacturer instructions for proper use.
Can I Use Silicone Sealant on an RV?
Household silicone is not recommended for RV repairs because it may not bond well and can complicate future sealing work. Use an RV-approved sealant designed for the specific surface instead.
Can I Use Roof Repair Tape for a Permanent Repair?
Roof repair tape can provide a strong long-term fix for small tears and seams when properly applied. However, it will not fix structural damage, wet insulation, or rotted decking, which require professional repair.
Why Does My RV Leak Only While Driving?
Leaks that appear only while driving are usually caused by wind-driven rain or road spray entering weak points like windows, lights, doors, or lower seams. Movement increases pressure, making small gaps leak more easily.
Does RV Insurance Cover Water Damage?
RV insurance coverage for water damage depends on the policy and cause, with sudden events often covered more than gradual leaks. Damage from poor maintenance may be denied, so documentation is important.
How Can I Find a Hidden RV Leak?
To find a hidden leak, inspect above and around the damaged area, including roof fixtures, seams, and plumbing lines. Controlled water testing or professional moisture detection may be needed if the source is unclear.
Can a Small RV Leak Cause Structural Damage?
Yes, even a small leak can lead to serious structural damage over time by weakening wood, flooring, insulation, and wall panels. Immediate repair is important to prevent spreading damage.
Should I Have My RV Professionally Moisture-Tested?
Professional moisture testing is recommended when leaks are hidden, damage is suspected, or you are buying a used RV. Technicians can detect trapped moisture without removing large sections of the interior.
Can an RV Cover Stop All Water Leaks?
An RV cover can reduce exposure to weather but cannot stop leaks caused by failed seals or roof damage. Regular inspections are still necessary even when the RV is covered.

David Marshall shares travel route insights, mileage planning tips, and road-tested advice. His writing helps travelers understand distance, timing, and equipment choices. Every article is built around clarity and real-world usefulness.