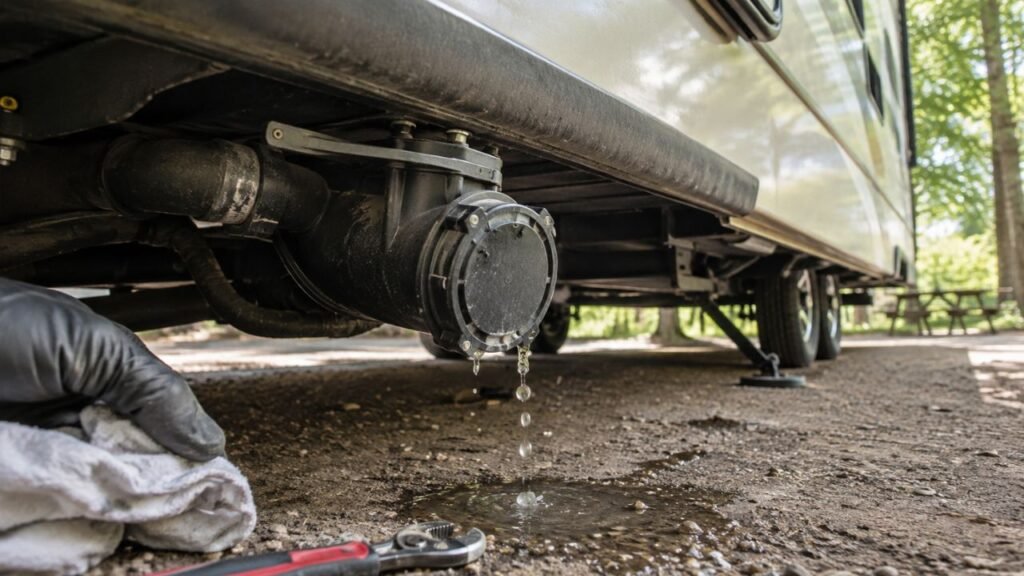
To troubleshoot RV plumbing problems, first identify whether the issue affects one fixture or the entire system. Then check your water source, valves, filters, pump, visible fittings, drains, tanks, and vents in a logical order. This approach helps you locate the actual cause before replacing parts.
In this guide, I’ll walk you through low water pressure, pump failures, leaks, clogged drains, toilet problems, hot-water issues, holding-tank trouble, and frozen plumbing.
Key Takeaways
- First determine whether one fixture or every fixture is affected.
- Confirm whether you are using city water or freshwater tank water.
- Check water levels, valves, filters, and aerators before replacing components.
- A cycling water pump usually means the system is losing pressure.
- Weak flow often comes from a restriction, low supply, or pump problem.
- Turn off the water supply before opening any plumbing connection.
- Avoid harsh household drain cleaners inside an RV plumbing system.
- Hidden leaks and propane appliance faults usually need professional attention.
How Does an RV Plumbing System Work?
An RV plumbing system has several connected sections. Knowing how they work makes troubleshooting much faster and prevents unnecessary repairs.
Freshwater Tank and Water Pump
Your freshwater tank stores clean water when you are traveling or camping without hookups. A 12-volt water pump pulls water from that tank and pushes it toward your faucets, toilet, shower, and water heater.
The pump normally starts when you open a fixture. It should stop after you close the fixture and pressure returns.
When the pump keeps running, the system may contain air, lack water, or have a leak. It may also have a damaged valve or pressure switch.
City Water Connection
The city water inlet lets campground water enter your RV plumbing directly. You normally do not need the onboard pump while connected to city water.
Campground pressure can vary considerably between locations. I always recommend using an RV water-pressure regulator between the spigot and potable-water hose.
The regulator helps protect fittings, hoses, valves, and older plumbing lines from excessive pressure.
Hot and Cold Water Lines
Cold water travels directly toward your fixtures and water heater. The water heater warms part of that supply before sending it through the hot-water lines.
Most RV water heaters also have bypass valves. These valves are changed during winterization and must return to their normal positions afterward.
An incorrectly positioned bypass valve can cause cold showers, reduced hot-water flow, or confusing pressure problems.
Gray and Black Holding Tanks
The gray tank usually collects water from sinks and showers. The black tank receives waste and water from the toilet.
Each tank also needs proper venting. Vent pipes allow air to move while wastewater enters or leaves the tank.
Blocked vents can cause slow drains, bubbling toilets, unpleasant odors, and poor tank drainage.
Traps, Check Valves, and Low-Point Drains
P-traps beneath sinks and showers hold water that blocks sewer gases. When these traps dry out, odors may enter the RV.
Check valves allow water to move in only one direction. A failed check valve can cause unusual problems, including city water entering the freshwater tank.
Low-point drains help empty the plumbing system. If one remains partly open, the pump may run continuously without building proper pressure.
What Should You Check Before Troubleshooting?
Simple checks solve many RV plumbing problems. Complete these steps before disconnecting pipes, removing fixtures, or replacing expensive components.
- Confirm that the freshwater tank contains enough water.
- Make sure the campground water spigot is fully open.
- Check whether the pump switch is turned on.
- Verify that the pump has adequate 12-volt power.
- Inspect the pump fuse and visible wiring.
- Confirm that low-point drains are fully closed.
- Check the water-heater bypass valve positions.
- Inspect the potable-water hose for kinks.
- Check visible supply lines for pinching or damage.
- Look beneath sinks, beds, cabinets, and storage compartments.
- Determine whether hot water, cold water, or both are affected.
- Test several fixtures to see whether the problem is widespread.
- Check the freshwater and holding-tank level indicators.
- Confirm that winterization valves returned to normal positions.
Before opening any connection, turn off the water pump and disconnect city water. Open a faucet afterward to release trapped pressure.
Allow the water heater to cool before opening its drain, fittings, or pressure-relief valve.
RV Plumbing Troubleshooting Chart
Use the symptoms below to narrow down the most likely cause. Start with the easiest checks before removing plumbing components.
| Plumbing Symptom | Likely Causes | First Things to Check | Urgency |
| No water anywhere | Empty tank, closed valve, pump power loss, disconnected city water | Tank level, spigot, pump switch, fuse | Medium |
| Low pressure everywhere | Clogged filter, restricted regulator, weak pump, kinked line | Filter, regulator, hose, pump strainer | Medium |
| Low pressure at one faucet | Clogged aerator, faucet cartridge, or local supply line | Remove and clean the aerator | Low |
| Pump runs continuously | Empty tank, open drain, air leak, plumbing leak | Tank, valves, fittings, pump inlet | High |
| Pump runs every few minutes | Small leak or pressure loss | Faucets, toilet valve, heater, fittings | Medium |
| Pump runs without water flow | Lost prime, clogged strainer, closed valve, empty tank | Tank, pump inlet, valves, strainer | Medium |
| Faucets spit air | Trapped air, low tank level, suction-side leak | Purge fixtures and inspect pump inlet | Low |
| Fresh tank fills on city water | Failed check valve or incorrect selector setting | Pump check valve and fill valve | Medium |
| Water drips beneath the RV | Open drain, overflowing tank, damaged line, loose fitting | Water location, color, and timing | High |
| Sink drains slowly | Clogged trap, full gray tank, blocked vent | Tank level, trap, and drain line | Medium |
| Toilet bubbles | Full tank, blocked vent, drainage pressure | Tank level and roof vent | Medium |
| No hot water | No power, no propane, bypass valve, failed component | Energy source and valve positions | Medium |
| Sewer odor enters the RV | Dry trap, vent problem, toilet seal, leaking valve | Traps, vents, and toilet bowl seal | Medium |
| No flow during freezing weather | Frozen hose, pipe, valve, or filter | Exposed plumbing and compartments | High |
How Do You Isolate an RV Plumbing Problem?
A logical process helps prevent misdiagnosis. Change one condition at a time and observe what happens before moving forward.
- Identify the affected fixture: Determine whether the problem involves a faucet, shower, toilet, water heater, or every fixture.
- Test both hot and cold water: A problem affecting only hot water usually points toward the water heater or its valves.
- Test another fixture: If one faucet has weak flow, the problem is probably near that faucet.
- Identify the active water source: Confirm whether water comes from the freshwater tank or city connection.
- Switch water sources when safe: Testing both sources can separate pump problems from supply-line problems.
- Listen to the water pump: Notice whether it remains silent, runs continuously, or cycles repeatedly.
- Inspect visible valves and fittings: Look for loose connections, wet surfaces, mineral deposits, and damaged tubing.
- Check filters and strainers: A clogged filter may reduce pressure throughout the entire RV.
- Check drains and holding tanks: A full tank can make several fixtures drain slowly.
- Confirm the diagnosis before replacing anything: New parts will not fix a closed valve or kinked hose.
This step-by-step approach also helps you explain the problem clearly when contacting an RV technician.
How Do You Troubleshoot Low RV Water Pressure?
Low pressure may affect one fixture or the entire RV. This distinction tells you where to begin looking.
Low Pressure at One Faucet or Shower
When every other fixture works normally, inspect the affected fixture first.
Remove the faucet aerator and check for sediment, rust, or mineral buildup. Rinse the screen and reinstall it before testing the flow.
Showerheads often collect mineral deposits inside their small openings. Soaking a removable showerhead in white vinegar may loosen those deposits.
Also inspect the local supply tube beneath the fixture. Make sure it is not kinked, pinched, or partially closed.
A damaged faucet cartridge can also restrict flow. Cartridge replacement depends on the faucet design.
Low Pressure Throughout the RV
Low pressure at every fixture usually indicates a system-wide restriction or weak water supply.
Start by checking the inline water filter. A clogged filter can greatly reduce flow even when it looks clean outside.
Next, inspect the pressure regulator. Some inexpensive regulators restrict flow more than expected, especially when sediment collects inside them.
Check the potable-water hose for kinks. Long, narrow, or collapsed hoses can also reduce flow.
When using city water, test the campground spigot separately. The campground supply itself may have weak pressure.
When using tank water, inspect the water-pump strainer. A dirty strainer limits the amount of water reaching the pump.
If every simple check passes, the pump may be worn or undersized for the system.
Low Pressure Only on Hot Water
Weak hot-water flow usually points toward the water heater or its nearby plumbing.
Check the bypass valves first. A valve left partly closed can restrict hot-water movement.
Some water heaters use check valves at the hot-water outlet. Mineral deposits or internal failure can restrict these valves.
Sediment buildup inside a tank-style heater may also reduce flow. Follow the water-heater manufacturer’s flushing instructions.
A kinked hot-water line can produce the same symptom, especially near tight cabinets or appliance compartments.
What Water Pressure Should an RV Have?
Many RV owners use regulated pressure around 40 to 55 PSI. However, you should always follow the limits provided by your RV and component manufacturers.
Older plumbing, plastic fittings, filter housings, and flexible hoses may tolerate less pressure than newer systems.
An adjustable regulator with a gauge makes troubleshooting easier. It shows the pressure entering your RV rather than making you guess.
How Do You Troubleshoot an RV Water Pump?
Water-pump symptoms often reveal whether the problem involves power, water supply, pressure loss, or internal pump damage.
Water Pump Does Not Turn On
Start by checking the pump switch. Some RVs have several pump switches in different areas.
Next, inspect the fuse and verify battery voltage. A weak battery may power lights while failing to operate the pump correctly.
Check the pump’s positive wire and ground connection. Loose or corroded terminals can prevent operation.
If voltage reaches the pump but it remains silent, the motor or pressure switch may have failed.
Lightly tapping a stuck pump may temporarily restore movement, but it does not solve the internal problem.
Replace or professionally test the pump when proper voltage reaches it without operation.
Water Pump Runs but No Water Comes Out
First, verify that the freshwater tank contains enough water. Tank gauges are not always accurate, so check the actual level when possible.
Make sure the tank outlet valve is open. Also check whether the winterization valve is drawing from an empty antifreeze hose.
Inspect and clean the inlet strainer. A blocked strainer prevents enough water from reaching the pump.
Look for loose fittings or cracks on the suction side. The pump may pull air through a small opening without leaking visible water.
A dry pump may also lose its prime. Open a nearby faucet and follow the manufacturer’s priming procedure.
Do not let the pump run dry for long periods. Continuous dry operation can cause damage.
Water Pump Will Not Stop Running
A pump runs continuously when it cannot reach its shutoff pressure.
Check whether the freshwater tank is empty or nearly empty. Then confirm that every faucet, shower valve, and low-point drain is closed.
Inspect the outdoor shower carefully. Its valves may remain open even when the showerhead control stops the water.
Look beneath sinks and around the toilet for leaks. Also inspect the water heater and pump connections.
A loose fitting on the pump inlet may pull air. This prevents the pump from building stable pressure.
If no external problem appears, the pump diaphragm or pressure switch may be worn.
Water Pump Runs Every Few Minutes
A pump that cycles briefly while every fixture is closed usually indicates gradual pressure loss.
Start with faucet drips and toilet bowl water. A small toilet water-valve leak can trigger occasional pump operation.
Check the outdoor shower, low-point drains, water-heater relief valve, and pump fittings.
Feel beneath connections with a dry paper towel. Tiny leaks often become easier to detect this way.
The pump’s internal check valve may also allow pressure to fall backward toward the tank.
Occasional cycling should not be ignored. A small hidden leak can eventually damage floors, walls, and insulation.
Water Pump Runs Loudly or Vibrates
RV water pumps naturally make some noise, but excessive vibration usually has a cause.
Check the mounting screws. They should hold the pump securely without crushing the rubber mounting feet.
Inspect nearby plumbing lines. Hard tubing touching cabinets or walls can transfer vibration throughout the RV.
Flexible hoses near the pump can reduce vibration. However, any replacement must match the pump manufacturer’s specifications.
A clogged inlet strainer can make the pump work harder and sound louder.
Air inside the system can also create irregular noise. Purge every fixture and test the pump again.
Water Pump Keeps Losing Prime
A pump loses prime when it cannot maintain a solid water supply from the tank.
Check the tank level, inlet valve, strainer, and winterization hose. Then inspect every suction-side connection.
Loose threaded fittings may pull air without showing water outside. Cracked tubing can create the same problem.
A failing internal check valve may also allow water to drain backward.
Why Are My RV Faucets Spitting Air?
Sputtering faucets usually mean air is trapped inside the water lines. This often happens after filling the tank, winterizing the RV, or opening plumbing connections.
A low freshwater level can also let the pump draw air. Suction-side leaks produce similar symptoms.
Use these steps to purge the system:
- Fill the freshwater tank above the pump intake level.
- Turn on the water pump.
- Open one cold-water faucet slowly.
- Let the water flow until it becomes steady.
- Repeat this process at every cold-water fixture.
- Purge the toilet and outdoor shower.
- Repeat the process using hot-water fixtures.
- Inspect the pump strainer and inlet fittings.
- Check the intake hose for cracks.
- Confirm the winterization valve is fully closed.
Do not operate the water heater until its tank is completely full. Open a hot-water faucet and wait for steady flow before activating the heater.
When sputtering continues after purging, inspect the pump’s suction side for an air leak.
How Do You Find an RV Plumbing Leak?
RV leaks can travel along pipes, wires, framing, and floors. The visible wet area may be far from the actual source.
Check the Most Common Leak Locations
Begin with areas containing several connections or moving components.
- Beneath kitchen and bathroom sinks
- Around faucet supply lines
- Beside the water pump
- Behind and beneath the toilet
- Around the water heater
- Near the outdoor shower
- Around the city water inlet
- At low-point drains
- Beneath the shower pan
- Inside basement storage compartments
- Around water filters
- Along visible PEX fittings
- Near the freshwater tank outlet
- Around washing-machine connections, when equipped
Look for moisture, water stains, white mineral deposits, swelling, soft flooring, and musty smells.
Test the Freshwater Pump System
Disconnect city water and fill the freshwater tank. Dry all visible plumbing areas before starting the test.
Turn on the pump and allow it to build pressure. Close every fixture and listen carefully.
The pump should stop and remain off. Repeated cycling indicates pressure loss somewhere in the system.
Inspect each connection while the system remains pressurized. Use dry paper towels to reveal small leaks.
Do not increase pressure beyond the RV manufacturer’s limit.
Test the City Water System
Turn off the onboard pump before connecting city water. Install a pressure regulator and connect the potable-water hose.
Open the spigot slowly. Inspect the city inlet, filter, fittings, fixtures, and water heater.
A leak that appears only on city water may result from higher pressure. It may also involve the city inlet or related check valve.
Look for Hidden Water Damage
Hidden plumbing leaks may create warning signs before visible dripping appears.
Watch for:
- Soft or spongy flooring
- Swollen cabinet panels
- Discolored walls or ceilings
- Peeling flooring
- Musty or damp odors
- Wet insulation
- Mold growth
- Rusted screws or brackets
- Water dripping from the underbelly
- Delamination near plumbing fixtures
Turn off the water supply when you suspect hidden damage. Continued pressure can release a large amount of water.
Repair Loose or Damaged Connections
Some threaded fittings only need gentle tightening. Hand-tighten plastic fittings first and test them again.
Over-tightening can crack plastic threads, deform washers, and create worse leaks.
Replace worn washers, O-rings, damaged tubing, or cracked fittings with compatible parts.
PEX repairs require fittings designed for the tubing type and size. Follow the manufacturer’s approved installation method.
Why Is Water Pouring From Under My RV?
Water beneath an RV does not always mean the tank is damaged. It may come from an open drain, overflowing tank, leaking supply line, water heater, air conditioner, or fixture.
Start by identifying the water’s color, smell, location, and timing.
Ask these questions:
- Does the water appear only when the pump runs?
- Does it appear only while connected to city water?
- Does it begin when someone opens a fixture?
- Is the water clear, soapy, or contaminated?
- Is the freshwater tank overflowing?
- Is the gray or black tank full?
- Are the low-point drains still open?
- Is the water heater leaking?
- Is water trapped inside the underbelly?
- Could the water be normal air-conditioner condensation?
Clear water near the freshwater tank may indicate an overflow or loose fitting.
Soapy water often points toward a gray-water drain or tank problem.
Contaminated water near the sewer outlet requires immediate cleanup and protective equipment.
Shut down the water supply when you cannot identify the source.
Why Is City Water Filling the Freshwater Tank?
City water usually enters the freshwater tank because water passes backward through the pump’s internal check valve. An incorrectly positioned fill valve can create the same problem.
First, check your RV’s water-selector controls. Make sure the valve is set to normal city-water operation rather than tank fill.
Some multi-position valves must align precisely. A valve left between positions may send water in the wrong direction.
If the selector is correct, turn off city water. Briefly operate the pump using tank water.
This action sometimes clears small debris from the internal check valve. Reconnect city water and monitor the tank level.
When the tank keeps filling, the pump’s check valve may need cleaning, repair, or replacement.
Some RVs use a separate external check valve. Review the plumbing diagram before ordering parts.
How Do You Troubleshoot RV Hot-Water Problems?
Water heaters vary between tank, tankless, propane, electric, and combination models. Always follow the manual for your exact unit.
No Hot Water From Any Faucet
Confirm that the water heater is turned on. Check both propane and electric controls when your model supports both.
For propane operation, verify that the propane supply is open. Listen for ignition and look for fault indicators.
For electric operation, inspect the breaker, switches, and power source.
Check the bypass valves near the water heater. Winterization settings may prevent water from entering the tank.
Some heaters include a resettable high-limit switch. Follow the manufacturer’s directions before resetting it.
A failed heating element, thermostat, control board, igniter, or gas valve may require professional testing.
Hot Water Becomes Cold Quickly
Tank-style RV water heaters hold less water than residential units. Long showers can empty the heated supply quickly.
However, very short hot-water duration may indicate cold-water mixing.
Check the bypass valve and outdoor shower valves. Open outdoor shower valves can mix hot and cold water even when the showerhead is off.
Sediment buildup may reduce usable tank capacity. A failing thermostat or heating element can also limit heating.
Tankless heaters may cycle cold when the flow rate becomes too low.
Water Heater Leaks
Turn off the heater and allow the water to cool. Disconnect the water supply before inspecting the leak.
Common leak points include:
- Drain plug
- Anode rod threads
- Pressure-relief valve
- Hot and cold connections
- Bypass fittings
- Internal tank seams
- Tankless heater connections
Some pressure-relief valves release small amounts during heating. Constant dripping may indicate excessive pressure, debris, or valve failure.
A corroded or freeze-damaged tank usually requires replacement.
Never remove the drain plug while the heater is hot or pressurized.
Water Heater Makes Unusual Noises
Popping or rumbling may come from mineral deposits inside a tank-style heater.
Clicking during propane ignition can be normal, but repeated failed ignition needs inspection.
Whistling may indicate restricted water flow. Tankless heaters may also produce noise when scale builds inside their heat exchangers.
Follow the manufacturer’s flushing and descaling procedure.
How Do You Troubleshoot Slow or Clogged RV Drains?
RV drain lines are smaller than many household drains. Hair, food, grease, soap, and tank buildup can restrict them quickly.
One Sink or Shower Drains Slowly
A single slow fixture usually has a local blockage.
Remove visible hair, food, or soap from the drain opening. Clean the strainer and accessible stopper components.
Inspect the P-trap when accessible. Place a container beneath it before loosening anything.
A flexible drain hose may sag or kink behind a cabinet. Correct its position without creating excessive tension.
Kitchen grease can coat narrow drain lines. Avoid pouring grease or oily food waste into the sink.
Several Fixtures Drain Slowly
When several fixtures drain poorly, check the gray tank level first.
A full tank may cause slow drainage, bubbling, or water backing into the shower.
If the tank is not full, inspect the vent system. A blocked vent prevents air from replacing wastewater leaving the pipes.
The main drain line may also contain buildup. Incorrect pipe slope or a sagging flexible line can contribute.
Safe Ways to Clear an RV Drain
Use the least aggressive method first.
- Remove visible debris by hand.
- Clean the strainer or stopper.
- Clean the accessible P-trap.
- Flush using warm water.
- Use an RV-safe drain-cleaning product when approved.
- Insert a small manual drain snake carefully.
- Flush the gray tank afterward.
- Clean the roof vent only when access is safe.
Confirm that any product is compatible with RV seals, tanks, and plumbing materials.
Drain-Cleaning Methods to Avoid
Strong household drain cleaners can harm seals, valves, tank sensors, and certain plumbing materials.
Boiling water may deform plastic components. Use warm water instead.
Avoid forcing oversized snakes into small RV pipes. They can puncture flexible lines or damage fittings.
Compressed air may separate joints or push debris deeper into the system.
How Do You Troubleshoot an RV Toilet?
RV toilets use limited water and drain directly toward the black tank. Small seal, valve, vent, or tank problems can create noticeable symptoms.
Toilet Bowl Will Not Hold Water
A small amount of water should usually remain in the bowl. This water helps block odors from the black tank.
A dirty blade-valve seal may allow the water to drain. Clean the seal according to the toilet manufacturer’s instructions.
RV toilet seals can dry out during storage. An approved seal conditioner may help when the seal remains undamaged.
Replace seals that are cracked, hardened, or badly worn.
Toilet Drains Slowly
A slow toilet may contain paper or waste near the drop pipe.
Add water and allow it to soften the blockage. Use only tools and treatments approved for RV toilets.
A pyramid plug can form when the black-tank valve remains open during use. Liquids drain away while solids collect beneath the toilet.
Close the black-tank valve between dumping sessions. Use enough water with every flush.
Toilet Bubbles When Another Fixture Drains
Bubbling often indicates changing air pressure inside the drain system.
Check whether the black or gray tank is nearly full. Then inspect the roof vent for blockage.
A shared or incorrectly modified drain connection can also cause air to move through the toilet.
Do not assume the toilet itself has failed. The actual problem may involve the tank or vent.
Toilet Water Valve Will Not Stop Leaking
A toilet water valve may leak because of debris, high pressure, worn seals, or freeze damage.
Turn off the pump and city water. Relieve pressure before inspecting the valve.
Some valves can be cleaned, while others require complete replacement.
Use a pressure regulator to reduce future stress on the valve.
Toilet Leaks Around the Base
Dry the area completely before testing. Flush the toilet and watch where water first appears.
A leaking supply valve may send clean water toward the base. A damaged floor flange or base seal may leak during flushing.
Soft flooring around the toilet suggests longer-term damage. This condition needs a more detailed inspection.
How Do You Troubleshoot Gray- and Black-Tank Problems?
Holding-tank problems often involve buildup, blocked vents, damaged valves, or incorrect dumping habits. Diagnose them carefully because wastewater creates health risks.
Holding Tank Will Not Drain Completely
First, confirm that the RV is positioned correctly for dumping. Severe slopes can leave waste trapped away from the outlet.
Check whether the valve opens fully. Cable-operated valves may not move the blade completely.
Waste buildup can restrict the outlet. Gray tanks may collect grease, soap, and food particles.
Black tanks may collect paper and solid waste. Use gradual flushing methods rather than aggressive pressure.
Tank sensors may also report waste after the tank is empty. Confirm the actual drainage before assuming a blockage.
Black Tank Is Clogged
Black-tank clogs often result from insufficient water, too much paper, or leaving the dump valve open.
Close the valve and add water when tank capacity allows. Give the water time to soften the buildup.
Use an RV-approved tank-rinsing method. Avoid sharp tools that could puncture the tank.
Do not climb beneath a tank that may release waste unexpectedly.
Serious blockages may require professional tank cleaning.
Dump Valve Leaks After Closing
Debris may prevent the blade valve from sealing completely.
Wear protective gloves and follow safe dumping procedures. Flush the tank before inspecting the valve.
A damaged blade, worn seal, bent cable, or valve-body crack may require replacement.
A temporary secondary gate valve can contain small leakage at the sewer outlet. It should not replace the permanent repair.
Tank Sensors Always Read Full
Internal tank sensors often collect waste, grease, soap, and mineral residue.
Thorough tank cleaning may restore accurate readings. However, some internal sensor systems remain unreliable as they age.
External sensor systems may offer more consistent readings, depending on the installation.
Use several clues before judging tank level. Consider usage, drainage, sounds, and visible flow.
Holding Tank Odors Enter the RV
Odors may enter through dry traps, failed air-admittance valves, blocked vents, or toilet seals.
Run water into every sink and shower drain. This refills dry P-traps.
Check whether the toilet bowl holds water. A dry bowl may allow black-tank odors into the bathroom.
Inspect air-admittance valves beneath sinks. These valves can fail open and release gray-tank odors.
Also check the roof vents and dump-valve seals.
How Do You Troubleshoot RV Plumbing Vents?
Plumbing vents let air move through your drainage system. Without airflow, wastewater can drain slowly and pull air through toilets or sink traps.
Common vent-related symptoms include:
- Gurgling sinks
- Bubbling toilets
- Slow drains
- Sewer odors
- Tank burping during flushing
- Poor tank drainage
- Odors appearing while driving
- Water disappearing from traps
Inspect roof vent caps for leaves, insect nests, ice, or damaged covers. Use proper roof-access precautions and avoid stepping on unsupported areas.
Some sinks use air-admittance valves instead of direct roof vents. These small valves are often installed beneath cabinets.
A failed air-admittance valve may release odors or interfere with drainage. Replacement is usually simple when the valve remains accessible.
What Should You Do About Frozen RV Plumbing?
Frozen lines require slow, controlled thawing. Rapid heat can damage plastic pipes, fittings, filters, valves, and nearby materials.
How to Locate the Frozen Section
Start with the campground hose and pressure regulator. These exposed components freeze before many interior lines.
Then inspect plumbing near exterior walls, storage compartments, the underbelly, and the water pump.
A line may freeze where it passes through an unheated opening. Cabinet corners and floor penetrations are common locations.
If one fixture stops working while others operate, the frozen section is probably near that fixture.
How to Thaw RV Water Lines Safely
Use gradual heat and check constantly for leaks.
- Turn off the water pump.
- Disconnect city water.
- Open a faucet to release pressure.
- Warm the RV interior gradually.
- Open cabinets around plumbing.
- Use controlled warm air near exposed lines.
- Warm frozen hoses indoors when possible.
- Inspect fittings while the ice thaws.
- Restore water pressure slowly.
- Watch for leaks after flow returns.
A hair dryer on a low setting may help accessible lines. Keep it moving and away from water.
Manufacturer-approved heat tape may protect suitable exposed lines. Install it exactly as directed.
Frozen-Pipe Methods to Avoid
Never use a torch, open flame, or unattended space heater near RV plumbing.
Do not pour boiling water onto frozen plastic components.
Avoid forcing the pump against an ice blockage. Pressure can separate fittings or damage the pump.
Do not twist frozen valves. Their plastic parts may crack.
How to Check for Freeze Damage
After thawing, keep the pump off and inspect every accessible area.
Restore pressure slowly. Watch the pump strainer, toilet valve, water filter, water heater, outdoor shower, and low-point drains.
Freeze damage often separates fittings or cracks plastic housings.
Check beneath the RV after each fixture operates. Water may collect inside the underbelly before becoming visible.
RV Plumbing Mistakes That Make Problems Worse
Small mistakes can turn a simple repair into water damage or component failure.
- Replacing the pump before checking the tank
- Ignoring winterization valve positions
- Operating the water heater while empty
- Connecting to city water without a regulator
- Over-tightening plastic fittings
- Using household chemical drain cleaners
- Leaving the pump running during an unknown leak
- Leaving city water connected while away
- Ignoring occasional pump cycling
- Continuing to use plumbing above soft flooring
- Forcing frozen pipes or valves
- Using incorrect PEX fittings
- Mixing incompatible plumbing materials
- Ignoring water beneath the sealed underbelly
- Performing propane repairs without proper training
Always confirm the cause before purchasing replacement parts.
What Tools Should You Carry for RV Plumbing Troubleshooting?
A small plumbing kit can solve minor problems before they interrupt an entire trip.
- Flashlight or headlamp
- Adjustable water-pressure regulator
- Water-pressure gauge
- Digital multimeter
- Screwdriver set
- Adjustable wrench
- Pliers
- PEX tubing cutter
- Compatible PEX repair fittings
- Spare washers and O-rings
- Approved thread sealant
- Water-hose washers
- Replacement pump strainer
- Absorbent towels
- Inspection mirror
- Small manual drain snake
- Disposable gloves
- Sealable waste bags
- Manufacturer manuals
Avoid carrying random fittings without confirming their size. RV plumbing systems may use different tubing and connection styles.
How Can You Prevent RV Plumbing Problems?
Preventive care is easier than locating a hidden leak. A few regular checks can protect your plumbing and interior structure.
- Inspect visible fittings before long trips.
- Check beneath sinks after traveling.
- Use a regulator on every city-water connection.
- Replace clogged water filters.
- Clean faucet aerators and showerheads.
- Inspect the pump strainer.
- Sanitize the freshwater system regularly.
- Flush the water heater as directed.
- Inspect the anode rod when your heater uses one.
- Use enough water when flushing the toilet.
- Keep the black-tank valve closed during normal use.
- Flush holding tanks after dumping.
- Avoid grease and food scraps in sinks.
- Never flush wipes or hygiene products.
- Winterize before freezing weather.
- Inspect carefully after de-winterizing.
- Turn off city water while leaving the RV unattended.
- Turn off the pump while storing the RV.
- Investigate unexpected pump cycling.
- Record filter, seal, valve, and pump replacements.
I also recommend opening cabinets occasionally during inspections. Many leaks stay hidden because owners only check the floor.
When Should You Call an RV Technician?
Many plumbing problems are manageable with simple checks. However, some repairs involve hidden damage, gas systems, electrical risks, or contaminated wastewater.
Contact a qualified RV technician when you find:
- A leak that cannot be located
- Water inside walls or floors
- A soaked or sagging underbelly
- Mold, rot, or structural damage
- A cracked freshwater tank
- A damaged gray or black tank
- Repeated water-pump failure
- Propane water-heater faults
- Damaged 120-volt water-heater wiring
- Extensive freeze damage
- Inaccessible plumbing connections
- Sewer leakage
- A broken toilet flange
- Unpredictable system pressure
- Repairs requiring appliance removal
- Plumbing covered by an active warranty
Gas appliance work should follow the manufacturer’s procedures and local safety requirements.
Check warranty coverage before cutting lines or removing major components.
Final Thoughts
Troubleshooting RV plumbing problems becomes easier when you follow a consistent order. Identify the affected area, confirm the water source, check simple restrictions, inspect for leaks, and test individual components.
Stop using the system when you find hidden moisture, contaminated leakage, propane faults, or structural damage. A fast shutdown can prevent a small plumbing issue from becoming an expensive RV repair.
Related FAQs
Why Is My RV Water Pump Running When No Water Is On?
The plumbing system is probably losing pressure. Check for dripping faucets, toilet-valve leaks, open drains, loose fittings, water-heater leaks, and pump check-valve problems.
Why Does My RV Have Low Water Pressure on City Water?
The campground supply may be weak. A clogged filter, restricted regulator, kinked hose, dirty inlet screen, or partially closed valve can also reduce pressure.
Can I Use Household Drain Cleaner in an RV?
Household drain cleaners may damage seals, valves, tanks, sensors, and plastic plumbing. Use cleaning methods specifically approved for RV systems.
How Do I Know Whether My RV Water Pump Is Failing?
Common signs include weak pressure, repeated cycling, failure to prime, overheating, loud operation, and continuous running after simple causes are eliminated.
Why Is My RV Faucet Sputtering?
The lines may contain trapped air. Other causes include a low freshwater level, loose pump-inlet fitting, cracked suction hose, or incorrect winterization valve position.
Why Does My RV Toilet Bubble When the Sink Drains?
A full tank, blocked vent, or shared drainage restriction may change air pressure inside the plumbing system. Check tank levels and venting first.
Why Is Water Leaking From My RV Underbelly?
A supply-line leak, overflowing tank, loose fitting, shower leak, water-heater problem, or open low-point drain may release water into the underbelly.
Should I Turn Off City Water When Leaving My RV?
Yes, turning it off reduces the risk of continuous flooding if a pipe, fitting, toilet valve, or filter housing fails while you are away.
Can High Water Pressure Damage RV Plumbing?
Excessive pressure can damage hoses, filters, valves, fittings, faucets, and older plumbing lines. Always use a regulator that suits your RV.
How Often Should RV Plumbing Be Inspected?
Complete quick checks before trips and after long drives. Perform a more detailed inspection during seasonal maintenance, winterization, and de-winterization.
Why Does My Freshwater Tank Overflow on City Water?
The fill selector may be positioned incorrectly. Water may also be passing backward through a dirty or failed pump check valve.
Why Does My RV Sink Drain Slowly When the Tank Is Empty?
The drain may contain grease, food, soap, or hair. A blocked vent, dirty P-trap, kinked hose, or poor pipe slope can also slow drainage.
Can I Repair an RV Water Line Myself?
You can often repair accessible tubing with compatible fittings and proper tools. Hidden lines, extensive damage, and warranty-covered systems may require professional service.

David Marshall shares travel route insights, mileage planning tips, and road-tested advice. His writing helps travelers understand distance, timing, and equipment choices. Every article is built around clarity and real-world usefulness.